Showing posts with label Cuttlebug. Show all posts

Thursday, May 7, 2015

A Kopy Kat Here

I fell in love with Jenny Gropp's "Paper Quilting" card and IO's Open Scroll Flower Die.  I also thought, WOW, a way to use some of my DP pieces (not used since falling in love with IO's CAC stamps).  If you want to see how beautifully done cards are done, don't miss Jenny's blog!  She really is One KOOL Krafty Kat!!!  Below is how I did my CAS of her card!

CARD FRONT:
  1. Used the Open Scroll Flower Die to emboss the image 3 times on a 5.75"X4.0" piece of Laid white cardstock.
  2. Die cut the flower using 1.75"X1.75" pieces of leftover pink print DP.  Used removable Scotch tape on the top of the die cut to keep in place.  Saved leftover negative pieces for back of card and envy.
  3. Die cut leaves using 1.5"X.75" pieces of leftover green print DP.  Saved negative pieces for back of card and envy.
  4. Glued die cut petals and leaves in place on the "TOP" of "embossed images" using Glossy Accents and needle-nosed applicator.  (It looks like you would place them on the backside, but guess how I know it's the front most embossed looking image? 
  5. Used Swiss Dots embossing folder on the left side of image and then lined up with right-end row of dots to emboss the right side of image.
  6. Each layer of cardstock for the base is increased by .25" on each side. 
  7. Mounted sequins with glue dots.  Added a little glitter to the centers.  Punched the centers out of sequins and mounted on lower right.

CARD BACK & ENVY
  1. Layered the back side as shown.
  2. Glued the bottom end of each leftover flower to the corners with GA.
  3. Lined up the leftover leaves with petals and glued the furthest end.  Trimmed the leaves at the petal area and glued petals last.
  4. Added a piece of embossed swiss dots on envelope paper to the corner of the envy and then did flower and leaves like the back of card.  Added sequins there too!
I am so slow these days with Spring acting like Summer in my yard.  I am behind in hopping, but will get caught up in the next few days.  I have really missed your art!!!  Thanks for stopping by to look and share everyone!!


 Shirley
 SUPPLIES:

Friday, March 30, 2012

Phoebe Butterfly

Hi everybody! It feels wonderful to be back and with a card to show you.  The little lady above was designed for Impression Obsession by Claudia Tenorio-Pearl.  She is called Phoebe and can be purchased in Red Rubber or as a Clear Set with sentiments.  I have the Clear Set.  She is intended to be a Ladybug, but I have chosen to use her as a Butterfly 'Fairy'.  Believe it or not, there are pink butterflies.  I fell in love with her after seeing Julie Koerber's Ladybug HERE.

IMAGE:
I stamped her with Brilliance Galaxy Gold and embossed with a heat gun to dry the ink.  She was painted with Twinkling H20's.  Her eyes and nose were accented with a Script fineline Brown pen.

I chose the largest Spellbinders Labels Twenty-Three die and
  • Used it as a template to determine my 'out of the box' area (leg) and traced with a pencil
  • Cut around her leg as shown, went up past the edge a little on each side of her leg
  • Laid the leg over the edge of the die (so it wouldn't be cut) and put it through the Cuttlebug
  • Turned it over with die in place, used a stylus to emphasize the embossed areas from the back
  • With die was still in place sponged the edges with Brilliance Coffee Bean (after stamping off to make sure it was not too dark) as shown.  
  • Removed the die and inked the outside edges with a Memento Cocoa Brown marker 
  • Outlined the areas where I wanted to emboss with a fine stylus on the front on a Pergamano mat (when you turn it over it looks like a map)
  • Turned her over again and embossed the areas I wanted raised from behind with a bigger stylus
  • Stamped another wing with Brilliance Galaxy Gold, dried with heat gun, and cut out. edged with the Galaxy Gold, turned over and embossed with a larger stylus, mounted it with 3D pop dots as shown.
Embellishments added:
  • Viva Decor Bronze Pearl for her 'butterfly bumps' and antennae
  • Glossy Accents and Deco Art Glamour Dust for her 'fairy spots' on her wings, and
  • Viva Decor Yellow Quartz for the Daisy centers
I used parts of sentiments from both Phoebe and Kate Clear Stamp Sets to get the wording I wanted.  Here is how I did it:
  • From Phoebe, "Sending ladybug hugs", inked bold words
  • From Kate, "Birthday kisses and butterfly wishes", inked bold word
  • Gave me "Sending butterfly hugs".  It was inked with a Memento Cocoa Brown marker
  • Put it through the Cuttlebug with the next to smallest of the same die set
  • Sponged the edges the same as the large die cut and then the outside edges too
  • Added some Glossy Accents with Glamour Dust and Viva Decor Bronze around that in the corner attached with as glue dot.
 BACKGROUND:
  • Mounted Sketchy Flowers on Mega Mount
  • Inked with Brilliance Coffee Bean and stamped on white cardstock.
  • Mounted image near one corner of  stamped background with 5/8 of an inch border on top and left side
  • Used Magic Matter 1/2" disk around entire die cut with image and trimmed
  • Used Magic Matter 1/8" disk around stamped background mounted on Bronze metallic text weight paper and trimmed
  • Mounted image with die cut on top
  • mounted May Arts ribbon as shown
  • Folded 8.5X11" white cardstock in half
  • Mounted image along fold and trimmed around for card
  • Added bow done with Bow-Easy
  • Used leftovers from Bronze metallic and Background cardstock for inside top part of card
Because the card measures 5.5"X4.5" I will need to make an envelope.  I plan on doing a tutorial for the IO blog on Tuesday Tips and Techniques, April 13.  It will show how to make a quick envelope for any size card easily and with a decorative easy liner too.  I am going to be doing the Tips And Techniques portion of the IO blog on the second and fourth Tuesdays of each month.

Hope you liked my card and I can't wait to get around to looking at yours.  It has been a while!!!  See you on your blog....:-)  Thanks for stopping by to look and say hi!!
 Shirley

Supplies:

Tuesday, December 20, 2011

It's Almost Here

And this could be my last post until after Christmas.  It all depends on what I get done.  :-)  This card was done using another Twisted Easel.  It looks like a square easel, but is isn't totally.  If it was a square one it would be 5X5.  I hated seeing the large margin on the right of square easels, so I changed it a little.  The fold for the easel part is the same.  A piece of cardstock cut 5"X10 and folded in the middle for the 5"X5".  Then don't forget top fold the top as from bottom left to right top (to make a triangle).  Look HERE.  Now for the difference.  I made my card front 5.25" and then mounted it so the overhang would be on the right.  Any questions, ask me.

I used Flourishes Poinsettia Boxwood Set for the flowers and the sentiment is from Flourishes Sleigh Ride.  The large flower was stamped twice, cut out, was painted with Twinkling H2O's, bottom and top turned over and embossed on mat with stylus, and layered with 3D pop dots.  3MM Mark Richard pearls were added to the center and Stickles Yellow was added in between them.  The leftover petals from the second Poinsettia were painted with Twinkling H2O's Olive Green and then mounted as shown after the flower was mounted.

The frame for the flower was done using Spellbinders Labels Thirteen.  You can see how I did it HERE.  The white embossed background is Cuttlebug's Kassie's Brocade 5"X7" embossing folder.  Since my card front was 5"X5.25, the next layer is Bazzill's Dotted Swiss Blissful 4.45"X5.0", then Kassie's Brocade at 4.5"X4.75, then Labels Thirteen frame mounted on a white BG, then on Kassie with 3D pop dots, and last the Poinsettia mounted with 3D pop dots.

The layering of the bottom is pretty self explanatory.  I painted the small Poinsettia with the same colors as above.  The pearls are 2MM.  The sentiment was stamped with StazOn Blazing Red and the die from Spellbinders Fancy Tags One was used as a stencil around it.  The die cut was done using more Blissful.  The pearls are 5 and 7MM.  The ribbon is May Arts and done with the Bow-Easy.

I am using the InLinkz Link Manager again.  Some of you said it was helpful.   Hope you enjoyed your visit.  If I don't make it by your blog to say so before Christmas, I hope yours is MERRY and BRIGHT!!  And a very HAPPY NEW YEAR too!!  Thanks for stopping by to look and say hi!!


 Shirley


SUPPLIES:

Sunday, November 27, 2011

Oh By Gosh By Golly....

Silly as it may seem, when I saw the sentiments in this stamp set it reminded of when I used to watch the Christmas musicals on TV, and I won't tell you who was singing them.  :-D  This is one of the hardest pictures I have taken.  The Whites just really didn't show right.

The card fold is again the Twisted Easel for 4.25X5.5 cards and the instructions can be found HERE.

All of the images on my card are from Flourishes Meet Me Under The Mistletoe.  The mistletoe was stamped twice with Brilliance Galaxy Gold ink, cut out, and painted with Twinkling H2O's.  The base was done by first using a Spellbinders Circle die with Bazzill Dotted Swiss Irish Eyes DP, cut and embossed.  Next, the white layer was first embossed with Cuttlebug folder D'Vine Swirls and then embossed again using their Swiss Dots.  A Spellbinders Picot Edge Circle die was then used for the shape.  The first mistletoe image was mounted.  Then the second one was embossed using a stylus to raise the bow, leaves, and berries, then mounted, using the first one as a base.  Glossy Accents was added to the berries.

Both the card front and the base were done with the same cardstocks and techniques as above.

The sentiments were done using Memento Bamboo Leaves ink on white cardstock and then using the same embossing folders as above.  (You would have a hard time stamping over the Swiss Dots) :-D  The shape for the first one is from a Spellbinders Circle die and then then Magic Matter with the Bazzill Dotted Swiss Irish Eyes DP for the bottom circle.  The second sentiment was done the same as the first with the exception that a Spellbinders Tags One die was used and adjusted as shown for the edges.

The ribbon is leftover from I think Michaels.  The pearls are Mark Richards 3 and 5mm.  The stick pin is from Maya Road Trinkets and the beads are Czech glass beads.

That's all for today!  Thanks for stopping by to look and say hi!!


 Shirley


Supplies:

Friday, November 11, 2011

Meet You At The Mistletoe

Okay, I have to admit, I am in love with A2 Twisted Easel cards.  HERE is my pictorial tutorial.   I also love Flourishes stamps and was looking for the Sunflower set when I found their Mistletoe sets.  The main site was out of the Sunflower and I found it and the others HERE.  It was a great buy and free shipping over $60.  She also has a great selection of dies for Cherry Lynn, Heartfelt Creations, Joy Crafts, Maryanne Creatables, and Nellie Snellen.  I have hunted all over for these in the states.  The service was extra fast.   She is in Las Vegas and I am in NC.  I had them in 3 days.  If you find what you want, tell her I sent you.


For my main image and sentiment, I used Flourishes Christmas Candles.  For the border trim and the bottom sentiment I used Flourishes Meet Me Under The Mistletoe.  All were done on Neenah Classic Crest Solar White cardstock.  All were stamped with StazOn Jet Black and painted with my Niji waterbrush and Twinkling H20's. I stamped the candle twice, cut them out, turned them over on my Pergamano embossing mat, embossed the bottom and candle with a stylus, and then layered the top over the bottom as shown.  I highlighted the berries on the lamp base with a Viva Decor Ice White Pearl pen.

After the sentiments were stamped they were put through and embossed with the Cuttlebug and Spellbinders Lacey Ovals dies.  The die was used as a stencil and a Round Stencil brush was used with Buttercup Twinkling H20's to do the edge around the sentiments.  In the photo it looks light orange when it is actually a pale shiny yellow!

The card front was done using Bazzill Dotted Swiss Irish Eyes DP as the base.  The Mistletoe border was stamped on Neenah Classic White Solar Crest and then put through the Cuttlebug using their  D'Vine Swirls embossing folder.  The candle and sentiment were mounted on top.  The bottom of the easel was done with the same cardstock and DP as shown.  The supports stops for the twist easel card front are Mark Richards Crystal Sticker 10mm pearls.

May Arts ribbon was wound and then threaded through the loops.  The bows were done with the Bow-Easy.   The stick pin is a corsage pin and Czech beads.  The tiny heart above the 'i' on Merry Christmas was done with Twinkling H2O's Garnet and Glossy Accents.  The lower left hand corner of an envelope was also stamped with the border mistletoe and painted.

This did not take long at all.  I love these sets and will be using them more.  Thanks for stopping by to look and share!!  Have a great weekend you all!!!

 Shirley
Supplies:

Friday, October 28, 2011

Old Fashioned Santa Easel Card

It was so hard to get a good picture of this.  I used glitter on the snowflakes and snow on the image in places.  The image, Checking His List by Stamps Happen, Inc., was stamped twice with StazOn Timber Brown .on Neenah Classic Crest Solar White 80lb. cardstock.  The image was painted with Twinkling H2O's. The first image was cut out, turned over on an embossing mat and used a stylus in the areas I wanted to raise. Then I painted and cut out his Holly crown with Cardinal, arm and hand, squirrel, rabbit, and list, and mounted as shown with 3D pop dots.  Flower Soft Polar White was used for Santa's fur trim.  Viva Decor Pearl White was used for the trim on his sash.  The ribbon is May Arts used with a Bow-Easy.  The pin was made using a Corsage Pear Pearl pin and Czech beads.  I always lay a little bit of Glossy Accents along the pin near the top as I slide each bead on and let it sit.  It holds them in place.

The card measuares 5"X5".  I created the fold using White cardstock according to the directions you can find HERE using my Scor-Pal.

The Background card front is from Bazzill Dotted Swiss Clover Leaf and Irish Eyes cardstock.  The next layer was done using my Mega Mount and Impression Obsessions Cover-A-Card Pine and Stampin' Up Classic Old Olive, with Neenah Classic Crest Solar White 80lb cardstock, that was embossed using Cuttlebug Embossing Folder Snowflakes, added off center at the bottom.  Deco Arts Glamour Dust Crystal was added to places on the snowflakes and snow using a Sakura Quickie Glue Pen.

The base is the the same card stock assembly as above.  The Snowflakes are die cuts from Cuttlebug Snowflakes #2 and are highlighted with the same Deco Arts Glamour Dust Crystal added to places on the snowflakes with the Sakura Quickie Glue Pen.  The die is from Spellbinders Fancy Tags Two and cut from Bazzill Dotted Swiss Clover Leaf cardstock.  The die was then used as a stencil on Neenah Classic Crest Solar White for the center. The sentiment is StazOn Blazing Red with Hero Arts Merry Christmas.  Hero Arts says this stamp is limited.  :-(

I have made a 5.25X5.25 box for this card, but I am patiently awaiting more of the Dotted Swiss cardstock to finish it.  :-)

That's my card for now.  I hope you enjoyed.  I am off to try and finish some more for Christmas, so I should be back here soon.  Have a great weekend everyone, and thanks for stopping by to look and say hi!!

 Shirley

SUPPLIES:

Tuesday, October 11, 2011

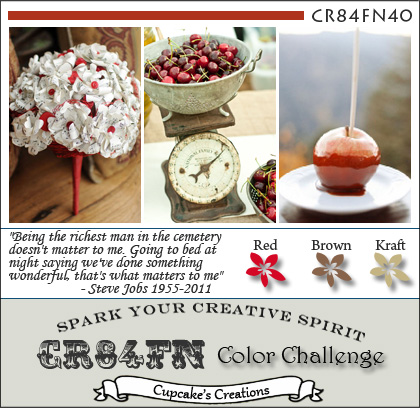
CR84FN40 Color Challenge And Christmas Is Coming


I have modified my post because a friend brought this color challenge to my attention.  When I looked into it, I was inspired when I saw the dedication.  This Color Challenge CR84FN40  is dedicated to Steve Jobs.  The challenge owner and administrator is Mona Pendleton and her husband, Scott, is a HUGE fan and chose a quote made by Steve himself to inspire all of us. R.I.P. Steve and Thank You for the difference you have made in all of our lives!

If any of you heard the speech that Steve Jobs gave as the commencement speaker in 2005 to Stanford University, you know just how special he was and what he did with life's challenges.  I wish I could have heard it 40 years ago.  He would have been 16 years old then.  :-)  You will find it HERE.

I have never ever done a challenge before, so this is a new experience.  I hope I do it right!!! LOLOL


And it's about time I got started with my cards.   I stamped The Artful Stamper fawn with Copper pigment ink (Challenge Color BROWN) on Neenah Classic Crest Solar White Super Smooth 80lb. cardstock, applied Copper embossing powder, and heated to set.  I couldn't find the image on their site and have asked them to send me the link.  The image was painted with Twinkling H2O'sStickles Diamonds and Glossy Accents were used to highlight the snowflakes and berries.  The spots on the fawn were done with Viva Decor Ice White Pearl.

I used Spellbinders Curved Rectangles for the shape around the fawn.  I put copper toned cardstock through the Cuttlebug and then, using the same die as a stencil for the fawn, mounted it on the die cut.

The background was created by applying SU Creamy Caramel Classic ink (Challenge Color KRAFT)  to Impression Obsession's Cover-A-Card Paisley Crystal mounted on my Mega Mount, then stamping on Neenah Classic Crest Solar White Super Smooth 80lb. cardstock.  Another piece of the copper toned cardstock was put though the Cuttlebug using the largest die.  The Paisley Crystal BG was mounted on top and the red ribbon (from Michaels) (Challenge Color RED) was added.

That was mounted over a piece of folded 6.25"X12" Neenah Classic Crest Solar White Super Smooth 80lb. cardstock and used as stencil to create the card.  The image was mounted on top with 3D pop dots.  The bow was tied with the Bow-Easy and mounted.  The snowflake die cuts are from Cuttlebug's Snowflake #2 and the cardstock is Arrio Wiggins Curious Ice Gold.  I used Mark Richards 5mm pearl stickers for the centers of the snowflakes.  The tag is Spellbinders Ribbons Tag Trio, also cut from Curious Ice Gold.  The sentiment was done with Brilliance Rocket Red and Impression Obsession Sentiments I.

The stick pin was done with a Maya Road Trinket Heart pin and adding a Czech bicone crystal bead and a copper bead brought back to me from France by a friend, who is also a stampaholic (thank you LaVerne).  They are truly beautiful and shine to no end.  I added a little Glossy Accent above each bead on the pin before pushing them up next to the heart.  It dries really fast and then they don't slide around on the stick pin.


The inside and the envelope images were done by stamping onto Neenah Classic Crest Solar White Text, trimming around them and then mounting on to the cardstock on more text paper, which is what I used to make my envelope.  Yes, I made the envelope and it is really easy to do, but that's another story for another day.

 Shirley

SUPPLIES:


Sunday, July 24, 2011

New Flourishes Stamp Set For Me

I purchased two new Flourishes stamp sets, Country Charm Labels and Country Charm Borders (and a few others too), a few months ago and finally made time to use them..  :-)  These are fun stamps!! Above is my result!

I stamped the label and 3 borders with Momento Bamboo Green ink on Neenah Classic Crest Solar White cardstock, painted the little flowers with Twinkling H2O's Cherry Sorbet, using a Niji waterbrush, and cut them out.  One border is for the inside of my card.  I also stamped the envelope bottom with a border too.

I stamped the sentiment, from Impression Obsession's All Occasion I, on the label with Momento Tuxedo Black. flipped it over and embossed the edges on a Pergamano cushion with a stylus.  The white doily die cut is from Martha Stewart Doily Lace Shimmer Die Cuts.  The scalloped edge is from Spellbinder's Scalloped Circles Large cut from Stardream Chiara Rose Quartz text weight paper (a left over and my "GOING GREEN contribution).  The doily was mounted on the scalloped circle.  The label was mounted using 1/16" pop dots on the doily.

A piece of the Neenah Classic Crest Solar White was put through the Cuttlebug using their Victoria embossing folder, and mounted on the Stardream Chiara Rose Quartz.   Two of the border were mounted on top of that as shown.

The main image with label was mounted on top of the background using 1/8" pop dots.   Mark Richards Black Onyx stickers (3mm, 4mm, and 5mm) were mounted as shown.  The Black May Arts Ribbon was placed as shown and the Bow-Easy was used for the bow.  The stick pin is a pearl boutonniere pin with Czech White heart and black onyx faceted beads.

I didn't take pictures of the inside and the envelope with the borders, but the borders were long enough for both.

Last but not least, I am so proud of me.  I finally pulled off making just one card.  You have no idea what a habit it can be to do a certain number each time.  It is so much faster this way and easier to work around doing the IO blog hop and challenge.  Happy camper here!!

Supplies:
StampsFlourishes Country Charm Labels, Country Charm Borders; Impression Obsession All Occasion I.
Paper:  Neenah Classic Crest Solar White cardstock, Stardream Chiara Rose Quartz
Inks:  Momento Bamboo Green, Tuxedo Black;  Twinkling H2O's Cherry Sorbet
Accessories:  Spellbinders Scallop Circles, Martha Stewart Doily Lace Shimmer Die Cuts, Cuttlebug Victoria embossing folder; White Pearl Boutonniere pin; Mark Richards Black Onyx 3, 4, and 5mm stickers; Czech white heart and black onyx faceted beads; Bow-Easy; May Arts ribbon.

Thanks so much for stopping by to look and share everyone!!

 Shirley

Wednesday, June 22, 2011

This Card Is For You

Before I talk about this card I would like to give thanks for the inspiration I used for my last card.  You can see it HERE.  I loved the card Colleen Dietrich at Dietrich Designs as seen HERE.  If you have never been there you need to visit and I promise you will want to look for a while!!  Thank you Colleen for your inspiration and creativity!

The card above was inspired by Lynn McAuley at Confessions Of A Left-Brained Stamper.  I was so excited when I pulled the jpg as an inspiration because Lynn had her name on it so I could find her blog.  Do you think I could find the card~!!!!!! Nooooooooo~  So Lynn, if you see this let me know where I saw your card!! :-)

A very simple card.  One piece of paper for the quilt look is hoarded leftovers.  It is called Italian Venetian and is has gold filigree here and there in the leaves and blossoms.  The other is Neenah Classic Crest Solar White 80lb. cardstock.  The pieces were punched with a 1 3/8" Paper Shaper punch and mounted to a piece of  the Neenah White.

The flourish, from Flourishes Siberian Iris, was stamped on the Neenah white cardstock with Brilliance Galaxy Gold.  The pearls are from Oriental Trading Company and they are not sticky and were mounted with Glossy Accents. The green is Twinkling H2O Moss Green.

A Dark Brown Sharpie and a ruler were used for the Faux Stitching.  That was run through my Cuttlebug with their Victoria embossing folder.  I pieced another piece of Neenah white so everything measured 4.0"X5.25".  That was mounted to a piece of Curious Metallic Chocolate text weight.

Now the fun really began.  I used my new PTI Flower Bloom #1 die set with the Italian Venetian paper as shown with my Cuttlebug.  I used a stylus on a piece of stylus foam to give the petals dimension along with 3D 1/16" pop dots under each petal.  The tips of the petals were rounded with the rod of a needle punch.  The buttons are from my stash, as well as the gold thread. One button is crystal clear with a gold trim and the other is a pearl pink.

The tag is from Spellbinder Tag Trio and was saved from a past project.  The sentiment is by Paper Salon and was embossed with Gold EP.  I mounted it on the Italian Venetian paper, trimmed around it, and cut out the ribbon slots with an X-Acto knife.  The dots are Stickles Cotton Candy. The ribbon is from Michaels.  The stick pin and Czech bead are from my stash!.

I am off to do another card.  I am down from 8 cards at a time to 2 and may get to 1.  That should speed up my production rate............maybe!!!  :-)

That's all for today and thanks for stopping by to look and say hi!!
 Shirley


Supplies:
Papers: Neenah Classic Crest, Solar White, Super Smooth cardstock and text weight; Curious Metallic Chocolate text weight; Italian Venetian

Stamps: Flourishes Siberian Iris - flourish; Paper Salon For You

Inks: Brilliance Galaxy Gold; Shaprie Dark Brown; Gold EP

Accessories: Oriental Trading Company pearls; EK Success Paper Shaper 1 3/8" punch; clear and pink pearl buttons; Gold thread from stash; Cuttlebug Victoria; Spellbinders Tags Trio; Stickles Cotton Candy; Michaels ribbon; Bow-Easy; stick pin and Czech from stash.

Wednesday, June 15, 2011

It's My Flower Time


For months I have wanted to do some flower cards and just never made time.  Well as you can see, I have.  I am starting with a flower I made using Spellbinder's Blossom die set.

The smallest 3 dies from Spellbinder's Blossom set were run through my Cuttlebug twice using Curious Gold Leaf White Gold 8.5X11 text.  It is more of a bone color with a gold sheen to it.  Text is easier to mold and is still thicker than normal text weight paper.  I trimmed the petals in the valleys a little so they would curl easier.  I laid them out and then inked up Impression Obsession's Cover-A-Card Dots on my Mega Mount with Brilliance Coral and rocked it over them and then dried them with a heat gun.  I curled the petals with a crochet handle and mounted them on top one another as shown.   A humongous White pearl sticker was put in the middle and Stickles Cinnamon glitter glue was used for the dots you see around it.  At this point I have one petal layer left for the sentiment.

I ran a pink piece of cardstock through the Cuttlebug using their Textile Texture embossing folder.  I ran my Opalite Golden Mist pad over the embossed area to add a gold sheen to it.   I cut it in half and then taped it to a white piece of Domtar cardstock.

I ran remnant pieces of Neenah Classic Crest Solar White 80lb. text weight paper through my Fiskars Eyelet Lace Border Punch to do 5 layers at 1.5"X4.0".

A remnant piece of dark brown ribbon was threaded through a piece of May Arts lace and taped to the card.  The bow was done with the Bow-Easy.  This was mounted on Curious Chocolate.

The sentiment is from Impression Obsession Clear Stamp Set Mini Messages and was stamped on Neenah Solar White Classic Crest remnant cardstock using Memento Rich Cocoa.  I placed a clear oval sticker on top of it and then taped to center of the last petal die cut and mounted as shown.  Last I used a Viva Decor Cream Pearl Pen to accent certain embossed areas in the paper lace.

I had fun and think I might try a ribbon rose next!  Thanks for stopping by to look and say hi!
 Shirley


Supplies:
Papers: Domtar White, Super Smooth, 90 lb. Folded card base ; Neenah Classic Crest, Solar White, Super Smooth cardstock and text weight; Curious Gold Leaf White Gold and Chocolate text weight; Pink cardstock

Stamps: Impression Obsession Cover-A-Card CC003- Dots and Mini Messages

Inks: Brilliance Coral; Memento Rich Cocoa; Opalite Golden Mist

Accessories: Fiskars Eyelet Lace Border Punch; Viva Pearl Pen Cream; Cuttlebug Textile Texture; Spellbinders Blossom; Mark Richards 10mm Pearl sticker; May Arts Lace; Bow-Easy; Clear Dome sticker, Michael remnant ribbon

Saturday, June 4, 2011

A Tweet Bird And A New List

I'll want to let you know about my new list tab.  With my new blog layout comes TABS.  Love them.  They are taking some of the stuff out of my sidebars and placing it on top where you can see them if you like.  As you can see, I've added 3 more tabs.  I think you can have a total of 7.

The one tab I would like to bring to your attention is the "Any Stamp Challenges".  I have been blog hopping more recently and noticed all of the Rubber Stamp Challenges in Blogland.  :-)  I had someone ask if I knew where there was a list of challenges for 'using any stamp'.  I said no, but I would collect them while hopping.  If you are interested, check the tab.  I was blown away with the ones I have already found.  If you know of any I don't have, let me know and I will put them on the list.  On to my card!!!

I was over at Stephanie Lanzalotto's blog, My Ink Well, and saw her cute Chickadee card!  I didn't have the stamp set she used, but I did have a button I had been wanting to use on a card for some time.

Construction of Bird:

I applied the button to a remnant of white cardstock and drew the legs, tail feathers, and beak with a pencil. I punched out a wing with one of my tear drop punches and then used it to make a larger one with a pencil. Cut it out and used it as a template on some SU DP scraps for the wing and the background for the flowers. Mounted it with a glue dot.  I trimmed around the bird, nose, and legs. Lined them with Viva Black Pearl Pen and applied a generous dot for the bird's eye.  I used the Viva Hematite Glitter Liner to accent some little dots on DP on the Wing.  Set aside to dry.

Stamped on Neenah White Cardstock with Cover-A-Card Swirls and VersaMark pigment ink.  Embossed with Clear EP.  Used Cuttlebug and Spellbinders Lacey Circles Dies for 2 die cuts.  Used larger die as a stencil and brayered with SU Classic Bashful Blue.  Used as stencil again on vellum to put over the Bashful Blue part to later stamp sentiment.  Used smaller die as stencil for background on SU remnant DP and used Viva Hematite Glitter Liner to accent small circles.

Placed larger die over Vellum as stencil, cut out and mounted over center, placed bird near top, stamped sentiment with StazOn near bottom, created Tweet on computer sticker paper, trimmed around, and placed above sentiment, and used Viva Hematite Glitter Liner over all words.

Mounted bird and words in upper left-hand corner with 3D pop dots.  Mounted May Arts ribbon and bow made with Bow-Easy as shown.

Mounted SU DP remnant in center of smaller die cut.  Mounted Prima flowers as shown.  Used Twinkling H2O's True Blue with Niji waterbrush on edges of larger rose.  I wet the edge of petals first with colorless water and Niji.  Then brushed the color lightly onto edges.  It bleeds and blends on the dampened area for a softer natural look.

It needed something else, so I pulled out a Making Memories Blue Heart Stick Pin and threaded it with a Czech jet black onyx bead and a Blue Moon cultured pearl bead from my stash.

Done except for a little of the DP and Cover-A-Card in thin strips inside the card on the top and on the envelope in the lower left-hand corner.

Thanks for stopping by to say hi and look and share!!

 Shirley


Supplies:

Papers: Domtar White, Super Smooth, 90 lb. Folded card base ; SU Bashful Blue/DP remnants; Neenah Classic Crest, Solar White, Super Smooth; Tan or Bone cardstock;Vellum


Stamps: Impression Obsession Cover-A-Card CC002 - Swirls and Damask; Just Rite Friendship Nested Sentiments; Tweet Computer Generated - Flemish Script BT


Inks: StazOn Jet Black; Brilliance Moonlight White;SU Classic Bashful Blue; Twinkling H2O's True Blue


Accessories: Viva Pearl Pen Black and Glitter Liner Hematite; Niji waterbrush 9mm Small; Cuttlebug; Spellbinders Lacey Circles; Prima Innocence (I think!); May Arts Ribbon; Bow-Easy; Czech black faceted bead, Making Memories stick pin, Blue Moon cultured pearl

Monday, May 2, 2011

A Quick And Easy Trellis Card

I needed a quick card for a friend and while blog hopping saw a "Trellis Card".  I saved the site so I could give credit.  Then after I did the card I promptly deleted the site.  :-(  I forget what it is you lose first as you get older?  LOLOL  I searched for it for 30 minutes with no luck, even using Google!  I remember that I had loved finding that blog and decided to 'Follow' it.  So if I recently visited your blog and commented on your trellis card, please let me know so I can give you credit for inspiring me.  :-)

The card was made from leftovers.  The image was done at least a year ago, cut out and layered.  It is Hero Arts Red Rubber Cling Bouquet In A Vase stamped with Brilliance Galaxy Gold on Neenah Classic Crest Solar White 80lb. cardstock, and painted with Twinkling H2O's Black Orchid, Mallard Green, and Warm Pecan.  The centers are done with Stickles Yellow.  The ribbon is May Arts.

The Trellis base background behind the bouquet was done using Spellbinders Lacey and Large Circle dies on the same cardstock and put through my Cuttlebug.  The weaving was done using 'white scraps' hoarded from way back when for who knows what!!!

The tag was done using a Spellbinders Blossom die on the Burgundy linen cardstock, a white acrylic tag and Impression-Obsession's new Clear Stamp Set All Occasions I stamped with StazOn Forest Green, and yellow rhinestone stickers. It was tied on with leftover gold cord.

The background paper was, I think, bought on sale at Michaels years ago.  I had cut it up for who knows what and it was stored in a box with other pieces I have waiting for a card!  The matte around that is Neenah Classic Crest Linen Burgundy.  The embellishments are leftover rhinestone stickers and a heart charm bought from Fancifuls, Inc.  The faux stitch was done with an SU marker.

Everything was mounted as shown with either my ATG tape gun or 3D pop dots.

I am finding more time to blog hop and love seeing all of your creations too!  Thanks for stopping by to look and share!!
 Shirley

Sunday, March 13, 2011

An Idea That Went The Other Way

And a little bit of everything!!!  I've had this image forever!  I had stamped Magenta's Dasies In A Rectangle on white cardstock with Encore Gold pigment ink and embossed it with gold embossing powder, probably 4 years ago or more.  I had painted it with Radiant Pearls and they had faded over time, like Radiant Pearls can do.  I went through my "saved images" the other day and decided to do something with it.

The embossed area had tuned a little dark like antique gold.  I painted over the ares with Twinkling H2O's Lemon Yellow, Gold Dust, Mallard Green, and China Black.  They really made the flowers pop.  I added Dimensional glue in dots to the centers sprinkles with AIG Old Gold

For the background I embossed on Neenah Classic Solar White cardstock with Cuttlebug Love Language folder and on orange cardstock with Sizzix Floral Flourishes and Vines.  I had a card I had done a long time ago that measured 4"X8.5" and I saved some folded blanks I hadn't used.  I punch the top layer with Martha Stewarts Around The Page Eyelet Lace.   I measured, cut, and mounted the backgrounds as shown.

I taped the back of the May Arts ribbon, mounted it over and under the embossed backgrounds, and mounted the bow, done with the Bow-Easy.  The gold flower finding (bought at a stamp convention) on the bow was bent to fit the knot and a 5mm pearl sticker added with some Glossy Accents.

A corner of Neenah Classic Crest Solar White 80lb text was punched with the same corner punch I used for the edge of the card.  The words from Just Rite's Friendship Nested Sentiments were stamped with StazOn Forest Green at an angle to the corner.  A ruler was used to measure where to cut so the punch could be used on the opposite end.  Then the Scor-Pal was used for decorative lines above and below the words.  3mm pearls were added.

Supplies:

Image:  Magenta Daisies In A Rectangle, Just Rite Friendship Nested Sentiments
Paper: Neenah Classic Crest Solar White Super Smooth cardstock and text; orange cardstock
Ink: Encore Gold; Stazon Forest Green; Twinkling H2O's Lemon Yellow, Gold Dust, Mallard Green, China Black
Accessories: Niji Waterbrush, AIG Old Gold glitter, Cuttlebug Love Language embossing folder, Sizzix Floral Flourishes and Vines, Martha Stewart Around The Page Eyelet Lace Punches, 5 and 3MM pearl stickers, May Arts ribbon, Bow-Easy, Brass (Gold) flower finding.

Okay, now I am scared.  I just did spell check and it didn't show me any misspelled words.  I just misspelled on purpose and it didn't catch it.  Oh well, you know what I meant to type!! Yikes!!!  I should be back soon.  This Thursday is IO's "Anything But A Card" challenge.  Thanks for stopping by to look and share. Praying for the Middle East and Japan. :-(  Hope your weekend was good!


 Shirley

Saturday, September 4, 2010

A "Bootiful" Halloween Card


This card is 5.25X5.25".  I couldn't resist using these great Leigh Hannan Halloween Window and Pumpkin Patch stamps with the season upon us!   I stamped the Window stamp on Neenah Classic Crest Solar White Super Smooth cardstock with Stazon Jet Black.  The image was painted with Twinkling H2O's.  2 and 3MM pearls were mounted with Glossy Accents to the areas as shown.  Stickles Diamonds glitter glue was used for the frost on the windows.  A piece of the Solar White cardstock was put through the Cuttlebug using their Distressed Stripes (it reminds me of vinyl house siding).  The image was cut out and then the edges sealed with Twinks China Black.  The window portion was glued to the "siding" and then the shutters on the side had 3D pop dots put underneath to give dimension. 

The pumpkin with vines was stamped again and painted with twinks. The berries were painted orange and then Stickles Orange glitter glue was applied for effect.  The eyes and mouth of the pumpkin were painted and then Stickles Yellow used.  The pumpkin was cut out with an X-acto knife.   The edges were sealed with China Black and then it was turned over on a Pergamano mat and embossed for depth using a stylus.  If you click on the image below you can get a close up.  Just enough raise to give it depth.  It too was mounted with 3D pop dots.


The envelope is handmade from Neenah Classic Crest Solar White 80lb. Text paper.  The image is the Pumpkin Patch mentioned above.  The punched edges are from the DP used on the front with Martha Stewart's Modern Garland Corner and Edge Punches.

Designer paper was used behind the Distressed Stripes siding.  A piece of Solar White 80lb Text paper was punched also using Martha Stewart's Modern Garland Corner and Edge Punches.  It was first mounted on a piece of SU Orange cardstock.  The DP was mounted on that and then the main image was mounted using 3D pop dots.  The 5MM pearls were then mounted using Glossy Accents.  The pearls all have sticky on the back, but it doesn't hold nearly as well as being reinforced with Glossy AccentsMay Arts Deep Green Ribbon was sealed to the cardfront back and passed under the Distress Stripes as shown.  The bow was done with the Bow-Easy.

The stick pin is a pear shaped boutonniere pin.  The heart is a Czech glass bead with a Clear Czech bead below that.  All were sealed in place with Glossy Accents.

The inside (shown below) was done with the same DP used on the front with the same Martha Stewart punches.  The image is IO Leigh Hannan's Pumpkin Patch.  It too was stamped, cut out, sealed edges with China Black, turned over on the mat and embossed with the stylus, and then mounted with 3D Pop Dots.  The words are my own and computer generated.

The edge of the envelope flap is using the same Martha Stewart Garland punches.  The tiny pumpkin is from IO Leigh Hannah's  Candy Corn Tree.  It was trimmed, sealed, and embossed from the back too.  Mounted using a 3D pop dot too.


Hope you enjoyed the card.  Thanks for stopping by to look and share!!  Hope your Labor Day is great too!


 Shirley


Friday, January 29, 2010

A Girly Card


I have never done one of these cards that I can remember. The minute I saw this stamp I liked it and didn't know why. It was different for me and so I thought I would do a different color combo than I usually do too.

It was stamped on Neenah Solar White cardstock with Archival Jet Black. Copic Spica At You Red was used for all of the areas on the mannequins that are not black. Red and Onyx Black rhinestone stickers from Mark Richards were also used as shown. That was mounted on Stardream Inferno. The dashes around the edges is Stickles Black Stardust Glitter Glue.

The background was created using Cuttlebug embossing folder Victoria and Neenah Solar White cardstock. That was also mounted on some Inferno. A piece of May Arts Black Crocheted Ribbon was placed in the middle of the background. The image was mounted in the middle on top.

The black heart clip from my miscellaneous stash was placed on the left. The red rhinestone is by Mark Richards. The tag is actually a real tag cut down and edged with a red marker. The dotted red ribbon is old and from WalMart. Some of the small red rhinestones were also added to the centers of the flowers in the black crocheted ribbon. The small gold heart is from Fancifuls, Inc.

Supplies:
Stamps: IO Leigh Hannan - Mannequins
Inks: Archival Jet Black, Copic Spica At You Red
Paper: Neenah Classic Crest Solar White and Stardream Inferno
Accessories: Cuttlebug Embossing Folder Victoria, Mark Richards Red and Black Onyx rhinestone stickers, , May Arts Ribbon, Fancifuls, Inc.

If you didn't know before, Impression Obsession has released all of their Valentine and Spring stamps. You can see them HERE if you like. Also, if you aren't aware, they sell wood, unmounted, and clear rubber stamps.

I am really having a time getting in the mood for anything. LOLOL It is going to be 16F here tonight and tomorrow night is supposed to be lower. How fun is that. It must be colder other places so you all be careful and say warm out there. Thanks for stopping by to look and share.


 Shirley


Thursday, January 21, 2010

It's Shaped Cards - Anything But A Rectangle Challenge Time


At IO. I chose to give a Sneak Peak at one of Gary Robertson's new stamps, Butterfly Scene. He does some really creative things with his scene stamps and this is just one of them. I stamped it on Neenah Solar White cardstock with Archival Jet Black ink. It was painted with Twinkling H2O's and then highlighted with Ranger Stickles glitter glues.

I trimmed around the image and then adhered it to Black Laid cardstock. A 1/8" Magic Matter disc was used to trace around the image.

I put a Solar White piece of cardstock through the Cuttlebug using one of their embossing folders. I mounted the butterfly layer to it and used the next to largest Magic Matter to trace around it. I scored it at the top of the traced image and then folded and cut around the image for the card. The top portion was inserted into a Cuttlebug embossing folder and put through the Cuttlebug. That was mounted to more Black Laid cardstock as a base. I traced around that, again using the 1/8" Magic Matter.

The May Arts Ribbon was woven through the holes, created by the shape of the butterfly wings, and then the Bow-Easy was used to create the bow. Mark Richards Black Onyx rhinestone stickers were added to give the card a flow from upper left to bottom lower right.

The image was mounted in the center using 3D pop dots. Extra butterflies were stamped and mounted for a 3D effect. After painting with Twinks, I rubbed the tops with Dorland's Wax. It seals it so I can use Stickles of different colors and they don't absorb the watercolor underneath to change the color.

Supplies:Stamps: IO Gary Robertson - Butterfly Scene
Inks: Archival Jet Black, Twinkling H2O's
Paper: Neenah Classic Crest Solar White and Black Laid
Accessories: Cuttlebug Embossing Folder Victoria, Mark Richards 3mm Black Onyx rhinestone stickers, Magic Matter, May Arts Ribbon, Bow-Easy
It's great to be back and better. Thanks for all of your well wishes. They worked! Thanks for stopping by to look and share.


 Shirley


Monday, December 7, 2009

Late For A Very Important Date

I missed the IO White Challenge because I could not believe how my card looked when I took its picture. It literally made me laugh. Now it is a little better at least and I will share. LOLOL

I embossed the background behind the trees using Cuttlebug's Snowflakes folder.

The foreground is Cover-A-Card Dots. I stamped it on Neenah White cardstock with VersaMark and then applied Heat & Stick Embossing Powder and heated until clear. I added the glitter and heat embossed again. Then I brush the extra glitter off with an art brush.

I also embossed some additional white cardstock using Swiss Dots. I tore it at an angle to get the layered look. Next I used IO Alesa Baker's Clear Stamp Set Swirl Tree to get the outline for the trees. The trees were mounted with 3D pop dots.

I applied glitter to the embossed background and Swiss Dots with a Quickie Glue Pen and added the glitter and then shook off extra.

I punched 1/4" holes with a punch along the top of the card. I threaded the ribbon through the holes as shown and then created a bow with the Bow-Easy. I tied the tail on the right with a slip knot.

Left over buttons were added to the trees and a brass snowflake to the bow. Pearls and glitter were added as shown.

The tag is from Spellbinders and the words were stamped with Galaxy Gold and pearls added as shown.

Supplies:
Stamps: IO Clear Set Swirl Tree and Cover-A-Card Dots used with the Mega Mount
Inks: Brilliance Galaxy Gold,
Paper: Neenah Classic Crest Solar White
Accessories: Cuttlebug Embossing Folders Snowflakes and Swiss Dots, Sakura Quickie Glue Pen, Deco Art Glamour Dust, Mark Richards 3mm and 5mm Pearl stickers, Spellbinders Ribbon Tags Trio, May Arts Ribbon, Bow-Easy, Fancifuls Inc. Brass Snowflake

Thanks for stopping by to look and share.


 Shirley


Thursday, November 19, 2009

The Shaker Card Challenge Is On

It's late and I just am so glad I finished!!! It's IO's Challenge Thursday and this week it's shaker cards. Above is mine.

Image:
The image was stamped on Neenah Natural with VersaFine Vintage Sepia. It was painted with Cherry Sorbet, Icicles, Solar Gold, and Olive Vine. Highlights of Stickles Gold and Liquid Pearls White Opal were added. I trimmed around it with scissors.

2 pieces of Neenah Solar White cardstock were embossed with the Cuttlebug Victoria embossing folder. One for behind the image and one for the background. The image was mounted to one pieced. Various beads were added to the center and the Shake-It Pouch was added over that. I trimmed around the edge of the cardstock.

A Spellbinders next to largest Large Circle Scallops die was used on the In The Pink Bazzill cardstock. A 3" center was cut out with a Fiskars stencil. It was then applied over the top. of the shaker.

Background:
A 4.0X5.25 piece of Neenah Natural was mounted to a piece of 4.25X5.5 In The Pink Bazzill cardstock. The other piece of the Victoria embossed cardstock was cut to 3.75X5.0 and mounted to that.

The image was backed with 3D Pop Dots and mounted to the left. The May Arts Ribbon was mounted as shown. A double bow was tied with the Bow-Easy. An extra tail was added by pulling a piece of ribbon through the back and then the ends were taped to the back of the cardfront. Mark Richard's Pearls were added as shown.

If you would like to see some really pretty cards you can by visiting the other DT Members sites below. You can also keep an eye out to see who joins in the challenge by going to the main IO site HERE. It's open to everyone.

Supplies:
Stamp - Impression-Obsession Alesa Baker Small Ornament Trio

Inks - VersaFine Vintage Sepia, Brilliance Galaxy Gold, Twinkling H2O's Cherry Sorbet, Icicles, Solar Gold and Olive Vine

Paper - Neenah Classic Crest Solar White and Natural, Bazzill Bling In The Pink
Accessories - Niji Waterbrush, Mark Richards 5mm pearls, Cuttlebug Victoria Embossing Folder, Bow-Easy, IO Shake-It Large Circle Pouch , Spellbinders Large Scallop Circle Dies, May Arts Ribbon.
Thanks for stopping by to look and share!


 Shirley


Tuesday, November 10, 2009

When It Rains


Plant flowers! So here is my card for today. The image is another one from Hero Arts. It is called Thank You and comes as a cling stamp.

  1. It was stamped with Brillance Galaxy Gold on Neenah Solar White. It was painted with Twinkling H2O's Dreamsicle and Olive Vine. I layered the flowers by stamping just the areas I wanted and then cutting and mounting. The buds on top look like Dew Drops, but are really tiny glass vase gems. You get a huge bag of clear ones for $3-$4. Like the ones HERE. You can used them over color, like I did here, or your can painted them with Sharpies or Alcohol Inks. The bottom left hand buds are Glossy Accents. The middle of the flowers are Mark Richards Pearls.

  2. The next layer down was done using a Neenah Solar White 4.25"X5.5". The left- and right-hand top corners were embossed in the Cuttlebug using Anja Corner Template FE 6124. An Xact0-Knife was used to cut out the areas as shown. Next the bottom was punched using Fiskars All-A-Fleur Border Punch. It embosses a little area above the punched image.

  3. Between the corners and the bottom I used the Dotted Swiss tiny folder from Cuttlebug's Just My Type. It was just a perfect fit as you can see. It was then mounted on SU Almost Apricot I think.

  4. The front was mounted on that and then on a folded piece of Neenah Solar White. The ribbon is from Michael's and tied with the Bow-Easy.

Supplies:

  • Stamp - Hero Arts Thank You - CG115
  • Inks - Brilliance Galaxy Gold, Twinkling H2O's Dreamsicle and Olive Vine
  • Paper - Neenah Classic Crest Solar White and SU Almost Apricot
  • Accessories - Niji Waterbrush, Mark Richards 2 and 5mm pearls, Mini Clear Glass Gems, Anja Corner Template FE 6124, Fiskars All-A-Fleur Border Punch, Michaels Ribbon, Cuttlebug Just My Type Embossing Folders, Bow-Easy

Thanks for stamping by to look and share! I've been out of town and checking to make sure things post on the dates I chose. It's been a little tricky. LOLOL


 Shirley


Tuesday, October 27, 2009

It's A Snow Day!

Another image from last year. I didn't get a chance to use this and couldn't resist it today. I love snowmen and this one is just too too cute!

1. The image, Snow Friends by Lyn Dillin at Inkadinkado, was stamped with Brilliance Galaxy Gold and then painted with Twinkling H2O's. It also comes in a Clear Set, which I didn't know about, ha! The eyes, nose and mount were highlighted with Glossy Accents. The berries and snowflakes were highlighted with Stickles Christmas Red and Diamonds glitter glues.

2. An oval template was used to create the edge for the image. The scalloped embossed die is Bazzill Swiss Dots cardstock used with the largest Spellbinders Large Scalloped Oval die.

3. After the image was mounted on the die cut, marks were where the holes were needed were made with a paper piercer. The smallest eye hole punch from my Silent Setter Hole Punch.

4. The Dotted Swiss ribbon from Michael's was threaded through the holes using a dental floss aid. The bow was made with the Bow-Easy.

5. The edge of the White Plastic disk was done with StazOn Teal Blue. The words stamped on it, with StazOn Blazing Red, are from Impression-Obsession Mini Messages. Gold cord was used to tie it to the oval. Stickles Diamonds was used to highlight here and there.

6. The background is Neenah Classic Crest Solar White embossed with the Snow Dots Cuttlebug embossing folder. That was mounted on Bazzill Dotted Swiss Neptune. A Sakura Quickie Glue Pen was used with DecoArt Glamour Dust Glitter to highlight the middle of snowflakes here and there. The image was mounted using 3D pop dots.

Supplies:

  • Image: Inkadinkado Snow Friends or Clear Set and Impression-Obsession Mini Messages
  • Paper: Neenah Classic Crest Solar White and Bazzill Dotted Swiss Neptune
  • Inks: Brilliance Galaxy Gold, Twinkling H2O's Icicles, Orange Peel, Autumn Skies, Garnet, Solar Gold, Honey Amber, China Black, Cherry Sorbet
  • Accessories: Spellbinders Large Scalloped Ovals, Glossy Accents, Stickles Christmas Red and Diamonds, Cuttlebug Snow Dots embossing folder, Sakura Quickie Glue Pen, DecoArt Glamour Dust Glitter, Michael's Ribbon, Bow-Easy, Gold cord, 1" white plastic disk.

A fun card! Thanks for stopping by the blog to look and share all!


 Shirley


Related Posts Plugin for WordPress, Blogger...