Showing posts with label Martha Stewart. Show all posts

Sunday, April 15, 2012

Victorian Fun

I have been dying to get to these stamps.  I love Victorian anything.  Alesa Baker has a lot of new stamps for Spring and here are some of them.  I am afraid I got so into using the stamps I got a little carried away.

I started out:
  • stamping with my Cover-A-Card Screen Stamp onto Neenah Classic Crest Natural cardstock for my background.  Trimmed a piece 4.25"X5.5".  I think any tan or brown colored ink pad would look good.  I used Stampin' Up retired Creamy Caramel. I think Adirondack Caramel will work.
  • Used Cover-A-Card Scratch on Neenah Classic Crest Solar White cardstock.  Trimmed to 3.75"X 5.0". Stamped the Worn Rose image in the upper left corner as shown and painted it with Cherry Sorbet and Olive Green Twinkling H2O's.  Mounted on the Screen cardstock.
  • Stamped Rose Ledger on more Neenah Classic Crest Natural cardstock and painted the bottom with the same Twinks. I trimmed around the edges and top scallops. Mounted on Scratch cardstock.
  • Stamped the inside pages (Worn Rose Vintage Book) for my book and painted with Twinks.  Trimmed and turned over to emboss the floral areas.  
  • Stamped the sentiment, So Glad We're Friends, on the right side. Folded.
  • Stamped the cover for my book, Vintage Worn Rose Cover,  trimmed, painted floral image, turned over and embossed the floral image, and mounted on folded vintage book pages.
  • Punched butterflies with MS 3-in-1 Butterfly punch.  Mounted with Glossy Accents.  Pearls on the butterflies are 2mm from HERE.and were placed with a Sticky Stick and Glossy Accents.  The pearls on the bottom right are probably 3mm and are from Mark Richards Crystal White Pearl stickers.
  •  Ribbon and lace are leftovers from other projects.
  • The ribbon buckle is from Fancifuls.  
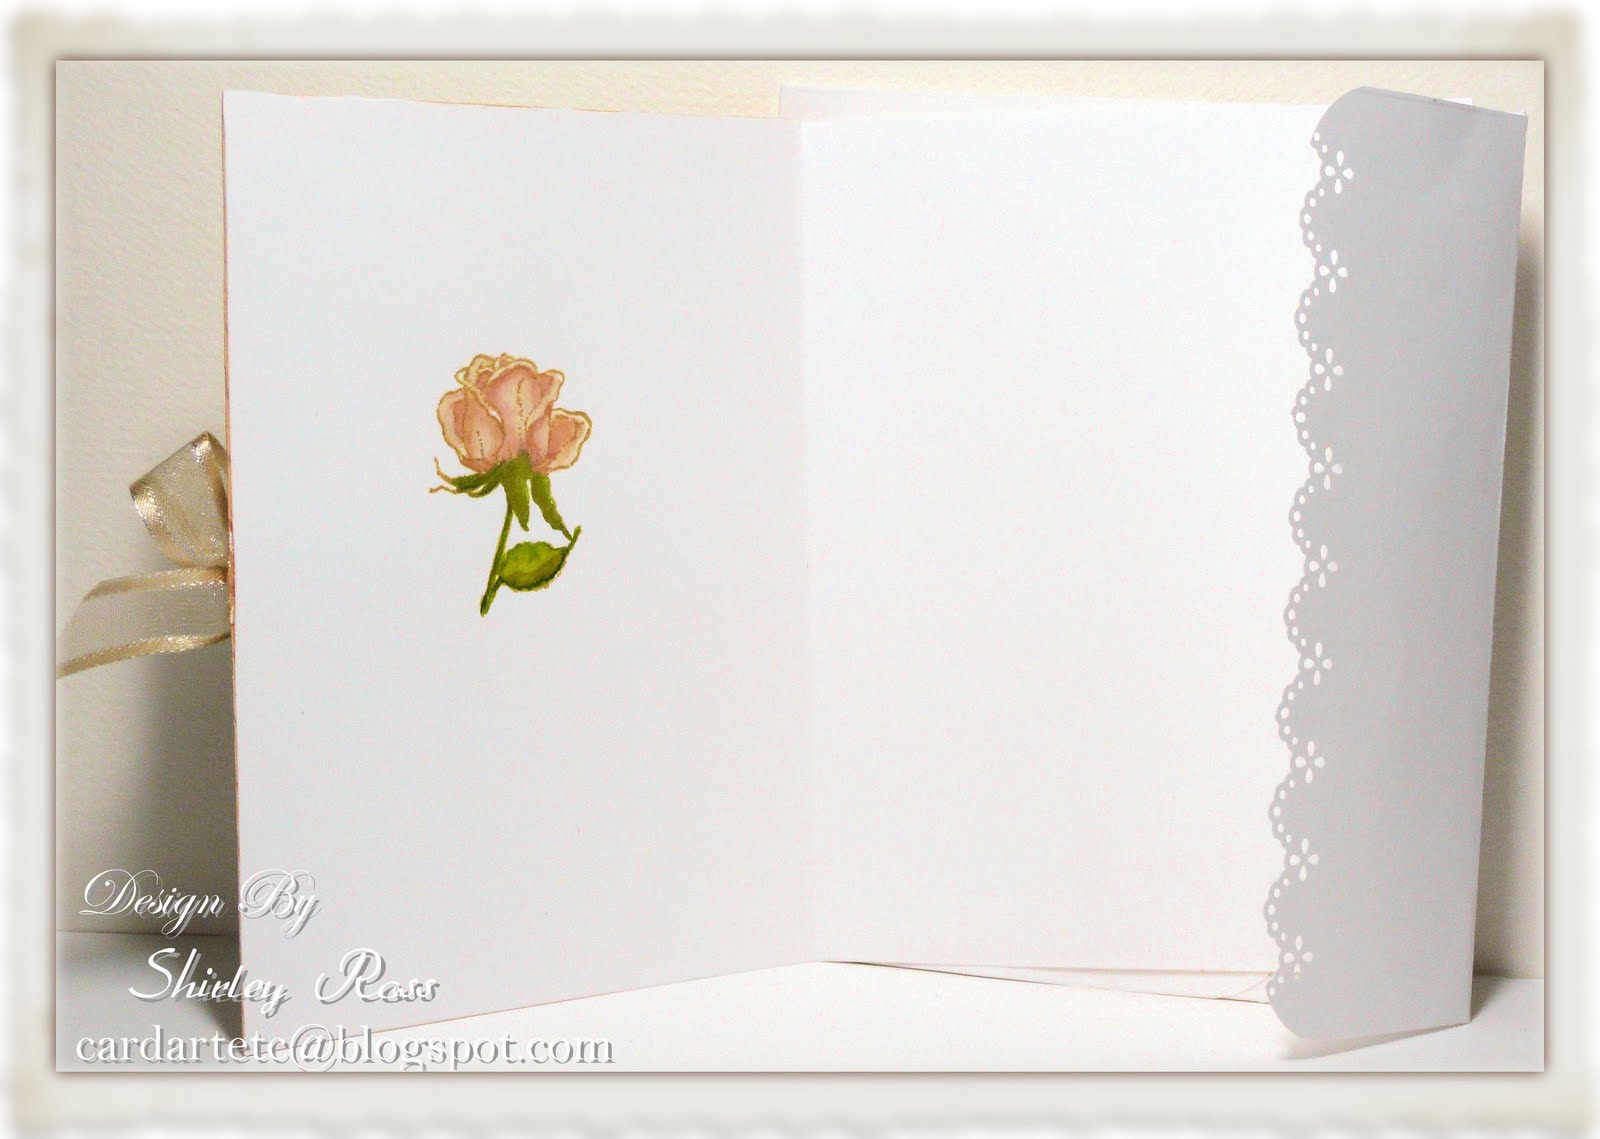
Below are photos of what I did for the inside of the card, the envelope, and inside the little book!


The scratch areas on the envelope were done after using a paper crimper to peel the paper apart so it would be thin if I mail the envelope.


I have one request for anyone who knows about blogger and the New Designer Template.  I am having a problem getting rid of the snow.  LOLOLOL  I deleted any widgets that had the code and it hung in there.  I looked all the way through my html layout.  No snow codes there.  Wow!!  This has been a really funny month.

Thanks for stopping by to look and say hi!!That's my card and envy! Hope you liked them. I got to stamp and make up for some of the time when I couldn't. :-)

 Shirley
SUPPLIES:

Sunday, December 4, 2011

CAS That Was Much Fun

I was blog hopping and came across Colleen Dietrich's Pastel Sleigh Ride and knew I had to try something like it!  The sleigh is from Flourishes Sleigh Ride and the Pine boughs are from Impression Obsession's Winter View.  The words are from Flourishes Meet Me Under the Mistletoe.

I stamped the sleigh with Brilliance Galaxy Gold on Neenah Classic Crest Solar White, painted it with Twinkling H2O's, cut it out and embellished it with a punched Paper Shapers Small Snowflake, added Glossy Accents and Deco Art Glamour Dust, then set it aside.

I punched a border on pink parchment paper with a Martha Stewart Around The Page Punch as shown.  I used a Spellbinders Floral Doily Motif die with Neenah Classic Crest Solar White Laid paper.  I cut it in half as shown and mounted it on the pink parchment paper.

Another piece was embossed with one of the folders from Sizzix's Flourish, Dots, and Ribbon set.  A piece of SU DP paper was cut for the background.  The white embossed paper was mounted on that followed by the pink parchment, the die cut, a piece of lace, and then the sleigh.

I stamped the Pine boughs using SU Certainly Celery Classic dye ink on some white CS, cut out, mounted as shown.  Snowflakes were die cut with Cuttlebug's Snowflake #2 die and mounted as shown.  I applied Glossy Accents to all of the centers, added pearl stickers to the centers, then dusted with Deco Arts Glamour Dust.  The ribbon was tied with the Bow-Easy and mounted with a glue-dot.

The base below was done with the same white CS and SU DP stamped with Impression Obsession Winter View Pine boughs and SU Certainly Celery.  A Spellbinders Fancy Tags One die was used for the word base, then the top was stenciled.  The words are from Flourishes Meet Me Under The Mistletoe.  If I made some grammatical mistakes, I apologize.  Somehow tonight I seem to be in a fog.  LOLOL  So if you have questions, please feel free to ask!

I must be doing something wrong with the Inlinkz Link Manager.  I liked it, but it just seemed to take so much time always adding new links.  Oh well, hope your weekend was great and thanks for stopping by to look and share.


 Shirley


Supplies:
Stamps:  Flourishes Sleigh Ride and Meet Me Under The Mistletoe; Impression Obsession Winter View
Paper:  Neenah Classic Crest Solar White and Solar White Laid cardstock; Pink parchment cardstock; Stampin' Up DP remnants
Inks:  Memento - Brilliance Galaxy Gold; Twinkling H2O's; SU Certainly Celery Classic
Accessories:  Paper Shapers Snowflake punch; Spellbinders Tags One, Mark Richards 3mm white pearl stickers; Bow-Easy; Micheal's ribbon, Martha Stewart Around The Page Punches.

Sunday, July 24, 2011

New Flourishes Stamp Set For Me

I purchased two new Flourishes stamp sets, Country Charm Labels and Country Charm Borders (and a few others too), a few months ago and finally made time to use them..  :-)  These are fun stamps!! Above is my result!

I stamped the label and 3 borders with Momento Bamboo Green ink on Neenah Classic Crest Solar White cardstock, painted the little flowers with Twinkling H2O's Cherry Sorbet, using a Niji waterbrush, and cut them out.  One border is for the inside of my card.  I also stamped the envelope bottom with a border too.

I stamped the sentiment, from Impression Obsession's All Occasion I, on the label with Momento Tuxedo Black. flipped it over and embossed the edges on a Pergamano cushion with a stylus.  The white doily die cut is from Martha Stewart Doily Lace Shimmer Die Cuts.  The scalloped edge is from Spellbinder's Scalloped Circles Large cut from Stardream Chiara Rose Quartz text weight paper (a left over and my "GOING GREEN contribution).  The doily was mounted on the scalloped circle.  The label was mounted using 1/16" pop dots on the doily.

A piece of the Neenah Classic Crest Solar White was put through the Cuttlebug using their Victoria embossing folder, and mounted on the Stardream Chiara Rose Quartz.   Two of the border were mounted on top of that as shown.

The main image with label was mounted on top of the background using 1/8" pop dots.   Mark Richards Black Onyx stickers (3mm, 4mm, and 5mm) were mounted as shown.  The Black May Arts Ribbon was placed as shown and the Bow-Easy was used for the bow.  The stick pin is a pearl boutonniere pin with Czech White heart and black onyx faceted beads.

I didn't take pictures of the inside and the envelope with the borders, but the borders were long enough for both.

Last but not least, I am so proud of me.  I finally pulled off making just one card.  You have no idea what a habit it can be to do a certain number each time.  It is so much faster this way and easier to work around doing the IO blog hop and challenge.  Happy camper here!!

Supplies:
StampsFlourishes Country Charm Labels, Country Charm Borders; Impression Obsession All Occasion I.
Paper:  Neenah Classic Crest Solar White cardstock, Stardream Chiara Rose Quartz
Inks:  Momento Bamboo Green, Tuxedo Black;  Twinkling H2O's Cherry Sorbet
Accessories:  Spellbinders Scallop Circles, Martha Stewart Doily Lace Shimmer Die Cuts, Cuttlebug Victoria embossing folder; White Pearl Boutonniere pin; Mark Richards Black Onyx 3, 4, and 5mm stickers; Czech white heart and black onyx faceted beads; Bow-Easy; May Arts ribbon.

Thanks so much for stopping by to look and share everyone!!

 Shirley

Thursday, April 28, 2011

A Smaller Folded Napkin Card Tutorial


First let me blame my friend Sue, at Suzanne's Stamping Spot, who started all of this with her beautiful Napkin card made from a 12"X12" piece of DP.  I loved it and wanted to do one, but not as big.  I decided to use Martha Stewart Around the Page punches because they are quicker.  In reading Sue's post, she refers you to an instruction post found, HERE.  I found it works on the rule of fourths, whatever that is!! Ha!  Here is my journey to a 5 1/8"X5 1/8" Square Folded Napkin card. BTY, IT IS NOT LESS WORK, JUST BECAUSE IT'S SMALLER!! LOLOLOL....

THE FOLDS:
1.  I checked out MS instruction sheet for 10.25" Around The Page.  I knew because Sue's finished card was 6" (1/2 of 12"X12") that mine would be a little more than 5".  I couldn't quickly figure out how to divide that by 4, (you'll get my point if you try doing it following the site above) so this is what I did.  I cut my Neenah Classic Crest Solar White 80 lb. text down to 10.25" square.  I used MS Eyelet Lace Around The Page punches and did my edge first instead of last.  You will see why soon.


2.  I folded it  to allow me to crease it (in the middle only) to find the center.  I actually ran my thumb nail across it (the center crease).
3.  Now fold it the other way and make another crease across your other one (in the middle only).

4.  Take a pencil and draw the cross you have made in the center:  It will be my guide all the way through.

5.  This is the part that allows you to use any square piece of paper for your fold.  Take one corner of the paper it to the center (NOT INTO the center) of the paper and crease the fold all the way.  (When this was done I also put my folded edges on my Scor-Pal to make them neater and easier to fold later.)


6.  This is the step that was first on Sue's larger card, where the measurements were easy to figure out.  Your sheet is totally open.  You take the two bottom corners of the square and fold them ONLY to the CENTER of the page, creasing the paper, as shown below (1/4 the width/length).  Turn the page a quarter of a turn and do the same thing.  Repeat until you have four creases as shown:


7.  What you do next looks tricky, at least it did to me, but it's relatively easy, once you get one corner going.  You have squares on each of the corners.  Next to them you have triangles and in the center you have one big square.  Gently fold the triangles next to each corner square inward as shown.  The only fold not here is the corners being folded back.  You will see what I mean below.


THE TRAINGLES:

Okay, so I am not going to go step by step.  I will tell you how I set up each step.  Let's take a look at the finished product:


MY STAMPED CARDSTOCK:
1.  I stamped on Cryogen White cardstock using  Cover-A-CardTM  Tapestry stamp inked with Memento Bamboo Leaves ink.  The stamp produces a 5.75"X5.75" piece.  I did two pieces.  I used printer copy paper to trace the pieces I would need with a stylus and then I traced it on the stamped cardstock.  As you can see from the picture, the corner pieces are not perfect triangles because of the punch I used.  :-) The picture looks like I used two different types of green ink because of the lighting.  Go figure!

2.  I stamped on Curious Ice Gold cardstock using the same stamp and VersaMark pigment ink, applied Stampendous Pearl White Embossing Powder, and heated with a heat gun.  I think one piece of 5.75"X5.75" worked.   I still used the copy paper first to determine my pieces.  Again, I didn't have perfect triangles because of the punch I used.  Click on the image to see the difference in the cardstock themselves, even though both names imply white.  One has a yellow cast and the other is whiter.

3.  For the center I put Curious Ice Gold through the Cuttlebug using a Spellbinders Lacy Circles die.  A Neenah Classic Crest Solar White cardstock die cut from a Large Circle Spellbinder die was put through the Cuttlebug using their Swiss Dots Embossing Folder.  Another smaller Spellbinders Circle Die with DCWV Latte Metallic Olive Green cardstock was done, and then another smaller one using the Solar White cardstock.  The sentiment is from Impression Obsession's brand new All Occasion I Clear Stamp set.  The vine twirlies are from Flourishes Sweet Peas Clear Stamp set.  The button is from Hancock Fabrics.  The butterfly is Martha Stewart's Classic Butterfly 3-in-1 punch. used on Stardream Chiara Rose Quartz paper.  The pearls are 2mm I found on EBay HERE.

CARD BAND WITH BOW:

1.  The band is a 2.25"X11" piece of Neenah Classic Crest Solar White Cardstock punched on both sides with the same border punch used for the edge.   An 11" piece of May Art ribbon was taped to the center.  The cardstock was rapped around a pencil to break down the cardstock so it would bend easier.  I used the same, just smaller sizes of dies and cardstock for the image as I did for inside the card.  I used Flourishes Sweet Peas Clear Stamp set for the image.  I stamped it with Brilliance Galaxy Gold and painted it with Twinkling H2O's Buttercup, Cherry Sorbet, and Olive Green.  It was cut out with an X-Acto knife, the edges painted again, and mounted with 1/16" pop dots.  The button is Hancock Fabrics.  It was mounted with tape on the band. The bow is May Arts and done with the Bow-Easy.

Hope your week has been good and that your weekend will be even better.  This has been a difficult week for all of us with what happened in the South!  Thank you all for stopping by to look and share!
 Shirley

Sunday, March 13, 2011

An Idea That Went The Other Way

And a little bit of everything!!!  I've had this image forever!  I had stamped Magenta's Dasies In A Rectangle on white cardstock with Encore Gold pigment ink and embossed it with gold embossing powder, probably 4 years ago or more.  I had painted it with Radiant Pearls and they had faded over time, like Radiant Pearls can do.  I went through my "saved images" the other day and decided to do something with it.

The embossed area had tuned a little dark like antique gold.  I painted over the ares with Twinkling H2O's Lemon Yellow, Gold Dust, Mallard Green, and China Black.  They really made the flowers pop.  I added Dimensional glue in dots to the centers sprinkles with AIG Old Gold

For the background I embossed on Neenah Classic Solar White cardstock with Cuttlebug Love Language folder and on orange cardstock with Sizzix Floral Flourishes and Vines.  I had a card I had done a long time ago that measured 4"X8.5" and I saved some folded blanks I hadn't used.  I punch the top layer with Martha Stewarts Around The Page Eyelet Lace.   I measured, cut, and mounted the backgrounds as shown.

I taped the back of the May Arts ribbon, mounted it over and under the embossed backgrounds, and mounted the bow, done with the Bow-Easy.  The gold flower finding (bought at a stamp convention) on the bow was bent to fit the knot and a 5mm pearl sticker added with some Glossy Accents.

A corner of Neenah Classic Crest Solar White 80lb text was punched with the same corner punch I used for the edge of the card.  The words from Just Rite's Friendship Nested Sentiments were stamped with StazOn Forest Green at an angle to the corner.  A ruler was used to measure where to cut so the punch could be used on the opposite end.  Then the Scor-Pal was used for decorative lines above and below the words.  3mm pearls were added.

Supplies:

Image:  Magenta Daisies In A Rectangle, Just Rite Friendship Nested Sentiments
Paper: Neenah Classic Crest Solar White Super Smooth cardstock and text; orange cardstock
Ink: Encore Gold; Stazon Forest Green; Twinkling H2O's Lemon Yellow, Gold Dust, Mallard Green, China Black
Accessories: Niji Waterbrush, AIG Old Gold glitter, Cuttlebug Love Language embossing folder, Sizzix Floral Flourishes and Vines, Martha Stewart Around The Page Eyelet Lace Punches, 5 and 3MM pearl stickers, May Arts ribbon, Bow-Easy, Brass (Gold) flower finding.

Okay, now I am scared.  I just did spell check and it didn't show me any misspelled words.  I just misspelled on purpose and it didn't catch it.  Oh well, you know what I meant to type!! Yikes!!!  I should be back soon.  This Thursday is IO's "Anything But A Card" challenge.  Thanks for stopping by to look and share. Praying for the Middle East and Japan. :-(  Hope your weekend was good!


 Shirley

Thursday, March 3, 2011

It's A Blue Challenge, Not A Blue Day!!!

When someone says blue to me and doesn't define anything else, for some reason, I think of Delft art or china.  Soooo here's how I did my card for this challenge.

I stamped Alesa Baker's new image, Wire Garden Bench, with StazOn Ultramarine.  It was painted with Twinkling H2O's Sapphire On Ice.  The great thing about watercolor is the different shades from just one color.  I highlighted the flowers with a Clear Sakuro Glaze Gel Pen

The edge was done with Martha Stewart's Around The Page String Lace and Neenah Classic Solar White Text paper.  I didn't like the white so I ran the StazOn Ultramarine over it and mounted the image on to.

I thought Impression Obsession's Cover-A-CardTM  Round Floral in Ancient Page Cobalt would look a lot like Delft tiles.  I stamped it once using my  Mega MountTM,  for the 5.25X5.25 background, and once more for the left inside of the card, the lower left-hand corner of the envelope and the 4 square tiles you see on the corners. I first punched the three squares like you see in the lower right-hand corner where you see the word "hello" with a .75" punch.  I highlighted them with a Clear Sakuro Glaze Gel Pen.  Then to get the other 3 tiles I used a .5" punch.  They were mounted with 3D pop dots.   One of the left over hollow frames was used for the word "hello",  from Impression Obsession's Sentiments II Clear Stamp Set.

The image was placed on the background with 3D pop dots.  I mounted the white seam binding ribbon and then mounted all to the folded card, added the pearl embellishments, did the inside and the envelope and done.

Now there's more fun waiting for you.  Below are the blogs of the DT members with more wonderful "Blue Cards".


Supplies:
Image: Impression Obsession - Cover-A-CardTM Round Flowers, Alesa Baker Garden Bench, and  Sentiments II 

Paper: Neenah Classic Crest Solar White Super Smooth cardstock and text
Inks: Stazon Ultramarine and Ancient Page Cobalt; Twinkling H2O's Sapphire On Ice
Accessories: Niji Waterbrush, Clear Sakura Glaze Pen, Martha Stewart Around The Page String Lace Punches, 5 and 2MM pearl stickers, White Seam Binding,  Bow-Easy

Thanks for stopping by to look and share.  Hope to see you all soon!!


 Shirley


Saturday, September 4, 2010

A "Bootiful" Halloween Card


This card is 5.25X5.25".  I couldn't resist using these great Leigh Hannan Halloween Window and Pumpkin Patch stamps with the season upon us!   I stamped the Window stamp on Neenah Classic Crest Solar White Super Smooth cardstock with Stazon Jet Black.  The image was painted with Twinkling H2O's.  2 and 3MM pearls were mounted with Glossy Accents to the areas as shown.  Stickles Diamonds glitter glue was used for the frost on the windows.  A piece of the Solar White cardstock was put through the Cuttlebug using their Distressed Stripes (it reminds me of vinyl house siding).  The image was cut out and then the edges sealed with Twinks China Black.  The window portion was glued to the "siding" and then the shutters on the side had 3D pop dots put underneath to give dimension. 

The pumpkin with vines was stamped again and painted with twinks. The berries were painted orange and then Stickles Orange glitter glue was applied for effect.  The eyes and mouth of the pumpkin were painted and then Stickles Yellow used.  The pumpkin was cut out with an X-acto knife.   The edges were sealed with China Black and then it was turned over on a Pergamano mat and embossed for depth using a stylus.  If you click on the image below you can get a close up.  Just enough raise to give it depth.  It too was mounted with 3D pop dots.


The envelope is handmade from Neenah Classic Crest Solar White 80lb. Text paper.  The image is the Pumpkin Patch mentioned above.  The punched edges are from the DP used on the front with Martha Stewart's Modern Garland Corner and Edge Punches.

Designer paper was used behind the Distressed Stripes siding.  A piece of Solar White 80lb Text paper was punched also using Martha Stewart's Modern Garland Corner and Edge Punches.  It was first mounted on a piece of SU Orange cardstock.  The DP was mounted on that and then the main image was mounted using 3D pop dots.  The 5MM pearls were then mounted using Glossy Accents.  The pearls all have sticky on the back, but it doesn't hold nearly as well as being reinforced with Glossy AccentsMay Arts Deep Green Ribbon was sealed to the cardfront back and passed under the Distress Stripes as shown.  The bow was done with the Bow-Easy.

The stick pin is a pear shaped boutonniere pin.  The heart is a Czech glass bead with a Clear Czech bead below that.  All were sealed in place with Glossy Accents.

The inside (shown below) was done with the same DP used on the front with the same Martha Stewart punches.  The image is IO Leigh Hannan's Pumpkin Patch.  It too was stamped, cut out, sealed edges with China Black, turned over on the mat and embossed with the stylus, and then mounted with 3D Pop Dots.  The words are my own and computer generated.

The edge of the envelope flap is using the same Martha Stewart Garland punches.  The tiny pumpkin is from IO Leigh Hannah's  Candy Corn Tree.  It was trimmed, sealed, and embossed from the back too.  Mounted using a 3D pop dot too.


Hope you enjoyed the card.  Thanks for stopping by to look and share!!  Hope your Labor Day is great too!


 Shirley


A Cute Fall Card! With A Touch Of Halloween


This cute card is 5 3/8X5/3/8" and was created using IO Leigh Hannan's new Tree Owls.  It was stamped on Neenah Solar White Super Smooth cardstock with Brilliance Galaxy Gold and painted with Twinkling H2O's Nutty Oak, Warm Pecan, Ginger Peach, and Daffodil.  The background was done using StazOn Saddle Brown ink with IO Cover-A-Card Maple Leaves on Classic Laid Solar White cardstock (It has a tooth to it that you can see in some of the leaves).  I used a Sakura Quickie Glue Pen for the dots to make the stars, dusted them with Deco Art Glamour Dust.  When dry I painted over the tops and around some with Twinks Daffodil. (Directly below the card above is the bottom of the envelope)

The bow was done using 3 metallic sprays and ivory seam binding.  It was then crumpled up in the corner of a ziplock bag and left over night.  The next day it was released and then a Bow-Easy was used for the double bow as shown.  You can find the instructions HERE.   I love the vintage effect.

All of the punched edges were done using SU Orange cardstock and Martha Stewart's Gothic Arches Corner Punch.  I used Spellbinders Fancy Tags for the greeting. Below is a close up.


Click on the image and you will see the detail in the owls.  Their little eyes were done with Twinks Daffodil and Copic Spica Black glitter pen.  Glossy Accents were applied over them, and I swear they almost look just like real 'Owl Eyes'.  LOL  The heart is from Fancifuls, Inc. online store.  I tied it on with some leftover gold cord.  The pearls are Mark Richards 3mm.  The words are IO Leigh Hannan's Owl Eyes.  Isn't that saying just too cute!

The inside of the card, shown below, was done with a stamped area of the Tree Owls and left over remnants from the Maple Leaves background.  The envelope is handmade from matching Solar White 80lb. text paper.  The flap of the card was done with the same Martha Stewart Gothic Arches corner punch.


 Shirley

Monday, August 9, 2010

Well It's About Time, Shirley

I honestly have to say that the detail in this card is not what has kept me from posting.  I am still working on getting my house ready to sell and that means going through my stash in the garage.  LOLOL

The main image is Hero Arts Friend.  I stamped it with Brilliance Galaxy Gold and thought it would be perfect for layering, so I stamped the flower three more times.  After cutting out each layer, the images were then painted with Twinkling H2O's Lemon Yellow, Mallard Green, Royal Satin, and Pink Grapefruit.  The images were then turned over and a stylus was used on each petal on my Pergamano mat.   Each layer was mounted using 1/16" pop dots.
I did the same thing with each of the flowers and also the leaves.  On the tiniest leaves I used Glossy Accents.  I used 2MM pearls on the large flower and the smaller yellow and purple flowers. 
Mark Richards has quit offering 2MM pearls and I couldn't find them anywhere so I went to EBay and guess what?  I couldn't believe my eyes.  I found I could get 1500 in a little compact for $3.60 from Hong Kong and the shipping was free HERE.  It did take 6 days, but that is nothing when you want something.  LOL No kidding!! I applied them using dots of Glossy Accents (I use this to cement all of my pearls, rhinestones, etc.) and a Sticky Stick, found HERE.  I still buy the other larger ones from craft vendors here.
The smaller of the pink flowers has Liquid Pearl White Opal with a touch of Glossy Accents.  And what do you know, they look like tiny pearls too.  LOL

I used my Martha Stewart Scroll Lace Around The Page Punch for the edge you see.  Bazzill Bling Petty Cash cardstock was used for the mat behind the image.  The image was mounted on it with pop dots and then it was attached to the white punched edge mat.

I wanted a pink design for behind the image so I got out my Impression Obsession Mega Mount and used the Cover-A-Card Circle (5.75X5.75) stamp, added some Ancient Page Pink Pizazz and off I went.  Not only did I have enough paper for the background you see, but I also had enough for the inside of the card and the bottom left-hand edge of the envelope too.  Then I used my Martha Stewart 3-in-1 Butterflies punch to get a butterfly for the main image, attaching (3) 2MM pearls to the middle.  Check the details out in my pictures above and below.


For embellishments to the card I used some 3MM pearls for the edges of the punched edge.  I added a May Arts bow using the Bow-Easy, and the last Nunn Design pin I had like this.  I embellished it with some Stickles Yellow and another 2MM pearl.  The pins are discontinued! :-(

For inside the card and the envelope bottom left hand corner I used a flower from the main image.  I added ink with my sponge dauber for the image and then painted, punched and cut out and there you go.

Supplies:
Image: Hero Arts - Friend - CG111 and Impression Obsession Cover-A-Card Circles - CC012
Paper: Neenah Classic Crest Solar White Super Smooth cardstock, Bazzill Petty Cash
Inks: Brilliance Galaxy Gold, Ancient Page Pink Pizazz, Twinkling H2O's
Accessories: Martha Stewart Scroll Lace Around The Page Punches, Stickles Yellow and Orange Peel Glitter Glue, Glossy Accents, Mark Richards 3mm pearls and 2MM from Hong Kong , Liquid Pearls White Opal, May Arts Ribbon, Bow-Easy, Nunn Designs Stickpin.

A really fun and detailed card. If you have any questions, please don't hesitate to ask. Thanks for stopping by to look and share.


 Shirley


Thursday, July 1, 2010

It's The IO Lazy Days Of Summer Challenge Today

And since I am back at the blog, I decided to submit my card too, along with the IO DT.  My card is pretty straight forward.  It was inspired by many of the cards, using Alesa Baker stamps, I have seen Julie Koerber do on her blog, Out To Impress, and she does!!

The image was stamped with Brilliance Galaxy Gold on 2 pieces of Neenah Classic Crest Solar White CS and then heat set with a heat gun. They were painted with Twinkling H2O's Dreamsicle, Olive Vine, Sweet Thistle, and Warm Pecan (wash to shade background). I trimmed around the best image and mounted over the other one with pop dots. That whole image with background was mounted on a scrap piece of Bazzill Clover Leaf Dotted Swiss. I trimmed around that with scissors, leaving about a quarter inch, letting the edge of the mounted image decide were to cut.

The greeting plaque was stamped by using a dauber for that piece of the stamp. Then it was trimmed around and mounted using ATG 1/4" tape. The faux brads are bead caps I flattened with a bead crimp tool. They were mounted using pieces of ATG tape and Mark Richards 2MM pearl stickers were mounted on top using Glossy Accents.

The white matte is Neenah Classic Crest Solar White text weight paper created using Martha Stewart's Eyelet Lace Around The Page punches. The image was mounted on top as shown.

To create the background mattes I ran a piece of SU Apricot Appeal through my Cuttlebug using the dots embossing folder from Just My Type around the edges. I mounted another piece of Bazzill Clover Leaf Dotted Swiss that had the corners punched using the Eyelet Corner Punch.

I really like the SU small slot punch, but it doesn't reach far enough, so I punched out a 'slot' with it and then drew the slots on my CS where I wanted to put my ribbon through. Then I used my X-Acto knife to cut them out. Didn't take that long at all.

I mounted May Arts ribbon and used the Bow-Easy to create the bow. I glued Mark Richards 2MM and 5MM to the eyelets and corners of the Dotted Swiss cardstock as shown, using Glossy Accents. What you see next to the card is the corner of the handmade envelope stamped with the bud image. Below you can see what I did with the envelope's flap edge and also the image stamped and painted inside the card.


SUPPLIES:
Stamp: Stampassions: Summer Thyme Bouquet by Shara Reiner.
Paper: Neenah Classic Crest Solar White Super Smooth 80lb. cardstock and text weight for the punched edges, Bazzil Bling, Stampin' Up and Anna Griffin.
Inks: Brilliance Galaxy Gold, Twinkling H2O's Cherry Sorbet, Heavenly White, Orange Peel, Dreamsicle, Cool Waters
Accessories: Glossy Accents; Deco Art Glamour Dust; 1/8" pop dots, Heart button, Mark Richards 2mm pearl stickers, Martha Stewart Double Loops Punch Set and EK Success Paper Shaper Butterfly punch.


You should also take at look at the wonderful cards that the IO DT did and the other cards the customers are entering for a chance at the $25 Gift Certificate.  See the IO DT cards at their blogs below:

First take a look at the Design Team's creations:
And now take a look at the beautiful cards the customers are entering for a chance to win a $25 Gift Certificate by going HERE.  For those of you who are new to IO Blog Challenges, follow the guidelines below and you too can get a chance to win the $25 Gift Certificate for free stamps of your choice in IO's online store:
  • Challenges are held the First and Third Thursdays of each month, unless otherwise noted.
  • Please use at least one Impression Obsession stamp.
  • Please provide the name(s) and/or stamp number(s) of IO stamps only with your email to me.  If you have a problem finding this information, sometimes I can help.
  • Let me know if you want me to post on the IO blog, using only your blog with hyper-link, or both, etc. 
  • Entries will be accepted until that Saturday 9 p.m. Eastern Standard Time.
  • Email your entry to me using the Email Shirley link provided near the top of the second sidebar to the right on the IO blog.
  • All participants' cards will be posted the way you choose the day they are entered.
  •  Cards with only all IO Stamps will permanently be added to the IO Customer Album in the very next sidebar over.
  • ALL participants in the current challenge will be entered in the drawing for the Impression Obsession $25 Gift Certificate. We use Random.org to select the winner.
  • It is for use at our ONLINE STORE.
Giftcert25  
Don't forget a list of our challenges is on the sidebar to the right.  If you have questions, please don't hesitate to ask.  So get busy out there!!  Stamp up a Lazy Crazy Day of Summer card and send  it to me.  Hope your week is starting out great!!  Thanks for stopping by to say hi!


 Shirley


Saturday, June 26, 2010

It's Me Again!

Well, I started to design a card and when I got to the Designer Paper I couldn't decide between two, so I did some of each. 

My image is from Stampassions. The designer is Shara Reiner. Isn't it whimsically wonderful. It was stamped with Brilliance Galaxy Gold and I colored it with Twinkling H2O's.  I high lighted the flowers with Glossy Accents and Deco Art Glamour Dust.
(As of the end of June, or by CHA anyway, they are going to be sold now by Creative Imaginations. There are less colors, but they are more vibrant and they are all in different packaging too.) They will be selling some in 5 gram pots with 6 to a set.  There area also some that are different colors in 10 gram pots and sold separately. They will also have the daubers and the sprays too, again in different containers and the sprays do not clog.)  They sent me some samples (LUCKY ME) and I am going to do some projects with them soon.
The image was framed with Bazzill Bling cardstock.  The edge was done with Martha Stewart corner and border punches.  The ribbon is from Michaels and the button is too.   Mark Richards 2mm pearls were used in the holes of the button.  The butterfly is also an MS punch.  I used Glossy Accents on the dots and applied Deco Art Glamour Dust.  What you see next to the card is the envelope.  It was done using a dauber to ink the image and then painted as shown.  Below is what I did with the inside and envelope:
Below is how I did the other card using different DP.  Same color, but different shades of pink and design on the paper too! 
SUPPLIES:
Stamp: Stampassions: Summer Thyme Bouquet by Shara Reiner.
Paper: Neenah Classic Crest Solar White Super Smooth 80lb. cardstock and text weight for the punched edges, Bazzil Bling, Stampin' Up and Anna Griffin.
Inks: Brilliance Galaxy Gold, Twinkling H2O's Cherry Sorbet, Heavenly White, Orange Peel, Dreamsicle, Cool Waters
Accessories: Glossy Accents; Deco Art Glamour Dust; 1/8" pop dots, Heart button, Mark Richards 2mm pearl stickers, Martha Stewart Double Loops Punch Set and EK Success Paper Shaper Butterfly punch.

Well I think that just about covers everything.  I hope your weekend is turning out great and I'll see you back here soon.  Thanks for all of your emails to say hi and for stopping by to look and share.
 Shirley

Monday, June 1, 2009

Sweet Peas of Summer


I really fell in love with this stamp and so here it is again. A little different. I am trying to get used to designer papers.


IMAGE:

The main image, from Flourishes Sweet Peas was stamped on white cardstock with Brilliance Gallaxy Gold ink. It was heat embossed to set it so it could be painted with Twinkling H2O's. Spellbinders largest Labels One was used as a template for the outer edge. It was cut with an X-Acto knife.

IMAGE FRAME:

A Magic Matter was used to create the frame around the image. It was then cut with an X-Acto knife. The image was mounted on this.

BACKGROUND:

The corners of the background were punched. The image and frame were centered within the punched corners as they were mounted.

EMBELLISHMENTS:

The pearls were added to the center portion of the punched area. The double ribbon bow was done with the Bow-Easy.

SUPPLIES:
Inks: Brilliance Galaxy Gold, Twinkling H2O's Jasper Red, Buttercup, Lemon Yellow, Moss Green, Sweet Alfalfa .(They are staying in business and the 40% off sale is good until June 14th. Read about it on the link I gave you.) Thanks to all of you who helped.
Accessories: Spellbinders Nestabilities Labels One, Hobby Lobby Ribbon, Bow Easy, Stickles Diamonds Glitter Glue, Martha Stewart Pearl Stickers from WalMart.

If I were to do this card again I think I would use a Red border around the edge. I find thought, that I am loving DP. I didn't think I would like it at all. I just need to get used to layering it and how. Well, thanks for stopping by 'the blog' to look and share!!


 Shirley


Friday, April 17, 2009

It's All About the 'BOW'

I have had several questions over time about my bows and bows in general. I am going to post some sites that have great information on how to tie different bows. I could do a tutorial or a video, but I am sure I couldn't do it any better than these ladies:
  • Martha's Bows - Actually Martha Stewart
  • Tying A Simple Knot or Bow - This is Becca Feeken at Amazing Paper Grace. I am not sure, but I think she has a little something else going on with the bow over the knot, but I can't be sure. I think she might be just fooling with it until she likes it. I do know I think I may like her way even better than Martha's. One thing I like about her bows is you can pull on the back part of each loop when tying a wrap around ribbon and it doesn't end of loose behind your bow, if you know what I mean. You do need to check out her blog. She is very creative with paper and ribbons, etc.
  • You Tube - Type in 'Tying A Bow' and you will get 135 choices. One of them may make more sense than others and be your light of inspiration. You can try narrowing it by typing 'Tying a Knot', Tying a Flat Knot, Tying a Gift Bow, etc.
  • Google - You will get even more choices and you can narrow it down from there.

I use Google for almost everything I want to know, but I am also finding You Tube is sometimes even better. An example would be finding out how to clean out the inside of your computer tower safely, without frying the whole thing with static electricity. Type in 'Border Punch Corners' and see what you get, if you haven't tried it already.

Hope I helped some of you on bows. Another thing I do on the side is keep a folder on any cards I see that have unique ways of using ribbon, etc. I try to save them with the creator's name or blog so I can give credit when I use it.

Thanks for stopping by 'the blog' to look and share. Back soon.


 Shirley


Friday, March 27, 2009

Well It's Different!

Here is where I got my inspiration for the above card. Michelle Giraud at Twisted Chick Creations was a Guest Designer for Impression-Obsession when I first started posting on their blog. She is such a great Designer and I check out her blog often. I saw her card and immediately loved the way she threaded the gold cord up the side! I also like that she had used a border punch I had! Hee hee. I actually loved the whole card. She is one creative designer. My problem was I wanted to use the ribbon you see because it matched the leaves in my image. So......I needed bigger scallops and bigger holes. I'll come back to this issue, but first my image.

Image:
1. The image is Victorian Blossom One by Impression-Obsession. Stamp with VersaMark and emboss with Enchanted Gold to give it a delicate sparkly look on Neenah Classic Crest Natural Super Smooth 80lb. Cover cardstock.
2. Paint using Niji waterbrush with Twinkling H2O's Cherry Sorbet and Wintermint, and highlight with Stickles Yellow. (Luminarte 40% off sale is still in progress.)
3. Run image through Cuttlebug using Spellbinder Large Square Die with embossing pad. The stack is:
- Plate A,
- 3 pieces 4.25X5.5 of cardstock,
- Plate B, *Die facing up,
- *Image (Removable Scotch tape used to secure the die to the image so it wouldn't move.)
- Spellbinder embossing mat,
- Plate B. (It actually gives 3 distinct embossed ridges to the frame when you do it this way.)
4. Trim around image.
5. Mount on DP 3.75"x4.0" with no DP showing on the right side. Anna Griffin-Pink Paisley
6. Mount that on 4.25"x5.5" of Bazzill Birthstone October cardstock.


Now for the fun part and what I did so I could use the ribbon:

Ribbon Braid:
1. (2) 1"x4" strips of DP. Draw a penciled line .75" high across the length of DP, from end to end. You can look at how it would be without the drawn line HERE. Then you could trim it down on the bottom to the .75" after you use the Slot punch as shown on the other blog. I have to say that might be easier.
2. Line up scalloped edges with the image side already mounted. (See Above)
3. Eyeball and draw little dots where you want the holes to be in the center of each scallop.
4. Use EK Success 1/4" Paper Shaper Large Circle in the middle of each scallop.
5. Thread 16" of Michaels ribbon through as shown.
6. The Ribbon Slide is from Fancyfuls, Inc. online store.

Embellishments:
1. The butterfly is from the Martha Stewart Butterflies punch. Your local Wal-Mart has it.
2. The 2mm Pearls are Mark Richards Small Script Alphabet and the 3mm are Mark Richards Crystal Stickers Elements Pearls.

On here the card looks a bit over-the-top to me. In person it looks very light and feminine. What is it about the eye of the beholder they say? Ha! And we are done! Thanks for stopping by 'the blog' to look and share.


 Shirley


Friday, February 27, 2009

Roses On Marble And A Speical Friend

Image:
1. A piece of vellum 4"X5" was used for the canvas.
2. The back was painted with a Niji waterbrush filled with Ranger Adirondack® Alcohol Blending Solution and Adirondack Ginger Alcohol Ink. (Label your waterbrush with a Black Sharpie and store it with the brush side up.)
3. When it dried I pounced up and down on it with a cotton ball slightly wet with the same Alcohol Blending solution added from the bottle.

4. Penny Black Love Blush stamp was inked with Encore Gold ink, stamped on the opposite side of the 'marbleized' vellum, and then heat embossed with Ranger Princess Gold Embossing Powder.

Let me just say this about that. I found it very difficult to heat emboss on vellum and have it not flake. I ended up using a **Marvy Uchida Liquid Gold Extra Fine pen for the places that flaked off and even went over a lot of the other that didn't.
5. It was painted with a Niji waterbrush and Twinkling H2O's Sweet Alfalfa and Rose Petal.
6. It was trimmed down as shown.

Backgrounds:
1. A Martha Stewart Embossed Petals border punch was used for the edge on Neenah Classic Crest Solar White Super Smooth 80lb. Cover cardstock around the roses. It's hard to see the embossed flowers in the photo of the card, but here is what it looks like up close but with pearls, etc.:
2. The image was mounted in the center.
3. That was mounted on Anna Griffin Pink Paisley DP.
4. The corners were punched with an SU Ticket Corner Punch.
5. An SU Horizaonal Slot punch was used on each side of the image.
6. Hunter Green Satin Woven Ribbon was threaded through the slots.
7. That was mounted on Bazzill Bling Blank Check cardstock.
8. The ribbon was attached to the back of the Bling cardstock.
9. It was mounted on 5.5"X8.5" folded Neenah Classic Crest Solar White Super Smooth 80lb. Cover cardstock.

Tag:
1. The tag is from Spellbinders Tag Trio.
2. The words are from Impression Obsessions Clear Stamp Sets - Sentiments II stamped with Encore Gold ink and heat embossed with Ranger Princess Gold Embossing Powder.

Embellishments:
1. A Martha Stewart bow was tied and mounted with a glue dot.
2. Mark Richards 2mm pearls from the Script Alphabet were used in the hole of the punched embossed flowers. 4mm pearls were used on the coners, 5mm pearls were used on the tag.
3. Martha Stewart's new 3-in-1 Butterfly Punch (the largest butterfly) was used on Anna Griffin Pink Paisley paper. Three 2mm pearls were used down the middle and it was mounted as shown.
4. The stick pin was done using a JoAnn Sew Essential Pearlized Leaf Straight Pin, (it is only found in their stores and not online), and Czech Pink Glass Heart and Pearlized beads. They were secured with a Brass (Gold) Clutch Pin.

I always finish off my cards with something done inside on the left-hand side and on the lower-left bottom side of the envelope.


***********************************************
BLOG AWARD

Last, but certainly not least, I have an award I want to give to a very special and talented fellow blogger. His name is Sergei and he is the son of Elena at The Red Haired Girl. Sergei has been a follower of my blog and I have really enjoyed visiting his blog too. He loves football and has great artistic skills that he uses on cards, logos and a number of other hobbies as well.

I want to thank you, Sergei, for:
1. Creating such an interesting blog
2. Doing me the honor of following me, and
3. Inspiring me with your wonderful words of praise,
4. Your art and hobbies, and
5. Your patriotism you show in supporting our country.

Below is your award, Sergei, with big hugs and smiles attached:

You should post it on your blog and share it as you want to share.

Thanks for stopping by 'the blog' to look and share.


 Shirley


Related Posts Plugin for WordPress, Blogger...