Showing posts with label Mega-Mount. Show all posts

Sunday, June 15, 2014

Something Old And Something New Two


I'm back with the kind of new thing again!  I created the background using a technique from my Online Watercolor Class.  I had the images from an earlier card and just changed them around a little.  Here is how this card was created:

CARDFRONT:
  1. Stamped Rose Pitcher on white cardstock with Brilliance Galaxy Gold, painted with Twinkling H2O's.  The roses and the bud with stem were both stamped 3 more times and painted with twinks.  All were fussy cut, embossed from the back and mounted on the cardfront with 3D pop-dots and w/o on other areas.  The lace tablecloth open areas were cut out with an X-Acto Knife and a healing mat.
  2. The background area was created with CAC Craquelure and Twinkling H2O's using a technique I learned in the Online Watercolor Class series.

 Building Card:
  1. Front -  White Laid cardstock was used for the base.
  2. The Craquelure BG was mounted on that.
  3. The image was mounted on die cuts from Spellbinders Lacey Squares using white and natural cardstock.  It was then mounted on the Craquelure.
  4. Inside - Die Cut edges were mounted with strips of the Craquelure BG.
  5. A small die cut was used for the Rose and a rose with stem was mounted to the right.
  6. Envy - Two of the Lacey Square edges were mounted back to back and a rose with stem added. The lacey edges were peeled to thin before mounting and so was the rose with stem.  I start the separation by flipping the edge back and forth with my X-acto knife, see it starting a little and open it up enough to gently a little at a time holding one side flat or with the free hand.
  7. The bow is May Arts and the heart pen is Maya Roads with a Czech bead added by applying Glossy Accents to the stem.
Off to clean some rain gutters.  LOLOL  No rest for the wicked....or is it the stamping.  ;-)  Thanks for stopping by to  look and share.

 Shirley
SUPPLIES:

Tuesday, February 25, 2014

Picked Wildflowers

PICKED WILDFLOWERS
One of my loves, besides Impression Obsession products, is Flourishes.  You may have heard that Jan Marie was closing her shop.  Actually she is selling it.  Read more about it HERE.  I am so glad because I love her images.  The set  used for today is Picked Wildflowers.  The cardfront should look familiar to you.  I used it on my last card too.  I decided that this year I am going to try and not save things I don't use.  :-) So........the images are different, the BG is the same.

IMAGES:
  1. The flowers were stamped twice with Memento Rich Cocoa,  painted with twinks and highlighted with Stickles glitter glue.
  2. Trimmed with Kai scissors, embossed with stylus from the back, mounted with 1/16" 3D pop dots on the white embossed BG explained in #2 below.
CARDFRONT:
  1. The BG is CAC Dotted Floral stamped with Memento Bamboo Leaves.  It was mounted on Laid Natural CS, inside the Spellbinders Majestic Labels Twenty-Five largest die cut.
  2. The third largest die was used for the BG behind the bouquet.  It was then embossed with Cuttlebug's D'Vine Swirl.
  3. 4mm hearts were added to the corners with Stickles Lavender glitter glue.
INSIDE

INSIDE CARD & ENVY:
  1. The corners were done with one of the Sizzix Architectural Accents dies.  If I were to use them again with any patterned paper I would flip the paper over for four of them so the corners were match.  :-(  Oh well!
  2. I used the left overs from the last card for the center. Mounted the bouquet without the little white flowers (saved for envy).
  3. Mounted the die cut on the right.  Filled with glitter glues.  Stamped the sentiment from All Occasion II with Memento Grape Jelly.  Used glitter glue on the J and to mount the heart.
  4. Added another corner die cut to the envy and mounted the little white flowers.
A fun card!  My Chocolate Baroque stamps arrived from UK and can't wait to use them!!  You are all teaching me so many new things while I am hopping!!  TFS!!!  Thanks for stopping by to look and share.

 Shirley

SUPPLIES:

Sunday, February 16, 2014

Love Angel In The Clouds!

This may look like it's a Valentine Day card, but you would be mistaken!!  It's for a dear friend!  It's that darn ribbon again.  I have some thin like this too that does the same thing.  It really does match the dark color in the rose and heart!  Below is what I did:

STAMPED IMAGES:
  1. Stamped Love Angel twice, and the rose on the angel twice on white cardstock with Memento Rich Cocoa (once for inside and once for envy).  Painted them with twinks.
  2. Embossed the angel from the back on the first one.  Cut the hair, bodice, rose sash, and shoes on second, embossed and layered on first.
  3. Embellished with 2mm pearls to bodice, pearl glitter to wings and sash with glue pen, and added Diamonds glitter to dress trim and shoe crossed bands.  Highlighted hair, heart, shoes, dress, and rose with Spica AtYou pens.
Card Front Base:
  1. Cut one piece of natural laid cardstock 4.25"X6.25".  Created and mounted white cardstock die cut from Majestic Labels Twenty-Five on natural piece.
  2. Stamped CAC Dotted Floral on natural laid cardstock with Memento Bamboo Leaves.  Used largest die again, but as a stencil for the center on the Dotted Floral as shown on the card, and mounted.  Stamp is 5.75X5.75, so I placed die diagonally to get BG. 
  3. Used Cloud Dies on white card stock.  Trimmed them with glue pen and pearl glitter.  Used 3-4mm white AB sequins from my eons old stash!!  Added hearts to corners.
INSIDE CARD
Die on left shows portion placed on stamped area.  Right shows how it was place on stamped image.
INSIDE CARD AREA & ENVY:
  1. Stamped 2 more Dotted Floral images on natural laid cardstock.  Placed die on stamped images as shown in photo above 4 times.
  2. Where it says leftover shows the piece left by each die cut.  I taped two pieces from the first image together and they were a perfect match.  Mounted to the left side.
  3. Did die cut of the smallest die on white cardstock, mounted on center cut, mounted rose.
  4. Stamped sentiment with Memento Bamboo Leaves.  Used 2 leftover punch outs from die cuts on left.  Placed as heart and added sequin.
  5. Used a corner leftover from the card front center for the edge of envy.  Mounted rose that was stamped and painted on leftover envelope paper.
See you back here next time!  It is so great getting to see what all of you are doing too!  Thanks for stopping by to look and share!!

 Shirley

SUPPLIES:

Wednesday, January 29, 2014

Easy Fold With Impression Obsession Yummy Cake!

Tara Caldwell Cake - H16000
I have a friend who likes purple, green, and chocolate, and her birthday is coming up!  This card is a really simple easy card fold and great when you don't have a lot to say!!

IMAGES:
  1. Stamped Cake 3 times on white cardstock with Rich Cocoa.  Stamped envelope image by inking just that area of stamp. 
  2. Painted images with Twinkling H2O's.
  3. Trimmed around flowers, embossed all from back side with stylus, and mounted  with 3D pop-dots as shown.  I use the 1/16" thick ones most of the time.  On the cake for the inside I removed the bottom layer and added the cake dish.  Added the butterflies to the lower right-hand side.
  4. Added embellishments using Viva White Pearl, Spica At You glitter pens, Stickles yellow and orange glitter glues, added Glossy Accents to the cake dish.

Card Front:
  1. Did die cut with Polka Dots largest die.
  2. Stamped CAC Dotted Argyle with Rich Cocoa  on white cardstock twice.
  3. Used inside of Polka Dot die as a template, traced, cut out, and placed on die cut.
  4. Threaded outside of die cut with lavender ribbon and made a bow.
Inside Base: 
  1. Cut a piece of cardstock 4"x5.5".  Fold at 2.75".  
  2. Mount to back of card front.
  3. Mount a 4"x2.75" piece of Dotted Argyle to the left side of inside card base.
  4. Made a bow.
I have a question for any of you who use a feed reader to follow their blogs.  I am not happy with Googles current way of doing it.  I would like something that lets me know in my sidebar, without email, when someone posts on their blog.   Also, when I have read a post I would like to be able to delete or it deletes itself.  I probably want too much, huh?  That's what the old Google reader did.  :-(  TIA if you know of one!!!  If you really like yours, tell me anyway.  Who knows...it might be just what I need!

Thanks for stopping by to look and share. 

 Shirley
 SUPPLIES:

Tuesday, November 19, 2013

Twisted Peppermint Moon

I was inspired to use this stamp by Ellen Taylor, who used it in her post HERE.  The colors on my cardfront match the bottom of the card in real life, but somehow when I took the picture it looks like different colors were used on the bottom.  Go figure!

I really like twisted easels and so do my friends.  I used to think they limited my ability to write extra if I wanted, so I started using the back side of the card for my note.  Some said they liked that so they could stand it up for others to see without sharing the personal writing.

CARD FRONT AND IMAGES:
  1. Stamped Peppermint Moon with Espresso Truffle on white cardstock twice, painted with Twinkling H2O's, cut out, embossed with stylus from the back, and mounted on Lacey Circles largest die cut from white cardstock.  Cut out extra sash and tree, painted with H2O's, embossed from the back with stylus, and mounted with 3D pop-dots on main image.
  2. Stamped two more trees from the main image, painted and trimmed (one for the easel bottom and one for the envelope).
  3. Created card front and bottom bases using the outised of  the Curved Matting Basics largest die as a stencil on white cardstock. Used as a die to get 2 red die cuts.  Stamped CAC Thick Stripes on white 8.5"X11" cardstock with SU Real Red twice along the length. 
  4. The bottom was built just like the top, only Lacey Ovals was used for the sentiment.  The sentiment from Round Ornaments was stamped with Real Red too.  The extra tree was mounted on the smallest Lacey Circles die cut.
  5. 2mm round and 5mm heart pearls, Glossy Accents for the stars, Glitter, a bow, and heart pen were added to embellish.
  6. *I've had the glue bottles you see in Supplies for nearly 6 years.  I use them for Glossy Accents and other adhesives.  They're great for small places.  **At first I thought the QuikStik would be awkward, but after using it I love it!! Thanks to you, Kitty Caracciolo. It doesn't grip it as hard as the AIG Sticky Sticks and means the Glossy Accents doesn't have to have started drying for the item to release.  Also, that green stuff you see on the tip lasts forever.

TWISTED EASEL BASE:
  1. I did the easel base the same as my tutorial HERE.  As an extra step on this card I trimmed around the rounded corners on the front so they lined up after mounting the cardfront.
Thanks for stopping by to look and share everyone!!


 Shirley

SUPPLIES:

Tuesday, September 24, 2013

Winter Mitten


When I saw Snowman Mitten, I immediately thought that stamp needs the 'Kiss' technique with CAC Knit!  That thought led to below:
Cardfront Background:
  1. Stamped CAC Ornate Snowflakes on white cardstock with Memento Summer Sky, trimmed to 4"X5.25" and mounted to white cardstock.
 Kissing Technique:
  1. Inked CAC Knit with Summer Sky ink, placed Snow Mitten on inked CAC and then stamped on white cardstock twice.  Trimmed around first mitten.  Cut out snowman and buttons on second mitten.
  2. Mounted mitten on white cardstock with 3D pop-dots, traced around with Magic Matter 1/8" and cut out.  Mounted buttons with 3D pop-dots.
 Sentiment Snowflake:
  1. What a pleasant surprise when I die cut Lg. Snowflake.  I honestly had no idea this die was actually 4 separate snowflakes if you want.   I saw it embossed by Jenny Gropp HERE, so I thought I would be getting a really detailed one snowflake and instead I got 4 detailed and lovely snowflakes.  You see 2 above and I used the other two for the sentiment on the card as shown.
  2. I stamped the sentiment Happy Holidays on a leftover circle from Circle Shaker Frame Die Set.
Assembly:
  1. Mounted the snowflake on the right first with Glossy Accents, mounted sentiment in the center, then mounted the center small snowflake.  Added glitter with a Sakura glue pen to snowflakes and parts of mitten.
  2. Mounted the circle with sentiment.
  3. Mounted mitten.
  4. Added a bow and heart embellishments.
A really fun card and can't wait to use the leftover snowflakes.  I see a frame with the large one!!!

 Shirley

SUPPLIES:

Tuesday, September 10, 2013

Cut-Out Sparkle


A quick card with a bit of whimsy using the Cutout Christmas Tree Die.  I tried a new way of taking the photo to see if I could pick up more sparkle and I think it worked.  I laid the cardfront down flat and took the photo from above, just as I do supplies, etc.  The pearls don't show as white as they truly are though.

CARDFRONT BASE:
  1. Cut cardfront dark green background of 5.25"X5.25", and white dotted swiss at 5"X5" and mounted.
  2. Stamped CAC Mesh Circles with VersaMark on white cardstock, applied stamp and bond powder, heated to a gloss, applied glitter, and heat embossed to seal; trimmed to 5"X5".
  3. Added ribbon to green CS
  4. Die cut Mesh Circles BG with Spellbinders Scalloped Labels One die and mounted frame to cardfront with 3D pop dots..  Saved die cut for inside.


CHRISTMAS TREE CUT-OUT:
  1. Cut clear acetate 3"X4".
  2. Die cut Christmas Tree Cutout and mounted on acetate, trimmed around with scissors.
  3. Added yellow and clear sparkle glitter glue to light and ornament areas.  Next time I would like to try Glossy Accents and glitter for better dimension.
  4. Added Viva Ice White Pearl to the trim area.
  5. Added the flourish to the base and mounted in open area with 3D pop darts.
  6. Added ribbon as shown.
INSIDE LEFT:
  1. Mounted dark green cardstock on die cut left from the cardfront area.
  2. Stamped Peace Hope Joy and Love with Olive Grove on white cardstock die cut and
  3. Mounted inside left at a slant.  Attached a piece of the dark green cardstock.
  4. Added Glossy Accents, white pearl heart, and glitter to bottom of sentiment.
Hope you enjoyed my project.  Thanks for stopping by to look and share.

 Shirley

SUPPLIES:
Tuesday, August 20, 2013

A Quick Card


I just finished this card for my grandson's birthday.  It's later in December.  Here in NC our first snow can happen then, if we are lucky, and Winter Scene reminded me of that.  It was so easy as you can see below!!

 STEPS:
  1. Stamped Winter Scene on Ice Gold Cardstock with Memento Rich Cocoa.
  2. Painted with watercolors and Niji waterbrush.
  3. Added some glitz for snow with glue pen and glitter.
  4. Trimmed to 5.25"X5.25" and mounted to the blue cardstock.
  5. Die cut cardstock for the Anytime Sentiments clear set words.
  6. Stamped the words curving them to fit the die cut with Memento Rich Cocoa.
  7. Mounted on blue cardstock and used Magic Matter to trace around it.
  8. Used two die cut snowflakes from Sm. Snowflake set for ends.  Glued and then added glitter with glue pen.
A quick fun card.  I thought maybe I might not like the brown ink because of the creek, but I really like the look for all of it.  A fading Fall into Winter Scene!!

Thanks for stopping by to look and share.  See you then!

 Shirley

SUPPLIES:

Tuesday, August 13, 2013

Mistletoe Is On Its Way

P1040550


This card was really fast to do: IMAGES:
  1. Stamped Christmas Mousette, Mr. Mouse, Tiny Mistletoe, and Not A Creature Stirring on white cardstock with Memento Rich Cocoa on white cardstock using Mini Mount.
  2. Painted the mice and mistletoe with Twinks, but inkpads or markers can be used too.  Gave Mousette little pearl earrings too!!  Added Flower Soft with Glossy Accents to the mice, added Viva White Pearl and a little glitter to the berries.  Used a small piece of red glitter twine for a bow for the mistletoe.
  3. Used the cling Not A Creature Stirring as a template for tracing around the sentiment after I stamped it, then used the Magic Matter for 1/8" to get the tan matt for around it.  Mounted it to the inside and included left-over background from the Mesh Circles.

P1040553
BACKGROUND:
  1. Stamped CAC Mesh Circles with Memento Desert Sand ink on white cardstock.  Added VersaMark with a dauber to selected circles, added Stamp and Bond Powder, heated to clear, added glitter, heated to set (That's why my pictures are darker.  I wanted the glitter to show).  Alternatives could be glue pen or glitter glue.
  2. Mounted to tan cardstock and added white pearl hearts in corners.
DIES:
  1. Die cut the arch from Arch and Trellis from brown cardstock.  Cut the trellis from light tan cardstock and trimmed to fit doorway to use as a small area rug under mice.  Should have used some ink to make it more distinct I think.
  2. Used the window box die cut twice from brown cardstock for the base board (mop board) on each side of the arch.
ASSEMBLY:
  1. Arch and Rug were mounted with 3D pop dots to background, followed by the mistletoe.
  2. Mice were mounted with 3D pop dots.
  3. Trim mounted to inside and sentiment too.
Hope your week is starting out great and thanks for stopping by to look and share!

 Shirley

SUPPLIES:

Tuesday, July 9, 2013

Triple Thanks

This card happened by accident.  I had something else planned, but I have a neighbor boy who comes over and helps me with my flowers and weeds.  He sees me out there and just starts doing what I do.  He saw my cards the other day and asked if I would make him one.  This is to thank him for his help.  His favorite colors are purple and yellow.  Here is how I put it together:

IMAGES:
  1. Stamped Sketchy Flowers with Memento Pistachio ink on Neenah Solar White cardstock.  Used Spellbinders Majestic Elements as die for the Bazzill base and the Sketchy Flowers background.
  2. Created die cuts from Basket and Grass dies using Bazzill Dotted Swiss colors.  The basket has a slit ready to take the Grass, (stems for the flowers).
  3. Created 3 sets of Spiral Daisy, Layered Floral flowers and leaves.
  4. Did 2 die cut sets of the Heart Stems.
  5. Die cut a Sign Post for the sentiment and stamped it with "Heartfelt Thanks" from Thank You clear set.
ASSEMBLY:
  1. Mounted the Sketchy Flowers background to the Bazzill carstock.
  2. Inserted the stems (Grass) into the basket and mounted with 3D pop-dots.
  3. Rolled the Spiral Daisies.  Kittie has a great tutorial on how to roll all of the IO spiral flowers.  See it HERE.  The only difference is I use Glossy Accents as glue.  I place it on the inside part as I roll and then on the bottom before I put a glue dot between the bottom and the round dot on the bottom.
  4. Mounted the Layered Floral flowers and leaves with glue dots and 3D pop-dots.
  5. Mounted white hearts on green heart stems and inserted in basket.
  6. Used Stickles glitter glues for the centers of the flowers and Viva Decor Yellow Glitter for the hearts
  7. Mounted sentiment and bow.  The grass on the basket is leftovers from Grass Border.
Hope your weekend was great and your week better.   Thanks for stopping by to look and share!!

 Shirley
SUPPLIES:

Tuesday, June 25, 2013

Frilly Forget-Me-Not

This was done for a special friend that likes pink and hearts!

STEPS:
  1. Stamped CAC Dotty Circles on Neenah Natural cardstock with Memento Angel Pink.  Used Spellbinders Resplendent Rectangles as a stencil to get the background shown above.
  2. Stamped Frilly Forget-Me-Nots (can also be purchased as part clear set Spring Medley) with Brilliance Galaxy Gold, embossed to dry, painted with Twinkling H2O's, glued and applied Baby Pink Flower Soft, applied Stickles glitter glue to the centers.  Trimmed around, applied 3D pop dots and set aside.  (It was so much easier cutting around the flowers with the flower soft for body)
  3. The die cut is from Circle Shaker Die Set.  Went around it with Angel Pink brush marker and mounted on a piece of the background.  Stamped the sentiment from Hydrangea clear set with Memento Bamboo Leaves and applied 3d pop dots to the back.
  4. Mounted ribbon to back and taped to one end.  Punched slots into sentiment die cut, threaded ribbon though slots, taped to other end, and mounted bouquet.
  5. Applied ribbon bow and stick pin.  Applied a little glitter glue to 3 of the centers of Dotty Circles.
Thanks for stopping by to look and share.


 Shirley
SUPPLIES:

Monday, September 3, 2012

I Love Angels


I am using some of the new stamps by Impression Obsession and what fun.  This little lady is Angelica.  She can also be purchased as a Clear Stamp Set.  Just a note that I pretty much emboss all of my images from the backside with a stylus on an embossing mat.  The minute I saw her I thought "Perfect for paper piecing."  Below is how I did the rest:

IMAGE:
  1. Stamped Angelica on white cardstock with Memento Cocoa Brown.
  2. Painted the first images face, hands, and feet.
  3. Used Stickles Diamonds glitter glue inside her wings.
  4. Used Flock for the halo and wing edges. (It wasn't white enough for me so I applied Fluid Chalk Popcorn ink with a paint brush on top of it.  I squeezed the bottle just enough to wet the top opening.  I laid the image aside to dry.)  You could try Flower Soft too.
  5. Stamped Angelica's head and painting hair, cutting out and mounting on head.
BACKGROUND and GOWN:
  1. Inking Cover-A-Card Ornate Snowflakes with Fluid Chalk Warm Red and stamped on white cardstock twice length-wise with Mega Mount. 
  2. Trimmed a piece to 4"X5.25" and applied the bottom half of IO Border Duo 1 to one of the bottom of the 5.25"H sides and mounted to white cardstock base.
  3. Stamped arms and skirt of Angelica on piece of Ornate Snowflakes with Memento Cocoa Brown, cut out and mounted on Angelica with 3D pop-dots.  Added embroidery string bow and pearl stickers to waist and skirt.
  4. Applied a piece of white cardstock to a Spellbinders Oval Deckle die, used a dauber to add Fluid Chalk Warm Red around the edge using die as stencil as shown.
  5. Stamped Heavenly Holiday with Memento Cocoa Brown to oval and added 6mm pearl heart.
ASSEMBLY:
  1. Mounted oval with image to background.
  2. Mounted white organdy ribbon and bow as shown.


INSIDE and ENVELOPE:
  1. Two Deckled Oval dies were used with a piece of Ornate Snowflake background and used like THIS.
  2. A piece of the die cut from Border Duo 1 was used for the lower left front.
  3. The die itself was used on the flap of the envelop as shown.
I am posting this Monday evening.  If you want to see my cute Halloween card tomorrow, 09/04, on the IO blog go HERE.  That's it for this visit. Thanks for stopping by to look and share!!!

 Shirley

SUPPLIES:

Sunday, April 15, 2012

Victorian Fun

I have been dying to get to these stamps.  I love Victorian anything.  Alesa Baker has a lot of new stamps for Spring and here are some of them.  I am afraid I got so into using the stamps I got a little carried away.

I started out:
  • stamping with my Cover-A-Card Screen Stamp onto Neenah Classic Crest Natural cardstock for my background.  Trimmed a piece 4.25"X5.5".  I think any tan or brown colored ink pad would look good.  I used Stampin' Up retired Creamy Caramel. I think Adirondack Caramel will work.
  • Used Cover-A-Card Scratch on Neenah Classic Crest Solar White cardstock.  Trimmed to 3.75"X 5.0". Stamped the Worn Rose image in the upper left corner as shown and painted it with Cherry Sorbet and Olive Green Twinkling H2O's.  Mounted on the Screen cardstock.
  • Stamped Rose Ledger on more Neenah Classic Crest Natural cardstock and painted the bottom with the same Twinks. I trimmed around the edges and top scallops. Mounted on Scratch cardstock.
  • Stamped the inside pages (Worn Rose Vintage Book) for my book and painted with Twinks.  Trimmed and turned over to emboss the floral areas.  
  • Stamped the sentiment, So Glad We're Friends, on the right side. Folded.
  • Stamped the cover for my book, Vintage Worn Rose Cover,  trimmed, painted floral image, turned over and embossed the floral image, and mounted on folded vintage book pages.
  • Punched butterflies with MS 3-in-1 Butterfly punch.  Mounted with Glossy Accents.  Pearls on the butterflies are 2mm from HERE.and were placed with a Sticky Stick and Glossy Accents.  The pearls on the bottom right are probably 3mm and are from Mark Richards Crystal White Pearl stickers.
  •  Ribbon and lace are leftovers from other projects.
  • The ribbon buckle is from Fancifuls.  
Below are photos of what I did for the inside of the card, the envelope, and inside the little book!


The scratch areas on the envelope were done after using a paper crimper to peel the paper apart so it would be thin if I mail the envelope.


I have one request for anyone who knows about blogger and the New Designer Template.  I am having a problem getting rid of the snow.  LOLOLOL  I deleted any widgets that had the code and it hung in there.  I looked all the way through my html layout.  No snow codes there.  Wow!!  This has been a really funny month.

Thanks for stopping by to look and say hi!!That's my card and envy! Hope you liked them. I got to stamp and make up for some of the time when I couldn't. :-)

 Shirley
SUPPLIES:

Monday, November 21, 2011

Snow Family Fun And No Patterned Paper

The IO blog is having a "No Patterned Paper" challenge this week, and although I didn't play, I couldn't resist finishing this card that would have been okay to enter.  I love Alesa Baker stamps and had started this card a while back.

For some reason I did the card front and base backgrounds first this time.  I wanted a 5" square easel card.  I used a 5"X10 piece of Domtar Cougar Super Smooth White cardstock for the card.  You can find the measurements and instructions HERE.  If you would prefer a video, you can go HERE(You could increase the top half by .25" so it would cover more to the right when open, and set further to the right when flat.  It would extend .25" over the bottom part.  It would still fit in a 5.5" square envelope.)  I may try that next time myself.

The bottom cardstock is 5"x5" Bazzill Basics Blissful from their Blissful Trio collection.  The next layer (for the card front) is Neenah Classic Crest Solar White cardstock stamped with my Mega Mount and Impression-Obsession Cover-A-Card Pine inked with SU Old Olive.  I used snow behind the family that I had left over from another project.  I had stamped Cover-A-Card Dots on Neenah CC Solar White Laid CS with VersaMark, added Deco Art Crystal Glamour Dust, and heated it to set.  The layers were torn to give a snow drift effect. Then it was layered onto the Pine as shown.

I stamped Impression Obsession Snow Family Fun using Brilliance Galaxy Gold ink on Neenah Classic Crest Solar White cardstock.  They were painted with Twinkling H2O's, cut them out, turned them over on my Pergamano embossing mat, embossed their caps, scarfs, and buttons with a stylus, and then layered them on top using 3D pop dots as shown.  I added Glossy Accents to their buttons, coal, and carrot noses. :-)  Viva Decor Ice White Pearl Pen was added to the dots on the little snow-girl.

To finish off the bottom, I used the pine boughs from Impression Obsession's Clear set Winter View, by Alesa Baker on Neenah CC Solar White.  The image can also be purchased in red rubber as Pine Garland Border.  I used a Spellbinders Fancy Tags One die for the sentiment.  The sentiment is from Impression Obsession's Clear set Swirl Tree.  The pearls are Oriental Trading Post 7mm pearls.  The star pin is from aking Memories Mistletoe Deco Pins.  (I altered it in the photo because it looked gray when it really is a pearly white.  :-)

So that's all for now.  If you want to play, you have until this Wednesday night at 10:00 p.m.  The theme is No Patterned Paper and you could wind a $25 Gift Certificate for the online store.  You can get the detials by going HERE.

Hope you are having a great week!!  Thanks for stopping by to look and say hi!!


 Shirley


Supply List:

Saturday, November 5, 2011

It's A Chair Affair!

I know, I have used Impression-Obsession's Fall Serenity image before, but I saw a card HERE, that made me want to use it again!  So this time I stamped the image twice with Stazon-Timber Brown, so I could use one as a base, and painted with Twinkling H2O's Warm Pecan, Buttercup, Dreamsicle, and Ginger Peach.  I always paint with a Niji waterbrush.  (I never spray my pots of color, and I paint directly from the pot.)  I cut both images out.   I turned the painted image over and embossed on a Perganamo embossing mat and embossed with a stylus.  I spot stamped the pumpkin on the chair and the little pumpkin on the floor with a dauber of the Timber Brown.  I painted, cut them out, and embossed them too.

Here was the fun part!  I used my Mega Mount to stamp the upper 'wallpaper' behind the chair with Impression Obsession Cover-A-Card Round Floral, inked with Memento Bamboo Leaves, on SU Saffron cardstock (I think) .   Then I stamped IO Cover-A-Card Wood Grain, inked with Memento Rich Cocoa, on Bazzill Monochromatic Walnut cardstock.

I put a piece of Neenah Classic Crest Solar White 80lb. cardstock and Spellbinders largest Lattice Rectangle die though the Cuttlebug.   I then used the same die as a stencil to get the wallpaper and floor.  I left a space in between as the 'baseboard molding'.  These were mounted to the die cut.

A piece of Bazzill Dotted Swiss Clover Leaf cardstock was mounted on white cardstock as the base.  The die, with wallpaper and floor, were mounted on to that.  I used my retired SU Small Horizontal Slot Punch to be able to place the May Arts ribbon. 

3D pop dots were used to mount the chair with pumpkins.  Next the larger pumpkin on the chair and the smaller one on on the floor, that were separately cut out, were mounted with 3D pop dots.  The ribbon was mounted.  I made the triple bow with my Bow-Easy.  I twisted each bow loop in the opposite direction to get the swirly effect.


The stick pin was created using a Maya Road Trinkit Crystal pin with Czech leaf and faux pearl beads added after adding a dab of Glossy Accents onto the shaft.  The pearls on the chair back and skirt ruffle were added using Viva Decor White Pearls.

I hunted forever to find a post for the really simple easel card fold I used to do this step and found it HERE, using white cardstock.  I layered the bottom portion with the Bazzill Dotted Swiss Clover Leaf cardstock, created wallpaper, and more white cardstock.

The sentiment is computer generated.  I didn't have a stamp I liked and didn't want to shop or wait.  I ran it through the Cuttlebug using a Spellbinders Fancy Tags One die.  Then I used my Magic Matter around the die cut.  Of course, I had to turn it over on the Pergamano embossing mat and use a stylus around these edges too.  The Self-Adhesive Pearl Jewels are some I've had a long time from Oriental Trading Post.

That's it for today and I hope you are having a great weekend!  Thanks for stopping by to look and say hi!!!

 Shirley

SUPPLIES:

Tuesday, October 11, 2011

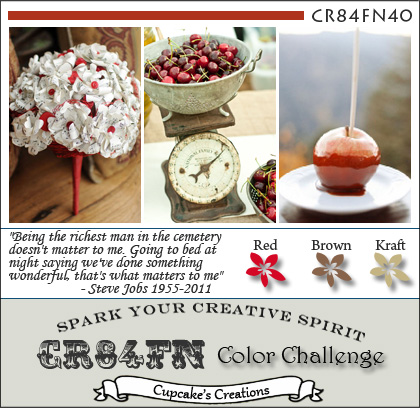
CR84FN40 Color Challenge And Christmas Is Coming


I have modified my post because a friend brought this color challenge to my attention.  When I looked into it, I was inspired when I saw the dedication.  This Color Challenge CR84FN40  is dedicated to Steve Jobs.  The challenge owner and administrator is Mona Pendleton and her husband, Scott, is a HUGE fan and chose a quote made by Steve himself to inspire all of us. R.I.P. Steve and Thank You for the difference you have made in all of our lives!

If any of you heard the speech that Steve Jobs gave as the commencement speaker in 2005 to Stanford University, you know just how special he was and what he did with life's challenges.  I wish I could have heard it 40 years ago.  He would have been 16 years old then.  :-)  You will find it HERE.

I have never ever done a challenge before, so this is a new experience.  I hope I do it right!!! LOLOL


And it's about time I got started with my cards.   I stamped The Artful Stamper fawn with Copper pigment ink (Challenge Color BROWN) on Neenah Classic Crest Solar White Super Smooth 80lb. cardstock, applied Copper embossing powder, and heated to set.  I couldn't find the image on their site and have asked them to send me the link.  The image was painted with Twinkling H2O'sStickles Diamonds and Glossy Accents were used to highlight the snowflakes and berries.  The spots on the fawn were done with Viva Decor Ice White Pearl.

I used Spellbinders Curved Rectangles for the shape around the fawn.  I put copper toned cardstock through the Cuttlebug and then, using the same die as a stencil for the fawn, mounted it on the die cut.

The background was created by applying SU Creamy Caramel Classic ink (Challenge Color KRAFT)  to Impression Obsession's Cover-A-Card Paisley Crystal mounted on my Mega Mount, then stamping on Neenah Classic Crest Solar White Super Smooth 80lb. cardstock.  Another piece of the copper toned cardstock was put though the Cuttlebug using the largest die.  The Paisley Crystal BG was mounted on top and the red ribbon (from Michaels) (Challenge Color RED) was added.

That was mounted over a piece of folded 6.25"X12" Neenah Classic Crest Solar White Super Smooth 80lb. cardstock and used as stencil to create the card.  The image was mounted on top with 3D pop dots.  The bow was tied with the Bow-Easy and mounted.  The snowflake die cuts are from Cuttlebug's Snowflake #2 and the cardstock is Arrio Wiggins Curious Ice Gold.  I used Mark Richards 5mm pearl stickers for the centers of the snowflakes.  The tag is Spellbinders Ribbons Tag Trio, also cut from Curious Ice Gold.  The sentiment was done with Brilliance Rocket Red and Impression Obsession Sentiments I.

The stick pin was done with a Maya Road Trinket Heart pin and adding a Czech bicone crystal bead and a copper bead brought back to me from France by a friend, who is also a stampaholic (thank you LaVerne).  They are truly beautiful and shine to no end.  I added a little Glossy Accent above each bead on the pin before pushing them up next to the heart.  It dries really fast and then they don't slide around on the stick pin.


The inside and the envelope images were done by stamping onto Neenah Classic Crest Solar White Text, trimming around them and then mounting on to the cardstock on more text paper, which is what I used to make my envelope.  Yes, I made the envelope and it is really easy to do, but that's another story for another day.

 Shirley

SUPPLIES:


Thursday, March 17, 2011

This Is Anything But A Card

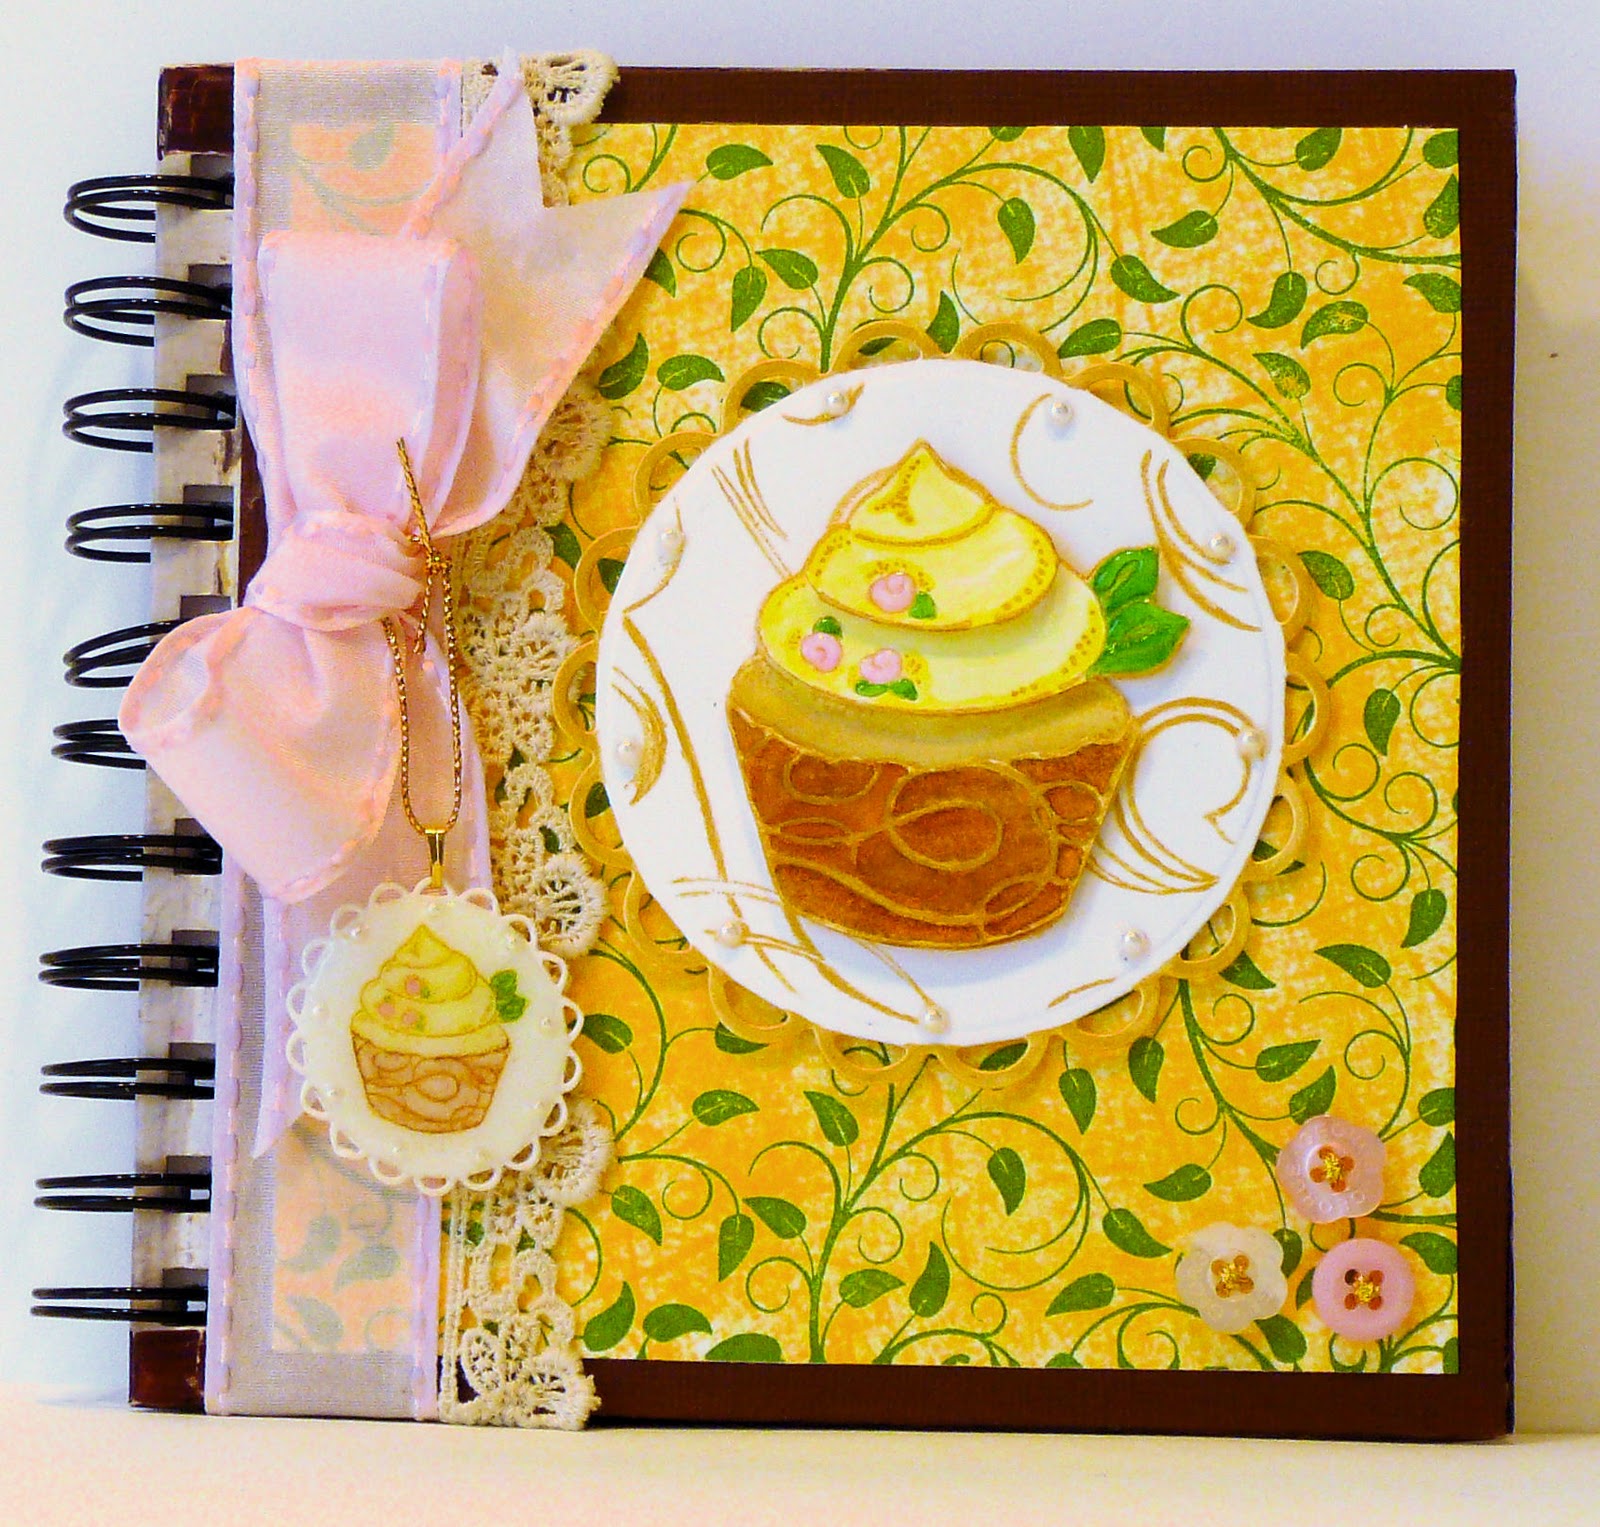
As you can see it really is.  How I got to this point is funny!  My friend is having a birthday and so I wanted to purchase a key chain and make cupcake charm (she loves cupcakes) to go with it.  Well the charm got made and key chain hasn't arrived and so........I know she likes to keep notes, etc., so..........hence the journal or whatever choose to call it!

I used a background I already had done using my Mega MountTM and Cover-A-CardTM Vines inked with Brilliance Thyme.  It was on white cardstock.  I applied an old yellow mustard dye inkpad,  mounted it on a dark brown cardstock, probabaly Bazzil, then mounted those to the front and left inside.  That's the neat part about Cover-A-CardTM. The stamp area is 5.75X5.75 and it fit great here.

I stamped Alesa Baker's  CrÅ me Cup with Brilliance Galaxy Gold 3 times on Neenah Classic Crest Solar White cardstock, painted it with Twinkling H2O's Daffodil, Fern, Golden Sand, and Warm Pecan, cut out the layers, and placed them as shown.  Glossy Accents was added to the rosettes and leaves.

I ran a piece of Neenah Classic Crest Solar White cardstock through the Cuttlebug with Spellbinders Lacey Circles and embossed it.  Leaving the die on the scalloped piece, I stamped it with Cover-A-CardTM Wispy inked with Brilliance Galaxy Gold.  I painted the scallops with Twinkling H2O's Solar Gold.  The image was mounted on the die cut and the 3mm pearls were added with Glossy Accents.

My friend loves big ribbon, so May Arts was taped around the cover and inside and a Bow-Easy bow was added with a little lace, to make it even more feminine.  The die cut image was added, along with some leftover buttons with gold sewing thread.


Next I used a stamp from one of Kalani Allred's new friendship sets, True Blue Friend.  I inked it with Gold Galaxy, stamped it on white cardstock, put it through the Cuttlebug with one of Spellbinders' Fancy Tags, trimmed it down as shown and used 3mm pearls as embellishments for it.


All this because I didn't get a key chain you ask??  LOL  Well, when I did the key chain charm I used the next to largest of Spellbinders Lacey Circles and White Shrink Plastic.  I stamped the front with Galaxy Gold and the same image as above.  Then I used VersaMark on the edges around it so when I heated it with my heat gun it wouldn't stick to itself.  Cleaned off the VersaMark with a soft toothbrush and water, dried it and painted it with Brilliance and Mica Gloss Colors.  I heated them to seal and dry and then I applied 2mm pearls and Glossy Accents as a seal and let that dry.

On the back I used a stamp from another Kalani Allred set, All Occasion I.  You really need to check out all her new phrase sets starting HERE.  You will go crazy, I swear.  One is has such cute and fun phrases that I had to have it, even before knowing how I would use them.

So now that you have seen what  I did, check out what the IO DT members did too!

And don't forget that the IO Blog is now using Inlinkz for people who want to join in the challenges.  Much easier and faster I think.  There will be some more changes for the challenges coming soon too.  We also have the DT doing posts on their blogs in off-challenge Thursdays.  You can check the IO blog on that day to find out who is creating for the day!

Thanks for stopping by to look and share!!  See you soon.

 Shirley

Friday, November 13, 2009

Me And My Mega Mount

I was showing my Mega Mount™ to a friend and she immediately said, "How do you hold it?"  I showed her and of course she was sold.  So I thought maybe I should do a mini tutorial on how I use mine.
I did the background below using 2 Cover-a-Card™ stamps and the Mega Mount™.  Below is a quick pictorial of how I use my Mount and how I did it.
Supplies:
Front

Click on the photo and take a look at how I mounted it.  It is actually sitting on the handle in the photo.   All of IO's Cover-a-Card™ stamps are 5.75"C5.75".  As you can see the sides on the left and right have a little more acrylic block showing.  That comes in really handy when you are lining up with the bottom of your cardstock.  There is a tad on the top and the bottom and that really helped me line up the left edge.
 You get another really good idea from looking at the back too.  Now for how easy it is to ink up the stamp.

Inking stamp

  • For me it's easiest to let it sit on the handle.
  • I put my left hand through the handle to keep it in one place and then I ink the top portion first moving from right to left, etc. 
  • Then I switch ends to ink the bottom that will now the top.  Topsy Turvy!!  It is so easy.

  • Next I lay the 8.5"X11" piece of cardstock in front of me.
  • I line up my stamp with the left and bottom sides of the cardstock.  It's like a right angle.  When I have done that:
NewONE
  • I put it down on the cardstock and simply roll it forward.  (When I first started doing this I thought, "It can't be that easy.  I am going to rock it back and forth a little. I wonder if I will mess up the image."  I have to honestly say I have not had a bad image yet.  If your ink pad is dry, don't expect a good solid image. This applies to any stamp with any mount.
  • I also find it is a lot easier to clean the stamp by sitting it on the back of the handle, holding it in place with my left hand and cleaning it with my wipee.  I use the alcohol free type and have for years.
  • I always replace my backing on the stamp.  It helps it keep its cling for the next time I use it.
Resist Stripes
Background Instructions:

1.  I inked CC002 - Swirls with VersaMark ink and stamped it on the lower left-hand corner of an 8.5"X11" Neenah Solar White piece of cardstock.  I applied Clear Embossing Powder and heated it with my heat gun.  I do not trim my cardstock yet.
2.  CC008 - Thick and Thin was inked with an Olive Green ink and stamped over the first image.  I gently took a piece of tissue ( I use Kleenex), and blotted the top.  Ink will lay on the embossed swirls because they are plastic and can't absorb it.
3.  You will probably notice that I was a little off on each stamp.  It really doesn't matter.  I picked the lines I liked and trimmed around it.  I trimmed the 4.25 piece first and the other side.  I save these for stamping images, punching borders, or for dies.
Time to finish my card with my new background and then get on to my shaker for the challenge coming up.  If you have more questions about the Mega Mount™, please ask by posting here and I will answer here so others can see too.  If I don't have the answer I will, of course ask the designer of the Mega Mount™ and owner of Impression Obsession Inc., Mitra Friant!!!

Thanks for stopping by to look and share!

Tuesday, October 6, 2009

A Quik Post With A Quick Card!

Pumpkin Patch 2


I just finished my first Shake-It™ card and it was not only easy, but fun too! Below are the steps I used to do it and the card:
1. Pumpkin Patch - C2271 was stamped on Natural cardstock with VeraFine Onyx Black ink. It was painted with Twinkling H2O's Orange Peel, Olive Vine, Sweet Alfalfa, and Yellow Rose. Stickles Yellow glitter glue was used to highlight the eyes and mouth of the pumpkin.
2. Splellbinders Large Scalloped Ovals largest die was used to cut and emboss with Bazzill Swiss Dots cardstock. The next to largest oval from Spellbinders Large Ovals was used to cut out the center of the scalloped die cut.
3. Treasure Beads Blazing Orange bead mix was placed in the center of the painted image. The Oval Shake-It Pouch™ was used next. There is a lining around the outer edge of the oval. (I saved the lining to use on another card.) That was removed exposing the adhesive underneath. It was centered over the image and put down as shown. Then the scalloped embossed die cut was mounted over that as shown.
4. The center portion of the die cut was used to make the diecut frame for the word as shown. The "Hi!" is from Clear Stamp Set Mini Messages - MC176. It was stamped with the VersaFine Onyx Black ink on Natural cardstock and the dots in the word were highlighted with Stickles Yellow glitter glue.
5. Cover-a-Card™ Leaves - CC019 was inked with Adirondack Pesto ink and stamped on Neenah Classic Crest cardstock using the Acrylic Mega Mount™. (It is so fast and easy to do background stamps now. I have yet to get a poor image using mine. I set it on its handle to ink it and clean it. Talk about easy!!). I also inked just a portion of it so I could do the lower left hand corner of my envelope.
6. A 4.25"X5.5" piece of the Swiss Dot cardstock for the Background edge. A 4.0"X5.25" piece of Neenah Classic Crest Natural cardstock was mounted next, followed by a 3.75"X5.0" piece of the Leaves cardstock. A piece of the left over Leaves was also used for the inside top portion of the card.
7. The main image was mounted with 3D pop dots. The May Arts ribbon was mounted as shown. It was crossed over just below the image. The words were mounted between the image and the corner of the card. The bow was made with the Bow-Easy and mounted with Glue Dots. Some of the Leaves were painted with just a wash of Orange Peel watercolor as shown.
8. Mark Richards Yellow 5 and 2mm rhinestone stickers were mounted at top left-hand corner, over the knot of the bow, and lower right-hand corner as shown.
Supplies:
Stamps: Pumpkin Patch - C2271, Cover-a-Card™ Leaves - CC019, Acrylic Mega Mount™, and Mini Messages - MC176

Paper: Neenah Classic Crest Natural Super Smooth cardstock, Bazzill Swiss Dots.
Inks: VersaFine Onyx Black, Adirondack Pesto, VersaMark, and Twinkling H2O's Orange Peel, Olive Vine, Sweet Alfalfa, and Yellow Rose
Accessories: Spellbinders Large Scalloped Ovals and Large Ovals, Organdy Ribbon, Oval Shake-It Pouch™, Bow- Easy, Stickles Yellow glitter glue, Mark Richards 5MM and 2MM Yellow Crystal stickers, Orange May Arts ribbon.
A fun card. It looks like lots of steps, but it was fast. The shaker was a snap. I am off to do another one, it was so much fun! Thanks for stopping by to look and share!!
Thanks for stopping by to look and share.


 Shirley


Related Posts Plugin for WordPress, Blogger...