Showing posts with label Impression Obsession. Show all posts

Thursday, May 7, 2015

A Kopy Kat Here

I fell in love with Jenny Gropp's "Paper Quilting" card and IO's Open Scroll Flower Die.  I also thought, WOW, a way to use some of my DP pieces (not used since falling in love with IO's CAC stamps).  If you want to see how beautifully done cards are done, don't miss Jenny's blog!  She really is One KOOL Krafty Kat!!!  Below is how I did my CAS of her card!

CARD FRONT:
  1. Used the Open Scroll Flower Die to emboss the image 3 times on a 5.75"X4.0" piece of Laid white cardstock.
  2. Die cut the flower using 1.75"X1.75" pieces of leftover pink print DP.  Used removable Scotch tape on the top of the die cut to keep in place.  Saved leftover negative pieces for back of card and envy.
  3. Die cut leaves using 1.5"X.75" pieces of leftover green print DP.  Saved negative pieces for back of card and envy.
  4. Glued die cut petals and leaves in place on the "TOP" of "embossed images" using Glossy Accents and needle-nosed applicator.  (It looks like you would place them on the backside, but guess how I know it's the front most embossed looking image? 
  5. Used Swiss Dots embossing folder on the left side of image and then lined up with right-end row of dots to emboss the right side of image.
  6. Each layer of cardstock for the base is increased by .25" on each side. 
  7. Mounted sequins with glue dots.  Added a little glitter to the centers.  Punched the centers out of sequins and mounted on lower right.

CARD BACK & ENVY
  1. Layered the back side as shown.
  2. Glued the bottom end of each leftover flower to the corners with GA.
  3. Lined up the leftover leaves with petals and glued the furthest end.  Trimmed the leaves at the petal area and glued petals last.
  4. Added a piece of embossed swiss dots on envelope paper to the corner of the envy and then did flower and leaves like the back of card.  Added sequins there too!
I am so slow these days with Spring acting like Summer in my yard.  I am behind in hopping, but will get caught up in the next few days.  I have really missed your art!!!  Thanks for stopping by to look and share everyone!!


 Shirley
 SUPPLIES:

Sunday, April 12, 2015

A New Card, Die Set Storage Idea, & Google's New "I'm Not A Robot"

IO QUILT VASE, CAC DOTTED ARGYLE, & GREETINGS DIE SET
I need to schedule time to do what I love best since Spring is here.  For this card I chose another Tara Caldwell image.  She has only been with IO a short time.  I have fallen in love with her designs.  Here is how I used her Quilt Vase design:

DETAILS:
  1. Stamped the image with Timber Brown ink 1 time, and then the flowers 3 times on white cardstock and painted with Twinkling H2Os.  Cut around the main image and embossed from the back with a stylus.
  2. Used largest Spellbinders Labels 40 die twice with white cardstock to get the front and back side of the card, mounted on red cardstock.  (Mounted using ATG tape in the middle of the die cut and then used needle nose bottle with Glossy Accents (GA) to tack down the lace area in places.
  3. Stamped Argyle background with Blazing Red.  Used the center of the die as a template to get the portion I wanted for a tablecloth look, traced with a pencil, and cut out.
  4. Mounted tablecloth with 1/4" ATG tape, mounted the vase with ATG along the bottom of the vase and 3D pop-dots from middle to top.
  5. Cut out flowers and leaves from second image, embossed from the back and used GA lines on matched flower/leaf, let dry just a little and mounted flower or leaf with a tad of glue dot at one end.  Highlighted areas with Vivas, Wink of Stellas, and Stickles.  Mounted gold sequins and heart stick pin with gold bow.
  6. Die cut the "Hello" using the red and gold mirror cardstock.
  7. Trimmed the other 2 flower images and mounted as shown with tape and GA.
  8. Below is the back of the card with one of the flower images at the bottom.
  9. The third image was mounted on the envelope as shown above.  (The cardstock has been peeled to make the image thinner in case I mail it.  If mailed I will also place a clear piece of packing tape over the corner area with at least .25" overlap to the back side.  That way it slides right through the mail postage reader.)
DIE SET STORAGE SUGGESTION
I store my die sets in plastic ziploc bags.  I hate all the dies collecting on the bottom as it's to sort them to find the one I want.  It's hard enough reading them 'backwards'.  ;-) Another bad habit I have is saving anything that looks like I can use it for my cards, etc.  I save the magnetic strips that have come on the telephone directories, etc.  Below is what I did:
  1. Taped two of the magnetic squares together using duct tape.
  2. It was too big for the back of the IO cover, so I added ATG to the back of the magnetic strip(s) and mounted from the top and center on the IO cover back.
  3. Trimmed the bottom of the magnetic strip to match up with the IO cover bottom.Mounted the dies.  Love it!!!
 GOOGLE UPDATED
"PROVE YOU'RE NOT A ROBOT"
Many of you probably already know about this, because that's how I found out.  Some of us chose to use the 'Prove You're Not A Robot" feature and many of us hated it as commenters because of the time taken to figure out what the image said, like the one below which is easy compared to most.

OUT WITH THE OLD
One of the first things I noticed when blog hopping again was the NEW "I'm not a robot", shown below. Most of the time I didn't have to read a caption anymore (unless the Show Word Verification is checked in your Settings-Posts and Comments area).  Even then it was just three or four letters that were easy to read.  ***Below is the best part.

IN WITH THE NEW
With the NEW as Blog Moderator:
  1. "I'm not a robot" is automatic.
  2. They have also given us a choice of continuing to use the Word Verification or notIt too has been improved with simple to read short letters.  I have mine turned off because I tested having it on or off and I still didn't get those pesky ads anymore, even on old posts. (If any of you have questions, just email me).
Well that's it for this post and I can guarantee you the next one will be shorter!!!  Thanks for stopping by to look and share.  Thanks for all of your welcome backs too!!!  Big hugs.


 Shirley
 SUPPLIES:

Sunday, March 15, 2015

A Big Hello

IMPRESSION OBSESSION THOUGHTFUL BOUQUET & CAC FRENCH TEXT
To all of you.  I especially want to also say thank you to my friends who emailed me to ask what I had been doing.  I am sorry I didn't post about why I had not been posting.  I had some difficult family matters and had to take care of business.  :-)

For today's card I chose a new Impression Obsession stamp.  Below is how I created the card:

IMAGES:
  1. Stamped Thoughtful Bouquet with Espresso Truffle on natural cardstock once and the flowers on top on white cardstock twice.  Painted flower images with Twinkling H2O's ( they have shimmer.  Trimmed around main image and flowers.  Embossed main image and one flower image from back with stylus on mat.
  2. Stamped CAC French Text with Espresso Truffle on natural cardstock twice.  Stamped the corner of a natural envelope with the text too.
  3. Embellished the flowers with the Yellow and Purple pens from my Wink of Stella set.
DIE CUTS:
  1.  Did 2 die cuts from Spellbinders new Labels 39 die set.  I had to do the die cut and then trace around the edges of the die before removing it.  Then I trimmed the penciled edge as shown above and just below.
BACK OF CARD

ASSEMBLY:
  1. Trimmed 2 pieces of French Text to 4.0"X5.25" and mounted on 4.25"X5.5" white cardstock for front and back.  (I have found I really like the cards without the fold and it saves on cardstock.)  Used watercolor around the edges for a shadow or aged look.  Mounted the ribbon through the centers of the die cuts as I mounted them as shown.  Used Glossy Accents in my needle-nosed bottle for the die cut edges.  Taped my centers with ATG tape. (BTW you don't need the gun to use the tape.  Let me know if you want me to explain how).  Added bows and white pearl hearts to front and back.
  2. Tore the piece of French Text done on the envelope diagonally and painted on the edge as shown.  Added to envelope corner.
  3. Mounted the layered Bouquet image on the front and laid the bouquet image on the back.
  4. Cardstock has layers and I took the bottom layer off my last bouquet image before mounting it to the envelope.  If I send it in the mail I will cover the corner with clear package tape so it will glide through the postal thingy.

 Shirley
 SUPPLIES:

Tuesday, August 19, 2014

Christmas Wreath Two-Sided Card


Just a reminder to vote in my poles at the left if you haven't already.  You can keep up with the results too if you like by pressing on the view button.

I have another Christmas card so I don't get caught like last year, with not enough cards for all.  I still really liking making the card with just a front and a back (another green idea) when I can.  The photos make the red look more true red.  Mine is actually a deep pink red.  A very easy card as you will see:

IMAGE AND CARD FRONT:
  1. Stamped wreath on white cardstock 3 times (once for base, once for dimensions, and once for the back of card and envy.
  2. Painted all of first image, parts of second image for dimension, and trimmed parts for back and envy with twinks.
  3. Trimmed and embossed Holly leaves, bells, and bow from back and mounted with 3D pop-dot REMNANTS. (Go green and don't waste the left-over of pop dots.  They work even better than the dots/squares sometimes, if not just the same.)
  4. Put white cardstock through Cuttlebug with Sizzix Dots folder, painted the flourish with Twink H20 Solar Gold.
  5. Used Bazzill Pirouette taped to Merry Christmas portion of Merry Tree die.

ASSEMBLY AND EMBELLISHMENT:
  1. The Bazzill base is 6.25"x4.5".  The white embossed cardstock (5.5"x4.25) was mounted in the middle.  A plain white piece was mounted on the back.
  2. The wreath was mounted and then Viva Crystal Clear was added to the bells and Mistletoe.  When dry Stickles Diamonds was added lightly to the Mistletoe berries.  The same treatment was done on the backside of the card with the holly, bells, Mistletoe, and the bow. Spica AtYou pens were used to high light the leaves and bow edges where needed.
  3. Two strips of the Bazzill was added to the envy and then the Holly, Mistletoe, etc. like on the back of the envy.
  4. The hearts were added with a dot of GA and then hearts added to them with a Quikstik.
That's it for today and thanks so much for stopping by to look and share.

Shirley

SUPPLIES:

Saturday, August 9, 2014

New To You Stamps Happen Santas


Still getting out those old images to use, while incorporating some of my new 'stuff'.  I had several images of the Santas With Stars by Stamps Happen.  I decided to make a couple of cards with them and the fact that I usually layer really made it more appealing to me.  The only place I could find the stamp for sale was on EBay, etc.  I am also unmounting all of my woodblock stamps to make more room, so it worked well for that reason too.

IMAGES:
  1. The Santas W Stars was stamped on white cardstock 6 times with Brilliance Gold, heated to dry the ink, painted with twinks, used a black Sharpie for the eyes, then fussy cut for the front, back, and envy, leaving a thin white edge around the images.  Fussy cut 3 of the stars on one of the other images for the cardfront and 2 sides on the back.
  2. The Merry Christmas from the IO Merry Tree die was used with Bazzill deep pink cardstock.  I cut a 1.25 X5.5 piece of the cardstock.  Tape was placed on the die and paper on top to hole it in place.
  3. The Santas had been painted with twinks and were mounted as shown.  The stars were embellished with Stickles Buttercup glitter glue.  Flower Soft/Glossy Accents was used for the fur on caps and Viva Decor Ice White Pearl pen was  used for the beards and hair.
  4. The ribbon is from my stash and the Czech glass heart bead was added to the pearl corsage pin.

CARD FRONT/BACK AND ENVY:
  1. They were created using Spellbinders Enchanted Labels 28 largest die.   White Laid cardstock was used for the front and regular white cardstock was used for the back.
  2. All images were placed on the die cuts first.  ATG tape and was used to place the centers back to back, and the Glossy Accents was used on the 4 corners.
HINT - Someone asked about the needle nosed bottle for the Glossy Accents.  It has worked well for me for about 8 years.  It has only plugged up a couple of times.  I found leaving the bottle on its side keeps it from doing that.   When it did I used a long beading needle to unplug it.  If you have more questions don't hesitate to ask.

As you can tell, life is still taking place here, even more so with the cool weather for this time of year.  See you soon I hope and will be hopping your blogs to see your wonderful creations!!  Thanks for stopping by to look and share.

 Shirley

SUPPLIES:

Sunday, June 15, 2014

Something Old And Something New Two


I'm back with the kind of new thing again!  I created the background using a technique from my Online Watercolor Class.  I had the images from an earlier card and just changed them around a little.  Here is how this card was created:

CARDFRONT:
  1. Stamped Rose Pitcher on white cardstock with Brilliance Galaxy Gold, painted with Twinkling H2O's.  The roses and the bud with stem were both stamped 3 more times and painted with twinks.  All were fussy cut, embossed from the back and mounted on the cardfront with 3D pop-dots and w/o on other areas.  The lace tablecloth open areas were cut out with an X-Acto Knife and a healing mat.
  2. The background area was created with CAC Craquelure and Twinkling H2O's using a technique I learned in the Online Watercolor Class series.

 Building Card:
  1. Front -  White Laid cardstock was used for the base.
  2. The Craquelure BG was mounted on that.
  3. The image was mounted on die cuts from Spellbinders Lacey Squares using white and natural cardstock.  It was then mounted on the Craquelure.
  4. Inside - Die Cut edges were mounted with strips of the Craquelure BG.
  5. A small die cut was used for the Rose and a rose with stem was mounted to the right.
  6. Envy - Two of the Lacey Square edges were mounted back to back and a rose with stem added. The lacey edges were peeled to thin before mounting and so was the rose with stem.  I start the separation by flipping the edge back and forth with my X-acto knife, see it starting a little and open it up enough to gently a little at a time holding one side flat or with the free hand.
  7. The bow is May Arts and the heart pen is Maya Roads with a Czech bead added by applying Glossy Accents to the stem.
Off to clean some rain gutters.  LOLOL  No rest for the wicked....or is it the stamping.  ;-)  Thanks for stopping by to  look and share.

 Shirley
SUPPLIES:

Sunday, June 1, 2014

Online Watercolor Class - Victorian Bird


Don't forget to take part in my polls to the left.  This time they won't disappear!!   BTW, I am so sorry I am late in getting to some of you.  It's those comments on separate pages and I can't remember the card!!  ;-)  Just teasing.  I have over a hundred of your wonderful art blogs I am following and I can't not read them.  Whaaaah!!

Truth be told I did an card a long long time ago with this same image and coloring.  I had more than one image and what I was thinking I don't have a clue!!  Since I have started the Online Watercolor Class, I am trying to use anything I have that needs to be used!  The first and second days of the class are dedicated to backgrounds.  Below is how I did my images to use with the background I created.

IMAGES:
  1. The image, Victorian Bird, by Impression-Obsession, was stamped with a Stazon Jet Black ink.
  2. The image was painted with Twinkling H2O's and Black Diamond glitter glue was used for the legs, beak, and a little of the heart 'wing'.  Glossy Accents was added to the eye. Mark Richards Crystal Stickers 2mm Black Onyx Rhinestones were added to the wings as shown. If you click on the image they are easier to see.
  3. A Royal 3/8" Soft Grip SG 730 was used for the grass.  Below is a picture of the brush.
  4. The "hello." is from Impression Obsessions Social Greetings 2 clear stamp set was stamped with Luxe Tuxedo Black and embossed with clear embossing powder.
The background was created using Glossy white cardstock, Twinkling H2O's, and Tim Holtz Layering Stencil Honeycomb.  Remember how I did the back of the cardfront like I would normally do the inside.  I did it on this one too.  I did the same technique only on the corners and on white cardstock.  I also did the corner of the envy the same way.  See below.


I kind of like it.  I am off to do another card.  This time it is a CAS with some watercolor techniques too.  Thanks for stopping by to look and share.


 Shirley


SUPPLIES:

Monday, May 19, 2014

Stencil Class Day 2 - A Rose Is A Rose


Stenciling Day 2 covered using stencils with stamps, masking, watercolors, colored pencils, and using the negative portions of sticker sheets, etc. as a stencil.  Another packed lesson with the lessons in downloaded pdf and videos too.

I chose to use my stencils with inks, stamps, and watercolor too.  This is what I did:

STENCIL IMAGES AND SENTIMENT:
  1. Stenciled CW Echoes with TH Antique Linen on white cardstock.  Used tiny leaf and dot stamps from IO Branches Of A Tree inked with Memento Pistachio and Angel Pink over the AL.  I did the same to the corner of a wrong A2 envy.  Trimmed the corner and mounted on square envy so could still mail at cheaper rate.  Used Lil' Inkers Square for die cut.
  2. Taped MFT Rose Builder onto white cardstock.  Painted stencil areas with twinks.  Went over inside edges for depth with Niji waterbrush and ink gathered from ink pads for Pistachio and Angel Pink.  Embossed white areas with stylus.
  3. Used the negative leftover image from Day 1 on Dotted Swiss CS mounted on white CS as sentiment for today.
ASSEMBLY:
  1. Mounted Echoes BG on pink CS, then green, the white.
  2. Mounted rose on leaves.
  3. Mounted rose and leaves on Echoes BG with 3D Pop-dots.
 INSIDE CARD:
  1. Lined with dotted swiss and white CS.  Used left over remnants from stenciled Echoes for sides.
  2. Used Stitched Square die cut, sponged frame, added leftover Echoes remnants to frame, added smallest Spellbinders Classic Hearts die cut from Echoes leftover.
EMBELLISHMENTS:
  1. Added Wink of Stella to some of the little pink stamped dots, the edges of the rose and leaves, the white area of hello, inside for the same pink dots.  Added white pearl heart stickers as shown and white pearl corsage pin with dotted swiss bow.
Off to do Day 3.  Loving all of it so far.  Thanks for stopping by to look and share.


 Shirley

SUPPLIES:

Wednesday, May 7, 2014

Sweet Treats For You

IMPRESSION OBSESSION -  SWEET TREATS
IMAGES :
  1. Stamped  image with Golden Glitz three times, painted with twinks, trimmed around base image, embossed from backside with stylus.
  2. Trimmed around needed flowers, etc. on 2nd image as needed to mount on first image.
  3. Trimmed around cupcake for inside and fondant cake for envy.
CARDFRONT AND ENVY:
  1. Card fold - Used Spellbinders Resplendent Rectangles for four die cuts for card as described in Hinged Filigree Card Type 2 Tutorial.  
  2. Cardfront Background - Used the die as a stencil for the cardfront background with some leftover DP; used Tim Holtz Bubble stencil with a dauber and Brilliance ink over the lower right corner of the DP; mounted Sweet Treat image; mounted flowers, cupcake, butterfly cookie, whipped cream with chocolate bits, fondant cake, and bow on cake in window as shown; added sequins on stenciled circles.
  3. Envy - Mounted one leftover corner of DP from stenciled BG to envy; used Pentel eraser refill for dots with Golden Glitz; added fondant cake (separated cardstock to make it thinner); added sequins; mounted (separated) Sweet Treats sign.

INSIDE CARD:
  1. The top and bottom trims were done using the bottom of the largest die.  The inside die cut behind the cupcake was done using a Spellbinders Timeless Rectangles die; sequins were applied and the cupcake was added to the die cut.
EMBELLISHMENTS:
  1. The white cake and cookie frosting is Golden Iridescent Pearl Finish; the Pussy Willows, whipped cream, and candy dots on fondant and cake are Viva Decor Ice White Pearl Pen.
  2. The flower centers are Stickles Orange and Yellow Glitter Glue and Viva Decor Bronze Glitter Glue (which is also the edge of the butterfly, on cookie, wings.
  3. The chocolate bits on the whipped cream are Viva Decor Bronze Pearl Pen.
  4. The bow is May Arts ribbon.
That's enough for everyone, I am sure!!  ;-)   I am off to try and learn how to do things simpler.  ;-)  Thanks for stopping by to look and share!


 Shirley

SUPPLIES:

Saturday, April 26, 2014

Victorian Spray

WOODWARE - VICTORIAN SPRAY CARD FRONT WITH ENVY
All I can say is it's a mixed bag!!  It started when I ran my hand across the stamen of the flower, while it was wet with glitter glue.  Yuk!!!  I almost always paint with Twinks and since most everyone else uses Copic, Shinhan, etc., I haven't listed the H2O colors.  If you ever want them, feel free to email me.  I also started out with something totally different in my head and here is how I got the above:

IMAGE:
  1. Stamped image on white cardstock twice with Golden Glitz ink and used heat gun to dry ink; painted all of one with Twinks. Painted all but the flower on the second.  Fussy cut around the outside of the completely painted image.  Fussy cut around one corner, the leaves and the berries of the second image.
CARD FRONT:
  1. Used largest die cut, from Spellbinders A2 Curved Matting Basics - B, as a stencil for a piece of dark purple card stock.
  2. Used an old 4.25"X5.5" Lavender striped piece of DP with the largest die cut; daubed the smallest cirles corner of Circle Explosion stencil on upper left and lower right of die cut and mounted on the dark purple piece.
  3. Mounted the image in the middle of that.
  4. Embellished with Stickles orange and yellow glitter glue - rubbed my hand across it before it was dry. :-(
  5. Applied Stickles Golden Rod to spots and berries on image; applied here and there on the Circle Explosion area.  Brushed just a touch of Wink of Stella Clear along the darkest purple lines of the flower.  The ribbon for bow was a gift for a purchase somewhere.  I secured the heart bead with GA to diamante stick pin.
INSIDE CARD

 INSIDE CARD and ENVY:
  1. Cut two pieces of dark purple cardstock .75"X5.5"; taped to each side.  
  2. Used the IO Circles Cut Out on a piece of the striped paper ( NOTE - There are no borders on the circle die.  You can place it anywhere on any piece of paper, (i.e. in the middle if you want) and you just get holes.  Saved the negative holes.  Cut it in two pieces with 2 rows on one and one row on the other.  Taped to purple as shown.
  3. Taped to right and left as shown.
  4. Mounted fussy cut leaves and added Golden Rod glitter glue as shown.
  5. Applied the "leftover dots" from the Circles Cut Out here and there using Glossy Accents applied with needle-nosed bottle and a QuickStik for the dots, embellished with Golden Rod glitter glue.
  6. Used GA and needle-nosed bottle to apply corner of image to envy and berries with leaves; embellished with glitter glues.
That's it for now.  Almost have a Christmas card done!!  Thanks for stopping by to look and share!


 Shirley


SUPPLIES:

Tuesday, April 1, 2014

Blazzing Poppies Mixed Media Attempt

Blazing Poppies
I fell in love with this image the minute I saw it. Believe it or not, the hexagons are part of what attracted me, because so many if you are using them in your designs.

Main Image:
  1. Stamped the image 3 times with Golden Glitz on white CS.  If I had to do it again I think two would have been with a dark brown ink.  Painted with all 3 with twinks for the areas I wanted.  Trimmed around the first one as shown, shabbied and sponged the edges.  The first one is the base.  Cut out the other images, mounted with 3D pop dots.  embossed from the back and mounted on image.
  2. After mounting on the Card Front the flower centers were embellished with Viva Decor Pen Bronze, Yellow Quartz, and Peridot glitter liners.
Card Front:
  1. Stamped French Script on natural CS with Memento Desert Sand.  Cut a 5.75"X4.0", ruffed and sponged the edges with Desert Sand, mounted on white CS, used Perfect layers for 1/8" around edge, paper pierced the edge, and mounted the image on it.
  2. Used Hexagon stencil for the edges with pencil, painted with gold acrylic ink and used Lime glitter pen for dots.  
  3. Used MFT Distressed Circles and Brilliance Pearlescent Beige ink as shown.  Used Flourishes So Distressed small splats with Creative Medium Shimmer on top of the Distressed Circles Areas. (Believe me when I say the splats look like mixed shimmer medium and to me the whole card looks a little distressed!!!  LOL
Inside and Envy:
  1. Used the same products for the inside except I didn't use pop dots, the left side is smaller image than the front, the right side is natural text paper instead of CS.  I noticed when I did the paper piercing on the front (after mounting to the card fold) it showed on the inside too.  I kind of like it!
  2. The corner on the envy uses natural text paper and the image is hand drawn.
Hope to have another card soon and love seeing all of your art work!!  Many of you have really inspired me to step out of my comfort zone!!......a little anyway.  :-)  If you have any questions, please email me.  It's in the sidebar upper left.  Thanks for stopping by to look and share!!

 Shirley
SUPPLIES:

Friday, March 28, 2014

Something Old, Something New, Nothing Borrowed Or Blue!

What can I say except I have been looking at a lot of stamps!!!  Everything on my card is old except the stamp image, Huge Cake & Candles (without the candles),  and I do mean huge. What really caught my eye was the way it looked like stacked Boston Creme Pie with fondant for the tops and around the bottom!!  I am not doing sentiments on my cards unless I really need to anymore.  That way I can use them for any occasion.

Images:
  1. Stamped Huge Cake twice and the top twice on CS with Golden Glitz, painted with twinks, embellished with Viva Decor Pens and Stickles glitter.  Added a bow with ribbon from Michaels $1 bin!  Added Glossy Accents to the daisies with Needle nosed bottle.
  2. Trimmed around one whole image.  Trimmed around the top and second cake on the second, and the plate on the bottom. Painted with twinks, embellished with Viva Decor Pins and Stickles glitter.  Added Glossy Accents to the daisies with Needle nosed bottle.
  3. Trimmed around daisies on the two cake top images.  Added Stickles glitter and then Glossy Accents to the daisies with Needle nosed bottle.

Background, Card Front, and Envy:
  1. Stamped CAC Dots on white CS with Golden Glitz.  This was all leftovers from a previous card BG.
  2. Used Spellbinders Decorative Labels Eight largest die for top and bottom layer of card.  Cut 2 using white cardstock and 2 using white 80lb. text paper for the back of both CS die cuts.  Attached using GA.  Used my Score-It board to score just at the bottom of the trim, like I did it for this card HERE.  Joined both side together at top above score with GA.
  3. Used largest die for stencil on CAC Dots background for front and inside top. Cut a second die cut to mount the cake on front over CAC Dots.  Used left-over and die to get stenciled bottom piece.  Mounted second cake on top and created bottom dots trim with daisies on the bottom.  Took the two larger left-over daisies from the bottom-top layer for the middle daisy on each for envy and bottom trims.
  4. Used the left-over die cut edge from the inside bottom for the corner of my envy.  (I actually peeled the top layer of the cardstock off to create a thinner envy corner, and then I added the daisies and some small flourishes with twinks Solar Gold.
Thanks for stopping by to look and share!!

 Shirley

SUPPLIES:

Sunday, March 9, 2014

Mackintosh Beauty


MACKINTOSH BEAUTY

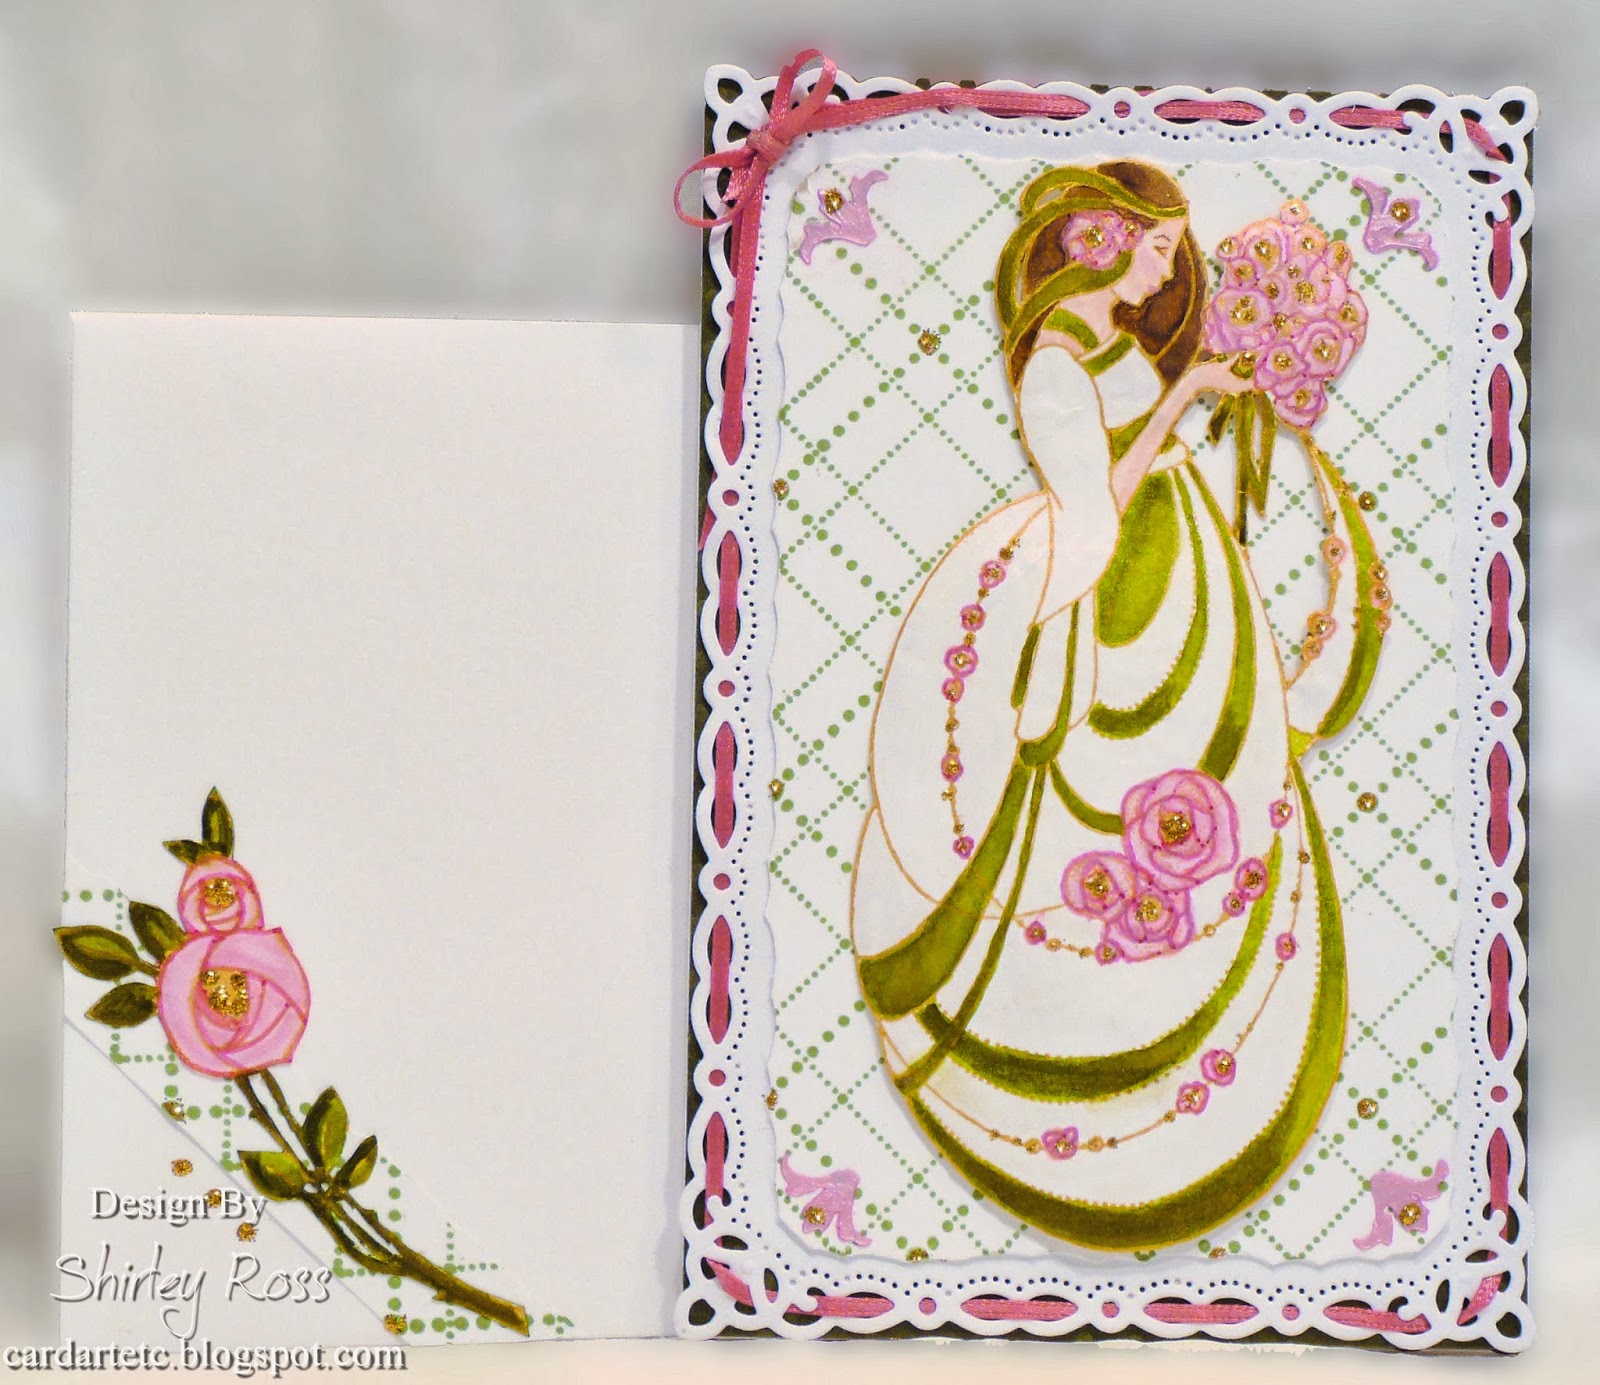
I fell in love with the Mackintosh stamps sold by Chocolate Baroque the minute I saw them at Paper Creations by Shirley and Miranda's 'Mir'acle Art In Inspiration. I found you can order them in the US HERE. She didn't have all I wanted, so I shopped at Chocolate Baroque in the UK. The shipping was quick and here I am with my first card!  I chose to start with Mackintosh Beauty.

IMAGES:
  1. Stamped lady on white cardstock and 2 of the roses on stems with Golden Glitz twice (once on white cardstock and once on a white leftover envelope for the new envelope!  ;-)  Embossed main image on back with stylus Painted with twinks and highlighted areas with Spica Atyou Pink pen, Brown Fine Sharpie pen and Golden Rod glitter glue.  The roses on stems were painted with twinks and cut out and highlighted too.
CARD FRONT BACKGROUND:
  1. Stamped CAC Dotted Argyle with Memento Bamboo Leaves on white cardstock.
  2. Used largest Spellbinders Romantic Rectangles for white cardstock die cut and stencil for Dotted Argyle as shown.  I used the Palette knife on the right, shown below, to release the die by placing it under the inside rim and gently moving it toward the outside of the die.  It works like a charm. Mounted to a piece of Green cardstock.
STENCILED AREAS:
  1. I trimmed the Fancy Frames template as shown with the black lines along the corner areas.  It made it easier for me to tape to the corners of my cardstock.  I chose to stencil the pink area on shown on the stencil.
  2. Taped it to one corner of the stenciled Dotted Argyle.
  3. Used my Palette Knife to put a bit of Viva Pearl Modeling Cream in an empty H2O jar. Matched Brilliance Pearlescent Orchid ink with my Twinkling H2O color Cherry Sorbet. Put 3 drops in the cream and stirred until mixed.
  4. Used removable tape for stencil on each corner.  Used the pointed palette knife on left below to detail stencil where shown above.
LEFT - MODELING CREAM/RIGHT - LOOSEN DIE CUT
INSIDE CARD

INSIDE CARD AND ENVY:
  1. LEFT SIDE:  Die cut on the left is same as front but Dotted Swiss cardstock, followed by next die cut of Dotted Argyle, followed by next die cut in white cardstock.  Used the left The roses on stems on cardstock was mounted as shown.  Stenciled flourish again on corner of die cut. Used Golden Rod glitter to embellish.
  2. RIGHT SIDE:  Stenciled 4 corners on right-hand side.  Added left overs from largest die cut for edges and trimmed as shown.  Embellished with glitter glue.
  3. ENVELOPE:  Added a piece of left-over Dotted Argyle to corner of envy, added roses on stems, and embellished with glitter glue.
That's all for today.  Back soon and thanks for stopping by to look and share!!


 Shirley
 SUPPLIES:

Tuesday, February 25, 2014

Picked Wildflowers

PICKED WILDFLOWERS
One of my loves, besides Impression Obsession products, is Flourishes.  You may have heard that Jan Marie was closing her shop.  Actually she is selling it.  Read more about it HERE.  I am so glad because I love her images.  The set  used for today is Picked Wildflowers.  The cardfront should look familiar to you.  I used it on my last card too.  I decided that this year I am going to try and not save things I don't use.  :-) So........the images are different, the BG is the same.

IMAGES:
  1. The flowers were stamped twice with Memento Rich Cocoa,  painted with twinks and highlighted with Stickles glitter glue.
  2. Trimmed with Kai scissors, embossed with stylus from the back, mounted with 1/16" 3D pop dots on the white embossed BG explained in #2 below.
CARDFRONT:
  1. The BG is CAC Dotted Floral stamped with Memento Bamboo Leaves.  It was mounted on Laid Natural CS, inside the Spellbinders Majestic Labels Twenty-Five largest die cut.
  2. The third largest die was used for the BG behind the bouquet.  It was then embossed with Cuttlebug's D'Vine Swirl.
  3. 4mm hearts were added to the corners with Stickles Lavender glitter glue.
INSIDE

INSIDE CARD & ENVY:
  1. The corners were done with one of the Sizzix Architectural Accents dies.  If I were to use them again with any patterned paper I would flip the paper over for four of them so the corners were match.  :-(  Oh well!
  2. I used the left overs from the last card for the center. Mounted the bouquet without the little white flowers (saved for envy).
  3. Mounted the die cut on the right.  Filled with glitter glues.  Stamped the sentiment from All Occasion II with Memento Grape Jelly.  Used glitter glue on the J and to mount the heart.
  4. Added another corner die cut to the envy and mounted the little white flowers.
A fun card!  My Chocolate Baroque stamps arrived from UK and can't wait to use them!!  You are all teaching me so many new things while I am hopping!!  TFS!!!  Thanks for stopping by to look and share.

 Shirley

SUPPLIES:

Sunday, February 16, 2014

Love Angel In The Clouds!

This may look like it's a Valentine Day card, but you would be mistaken!!  It's for a dear friend!  It's that darn ribbon again.  I have some thin like this too that does the same thing.  It really does match the dark color in the rose and heart!  Below is what I did:

STAMPED IMAGES:
  1. Stamped Love Angel twice, and the rose on the angel twice on white cardstock with Memento Rich Cocoa (once for inside and once for envy).  Painted them with twinks.
  2. Embossed the angel from the back on the first one.  Cut the hair, bodice, rose sash, and shoes on second, embossed and layered on first.
  3. Embellished with 2mm pearls to bodice, pearl glitter to wings and sash with glue pen, and added Diamonds glitter to dress trim and shoe crossed bands.  Highlighted hair, heart, shoes, dress, and rose with Spica AtYou pens.
Card Front Base:
  1. Cut one piece of natural laid cardstock 4.25"X6.25".  Created and mounted white cardstock die cut from Majestic Labels Twenty-Five on natural piece.
  2. Stamped CAC Dotted Floral on natural laid cardstock with Memento Bamboo Leaves.  Used largest die again, but as a stencil for the center on the Dotted Floral as shown on the card, and mounted.  Stamp is 5.75X5.75, so I placed die diagonally to get BG. 
  3. Used Cloud Dies on white card stock.  Trimmed them with glue pen and pearl glitter.  Used 3-4mm white AB sequins from my eons old stash!!  Added hearts to corners.
INSIDE CARD
Die on left shows portion placed on stamped area.  Right shows how it was place on stamped image.
INSIDE CARD AREA & ENVY:
  1. Stamped 2 more Dotted Floral images on natural laid cardstock.  Placed die on stamped images as shown in photo above 4 times.
  2. Where it says leftover shows the piece left by each die cut.  I taped two pieces from the first image together and they were a perfect match.  Mounted to the left side.
  3. Did die cut of the smallest die on white cardstock, mounted on center cut, mounted rose.
  4. Stamped sentiment with Memento Bamboo Leaves.  Used 2 leftover punch outs from die cuts on left.  Placed as heart and added sequin.
  5. Used a corner leftover from the card front center for the edge of envy.  Mounted rose that was stamped and painted on leftover envelope paper.
See you back here next time!  It is so great getting to see what all of you are doing too!  Thanks for stopping by to look and share!!

 Shirley

SUPPLIES:

Friday, February 7, 2014

I Heart This Watering Can!!

Heart Watering Can - G16007

This is another fabulous and pretty Tara Caldwell image called "Heart Watering Can".  You can view all of her new images HERE.  Below is how I created my card:

IMAGES:
  1. Stamped the image twice with Golden Glitz.  Stamped the Heart design once on text Neenah paper for envy, and once on white cardstock for inside card.  Painted them with Twinkling H2O's.  Embossed the cardstock one with stylus.
  2. Trimmed around the watering can and flowers, on base image embossed from the back with stylus.
  3. Painted table cloth and Zinnia on second image.  Cut out the red Zinnia and table cloth (leaving a bit of the can on top to attach to main can image, embossed both from the back.  (If I'm not embossing the whole image, like the table cloth squares, I line it on the front with a stylus, so I can see the lines, and then emboss from the back.) Attached the Zinnia with 3D pop-dots.
  4. Mounted the flowering can on table cloth flat.  Applied 3D pop dots on the top portion and set aside.
Card Front Base:
  1. Cut 6.25"X4.25" piece of Phoenix for base.
  2. Die cut largest die from white card stock.  Placed die cut over Natural cardstock as background for center.  I think I would do it white if I did it again.
  3. Stamped CAC Ticking with SU Barely Banana (discontinued) on white cardstock.  Stamped over that image with CAC Dotted Argyle inked with Brilliance Moonlight White and embossed with White embossing powder.
  4. Used next die down over this.  Saved punch outs for inside.
  5. Mounted watering can with flowers/tablecloth.
  6. Added 3mm hearts to corners, added Glossy Accents to heart.  Attached tulip Czech bead to heart pearl pin with GA.  Mounted behind Iris on card.  Added depth to flowers with Spica glitter pens and Stickles glitter glue.  (Honestly, the ribbon matches the reds in the table cloth and heart.  I think the yellow in the BG threw it off).
Inside Card And Envy:
  1. Inside Card:  Attached two .5" strips of Phoenix cardstock to each side.  Used the 3rd die down on the Ticking/Dotted Argyle BG and mounted.  Used one of the stamped hearts and added GA to it.  Used the left-over punch outs from the front die cut on the left for a heart and added the 3mm white pearl heart.
  2. Envy:  Added heart on text paper to envy and added some of the left-overs from the front die cut.
  3. I didn't do a sentiment and will save for Valentine's Day, a birthday, or some other special occasion for a friend or family.
In case any of you are looking for a great free feed reader, I found Feedly and I am loving it.  Let me know if I can be of any help.  Several of you were great to let me know what you were doing and how you felt about it.

I should be back sooner since I've been working on three cards.  LOLOL   Thanks for stopping by to look and share.

 Shirley


SUPPLIES:

Wednesday, January 29, 2014

Easy Fold With Impression Obsession Yummy Cake!

Tara Caldwell Cake - H16000
I have a friend who likes purple, green, and chocolate, and her birthday is coming up!  This card is a really simple easy card fold and great when you don't have a lot to say!!

IMAGES:
  1. Stamped Cake 3 times on white cardstock with Rich Cocoa.  Stamped envelope image by inking just that area of stamp. 
  2. Painted images with Twinkling H2O's.
  3. Trimmed around flowers, embossed all from back side with stylus, and mounted  with 3D pop-dots as shown.  I use the 1/16" thick ones most of the time.  On the cake for the inside I removed the bottom layer and added the cake dish.  Added the butterflies to the lower right-hand side.
  4. Added embellishments using Viva White Pearl, Spica At You glitter pens, Stickles yellow and orange glitter glues, added Glossy Accents to the cake dish.

Card Front:
  1. Did die cut with Polka Dots largest die.
  2. Stamped CAC Dotted Argyle with Rich Cocoa  on white cardstock twice.
  3. Used inside of Polka Dot die as a template, traced, cut out, and placed on die cut.
  4. Threaded outside of die cut with lavender ribbon and made a bow.
Inside Base: 
  1. Cut a piece of cardstock 4"x5.5".  Fold at 2.75".  
  2. Mount to back of card front.
  3. Mount a 4"x2.75" piece of Dotted Argyle to the left side of inside card base.
  4. Made a bow.
I have a question for any of you who use a feed reader to follow their blogs.  I am not happy with Googles current way of doing it.  I would like something that lets me know in my sidebar, without email, when someone posts on their blog.   Also, when I have read a post I would like to be able to delete or it deletes itself.  I probably want too much, huh?  That's what the old Google reader did.  :-(  TIA if you know of one!!!  If you really like yours, tell me anyway.  Who knows...it might be just what I need!

Thanks for stopping by to look and share. 

 Shirley
 SUPPLIES:

Friday, January 17, 2014

A New Artist At IO

Swirl Vase
When I saw Impression Obsession's new Spring images and dies, and I fell in love with Tara Caldwell's images!!  I also said to myself, "That flower pitcher will go perfectly with the CAC Swirls stamp".  Above is one of many I bought!!  Below is what I did:

Card Front Base:
  1. I stamped CAC Swirls on white cardstock with Delicata Golden Glitz.  Heated with heat gun to set.
  2. Put largest and second largest die (taped in place inside largest) from Spellbinders Marvelous Squares through the machine with embossing sandwich. Trimmed around the outside as shown. Removed the slots where you see the pink ribbon with X-acto knife.  Threaded ribbon through as shown.
  3. Using larges die as a template, traced around it on the Swirl BG with 3/8" disc and trimmed as shown.
  4. Cut 5.25"X5.25" white cardstock square and rounded corners with Rounder punch.
  5. Mounted layers as shown.
  6. Cut white cardstock 5.25"X10.5" and folded in middle.  Mounted cardfront and trimmed around the rounded corners.
Image:
  1.  Stamped Swirl vase once with Delicata Golden Glitz for the vase and twice with Memento Cocoa Brown for the flowers.  
  2. Trimmed around vase, embossed with stylus from the back.
  3. Painted flowers with Twinkling H2O's, embossed with stylus from back, and mounted over vase.  Applied 3D pop-dots on the upper portion.  Mounted to cardfront as shown.
  4. Painted 6 of the flowers, embossed from the back, and mounted with 3D pop-dots.
  5. Added some highlights with stickles and Spica Glitter pens to the flowers and Glossy Accents to the vase.
  6. Made a bow with my Craft-Dee Bowz.  I couldn't believe how easy it was to use!! I usually have to use a crochet hook to get the ribbon through on the Bow-Easy, but this was just....Well see it HERE.
  7. Added a Maya Road stick pin with an added 6mm cream heart bead.
I did the inside too, but haven't decided what I will do for a verse.  Will leave it to see to whom I give it!!!  See you back here soon with another card.  Thanks for stopping by to look and share.


 Shirley

SUPPLIES:

Monday, December 23, 2013

A Merry Christmas and Hinged Card Type 3

I wish you and yours a very Merry Christmas and a Happy New Year if I don't see you again before then.  It's the time of year when sometimes I want to fly away, so I picked this angel to see if I could for a little while.  I did the cardfold first.

CARDFRONT AND BASE:
  1. Cut the die cut from A2 Filigree Delight die set using a piece of card stock 1" longer than the width, and folded or scored at the 1" mark.
  2. Did an extra die cut from cardstock or text paper (you can use printer paper if it's white enough to match) to attach to the back side of my die cut cardfront.  I used cardstock and it was a little thick.  Attached it using Glossy Accents.  I had to trim a little from it before attaching the shadow left-over 1" part to the base because I used cardstock instead of text for the die cut.
  3. Cut a base twice as long for the width and the same length as your die cut.  If you look close you can see I scored it in the middle.  Added two sided tape around the edges and long one side of down the middle. 
  4. I folded it in half covering the extra 1" piece from the front. If it is a little longer than the top, after you line it up with the middle, just trim it with scissors to match the front.  Now it's ready for the images.

STAMPED IMAGES:
  1.  Stamped Hannah Davies Angel with Golden Glitz on white cardstock twice, painted with twinks, cut out one image.  Cut the arm and hair from the second image.  Embossed all from the back, mounted first image with 3D pop-dots and then mounted the hair and arm on it.
  2. Stamped CAC Mesh Circles on Neenah Solar White text paper with Memento Luxe Pistachio.  Cut another die cut from it, and then used the die to cut out the center.  The die cut was mounted on the bottom first and then the center was mounted on the inside top portion of the card.
  3. Stamped the sentiment from Round Ornaments 1 with the Pistachio in the center of the bottom part of the inside.  The ink in the photo shows up darker than it is.  Boy my pictures lately.....
EMBELLISHMENTS:
  1. The snowflakes are leftovers I had from the Small Snowflake set.  I mounted them with Glossy Accents.  Glitter and pearl stickers were applied with a Sakura Glue Pen.  The bow is Michaels ribbon.  The envelope matches the Mesh Circles and snowflakes.
This was done kind of fast so excuse the typos, etc.  A big big thank you to those of you who sent a card to the soldier.  Thanks for stopping to look and share.  Have a wonderful holiday and if you see this afterward, hope it was great too!


 Shirley


SUPPLIES:

Tuesday, November 19, 2013

Twisted Peppermint Moon

I was inspired to use this stamp by Ellen Taylor, who used it in her post HERE.  The colors on my cardfront match the bottom of the card in real life, but somehow when I took the picture it looks like different colors were used on the bottom.  Go figure!

I really like twisted easels and so do my friends.  I used to think they limited my ability to write extra if I wanted, so I started using the back side of the card for my note.  Some said they liked that so they could stand it up for others to see without sharing the personal writing.

CARD FRONT AND IMAGES:
  1. Stamped Peppermint Moon with Espresso Truffle on white cardstock twice, painted with Twinkling H2O's, cut out, embossed with stylus from the back, and mounted on Lacey Circles largest die cut from white cardstock.  Cut out extra sash and tree, painted with H2O's, embossed from the back with stylus, and mounted with 3D pop-dots on main image.
  2. Stamped two more trees from the main image, painted and trimmed (one for the easel bottom and one for the envelope).
  3. Created card front and bottom bases using the outised of  the Curved Matting Basics largest die as a stencil on white cardstock. Used as a die to get 2 red die cuts.  Stamped CAC Thick Stripes on white 8.5"X11" cardstock with SU Real Red twice along the length. 
  4. The bottom was built just like the top, only Lacey Ovals was used for the sentiment.  The sentiment from Round Ornaments was stamped with Real Red too.  The extra tree was mounted on the smallest Lacey Circles die cut.
  5. 2mm round and 5mm heart pearls, Glossy Accents for the stars, Glitter, a bow, and heart pen were added to embellish.
  6. *I've had the glue bottles you see in Supplies for nearly 6 years.  I use them for Glossy Accents and other adhesives.  They're great for small places.  **At first I thought the QuikStik would be awkward, but after using it I love it!! Thanks to you, Kitty Caracciolo. It doesn't grip it as hard as the AIG Sticky Sticks and means the Glossy Accents doesn't have to have started drying for the item to release.  Also, that green stuff you see on the tip lasts forever.

TWISTED EASEL BASE:
  1. I did the easel base the same as my tutorial HERE.  As an extra step on this card I trimmed around the rounded corners on the front so they lined up after mounting the cardfront.
Thanks for stopping by to look and share everyone!!


 Shirley

SUPPLIES:
Related Posts Plugin for WordPress, Blogger...