Showing posts with label Memento Luxe. Show all posts

Sunday, June 1, 2014

Online Watercolor Class - Victorian Bird


Don't forget to take part in my polls to the left.  This time they won't disappear!!   BTW, I am so sorry I am late in getting to some of you.  It's those comments on separate pages and I can't remember the card!!  ;-)  Just teasing.  I have over a hundred of your wonderful art blogs I am following and I can't not read them.  Whaaaah!!

Truth be told I did an card a long long time ago with this same image and coloring.  I had more than one image and what I was thinking I don't have a clue!!  Since I have started the Online Watercolor Class, I am trying to use anything I have that needs to be used!  The first and second days of the class are dedicated to backgrounds.  Below is how I did my images to use with the background I created.

IMAGES:
  1. The image, Victorian Bird, by Impression-Obsession, was stamped with a Stazon Jet Black ink.
  2. The image was painted with Twinkling H2O's and Black Diamond glitter glue was used for the legs, beak, and a little of the heart 'wing'.  Glossy Accents was added to the eye. Mark Richards Crystal Stickers 2mm Black Onyx Rhinestones were added to the wings as shown. If you click on the image they are easier to see.
  3. A Royal 3/8" Soft Grip SG 730 was used for the grass.  Below is a picture of the brush.
  4. The "hello." is from Impression Obsessions Social Greetings 2 clear stamp set was stamped with Luxe Tuxedo Black and embossed with clear embossing powder.
The background was created using Glossy white cardstock, Twinkling H2O's, and Tim Holtz Layering Stencil Honeycomb.  Remember how I did the back of the cardfront like I would normally do the inside.  I did it on this one too.  I did the same technique only on the corners and on white cardstock.  I also did the corner of the envy the same way.  See below.


I kind of like it.  I am off to do another card.  This time it is a CAS with some watercolor techniques too.  Thanks for stopping by to look and share.


 Shirley


SUPPLIES:

Monday, December 23, 2013

A Merry Christmas and Hinged Card Type 3

I wish you and yours a very Merry Christmas and a Happy New Year if I don't see you again before then.  It's the time of year when sometimes I want to fly away, so I picked this angel to see if I could for a little while.  I did the cardfold first.

CARDFRONT AND BASE:
  1. Cut the die cut from A2 Filigree Delight die set using a piece of card stock 1" longer than the width, and folded or scored at the 1" mark.
  2. Did an extra die cut from cardstock or text paper (you can use printer paper if it's white enough to match) to attach to the back side of my die cut cardfront.  I used cardstock and it was a little thick.  Attached it using Glossy Accents.  I had to trim a little from it before attaching the shadow left-over 1" part to the base because I used cardstock instead of text for the die cut.
  3. Cut a base twice as long for the width and the same length as your die cut.  If you look close you can see I scored it in the middle.  Added two sided tape around the edges and long one side of down the middle. 
  4. I folded it in half covering the extra 1" piece from the front. If it is a little longer than the top, after you line it up with the middle, just trim it with scissors to match the front.  Now it's ready for the images.

STAMPED IMAGES:
  1.  Stamped Hannah Davies Angel with Golden Glitz on white cardstock twice, painted with twinks, cut out one image.  Cut the arm and hair from the second image.  Embossed all from the back, mounted first image with 3D pop-dots and then mounted the hair and arm on it.
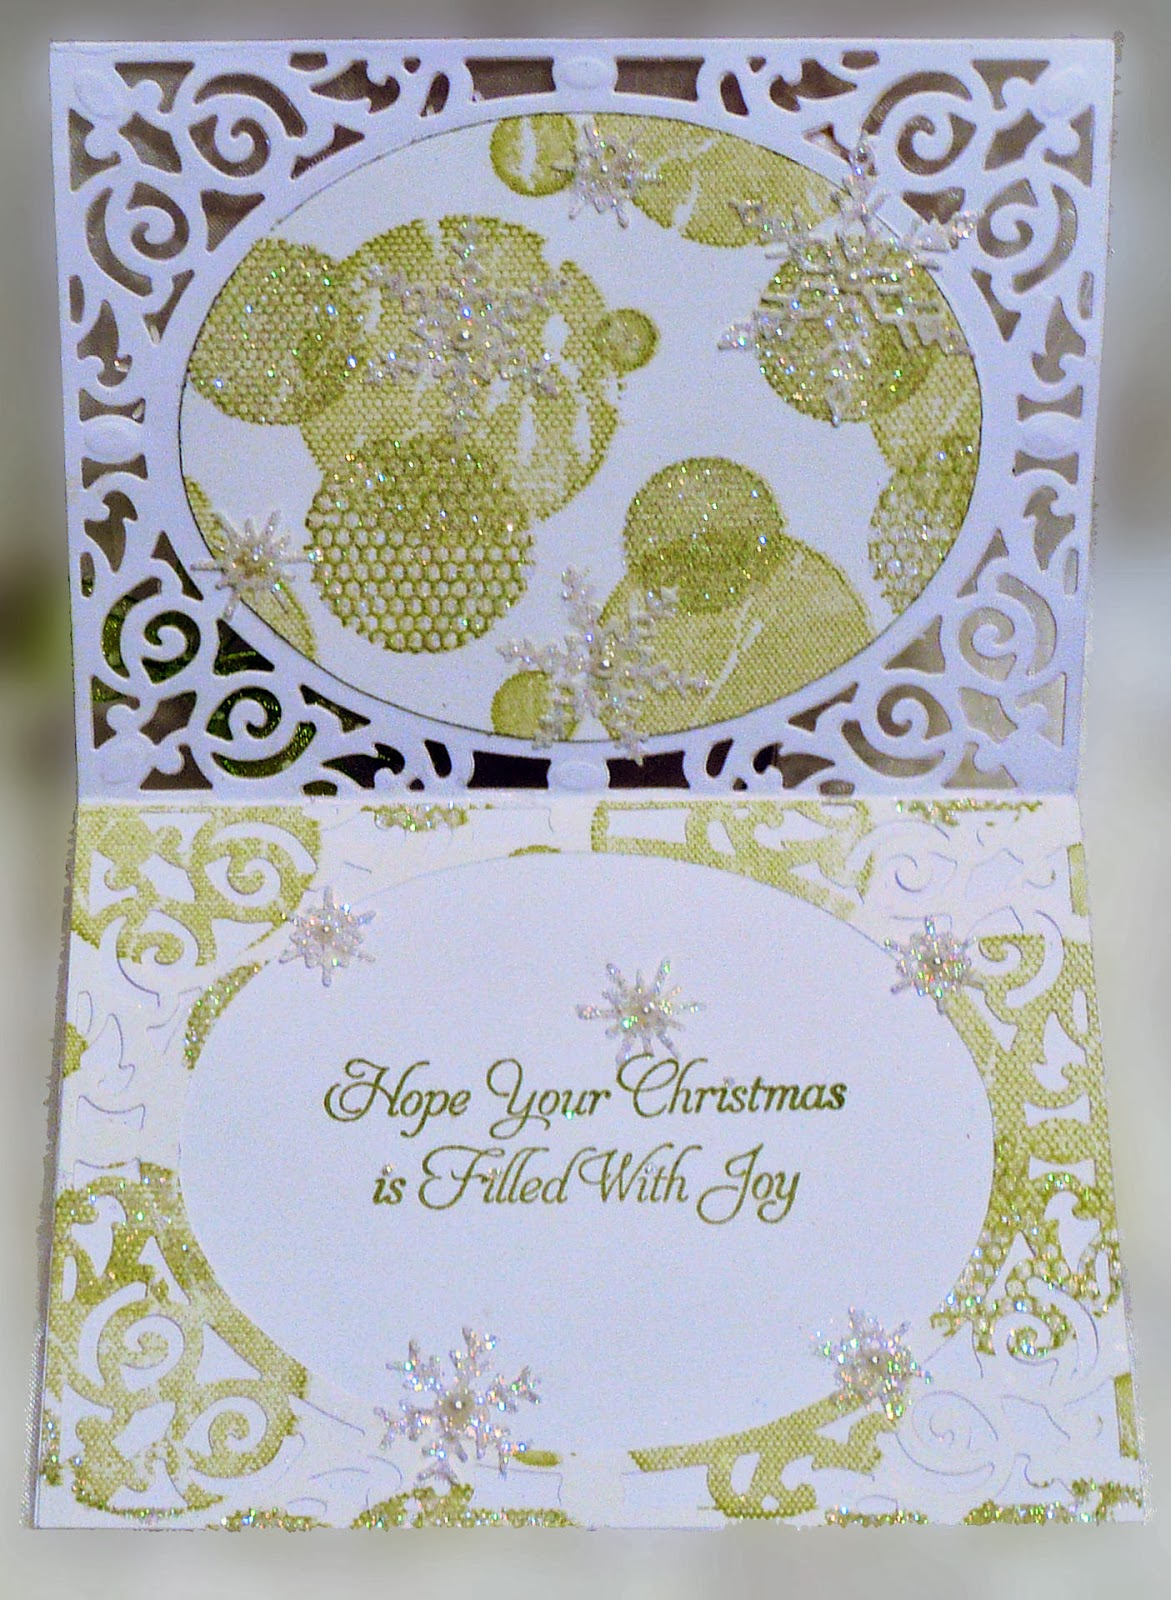
  2. Stamped CAC Mesh Circles on Neenah Solar White text paper with Memento Luxe Pistachio.  Cut another die cut from it, and then used the die to cut out the center.  The die cut was mounted on the bottom first and then the center was mounted on the inside top portion of the card.
  3. Stamped the sentiment from Round Ornaments 1 with the Pistachio in the center of the bottom part of the inside.  The ink in the photo shows up darker than it is.  Boy my pictures lately.....
EMBELLISHMENTS:
  1. The snowflakes are leftovers I had from the Small Snowflake set.  I mounted them with Glossy Accents.  Glitter and pearl stickers were applied with a Sakura Glue Pen.  The bow is Michaels ribbon.  The envelope matches the Mesh Circles and snowflakes.
This was done kind of fast so excuse the typos, etc.  A big big thank you to those of you who sent a card to the soldier.  Thanks for stopping to look and share.  Have a wonderful holiday and if you see this afterward, hope it was great too!


 Shirley


SUPPLIES:
Related Posts Plugin for WordPress, Blogger...