Showing posts with label Lucky Squirrel. Show all posts

Thursday, March 17, 2011

This Is Anything But A Card

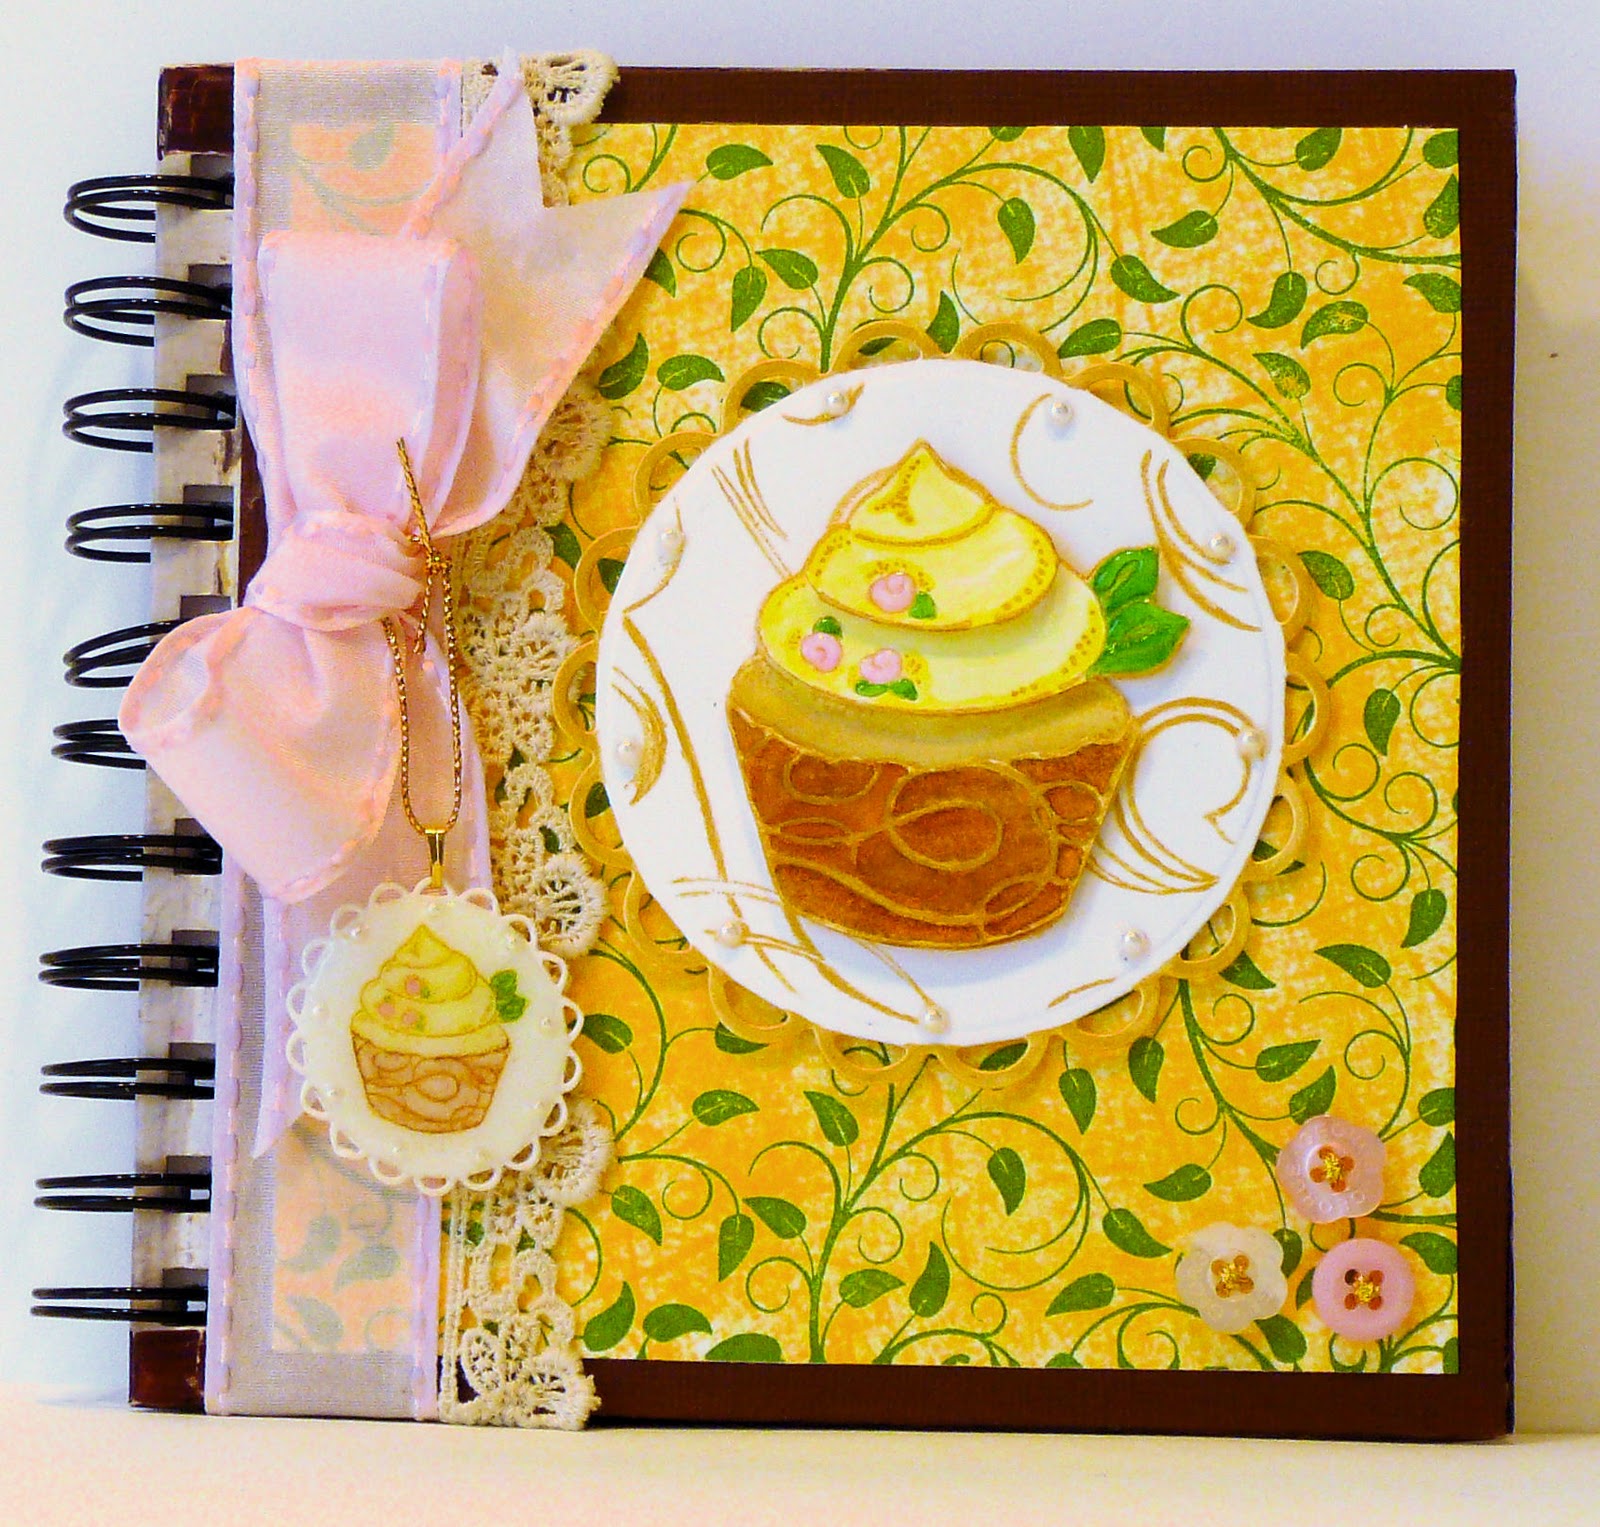
As you can see it really is.  How I got to this point is funny!  My friend is having a birthday and so I wanted to purchase a key chain and make cupcake charm (she loves cupcakes) to go with it.  Well the charm got made and key chain hasn't arrived and so........I know she likes to keep notes, etc., so..........hence the journal or whatever choose to call it!

I used a background I already had done using my Mega MountTM and Cover-A-CardTM Vines inked with Brilliance Thyme.  It was on white cardstock.  I applied an old yellow mustard dye inkpad,  mounted it on a dark brown cardstock, probabaly Bazzil, then mounted those to the front and left inside.  That's the neat part about Cover-A-CardTM. The stamp area is 5.75X5.75 and it fit great here.

I stamped Alesa Baker's  CrŠme Cup with Brilliance Galaxy Gold 3 times on Neenah Classic Crest Solar White cardstock, painted it with Twinkling H2O's Daffodil, Fern, Golden Sand, and Warm Pecan, cut out the layers, and placed them as shown.  Glossy Accents was added to the rosettes and leaves.

I ran a piece of Neenah Classic Crest Solar White cardstock through the Cuttlebug with Spellbinders Lacey Circles and embossed it.  Leaving the die on the scalloped piece, I stamped it with Cover-A-CardTM Wispy inked with Brilliance Galaxy Gold.  I painted the scallops with Twinkling H2O's Solar Gold.  The image was mounted on the die cut and the 3mm pearls were added with Glossy Accents.

My friend loves big ribbon, so May Arts was taped around the cover and inside and a Bow-Easy bow was added with a little lace, to make it even more feminine.  The die cut image was added, along with some leftover buttons with gold sewing thread.


Next I used a stamp from one of Kalani Allred's new friendship sets, True Blue Friend.  I inked it with Gold Galaxy, stamped it on white cardstock, put it through the Cuttlebug with one of Spellbinders' Fancy Tags, trimmed it down as shown and used 3mm pearls as embellishments for it.


All this because I didn't get a key chain you ask??  LOL  Well, when I did the key chain charm I used the next to largest of Spellbinders Lacey Circles and White Shrink Plastic.  I stamped the front with Galaxy Gold and the same image as above.  Then I used VersaMark on the edges around it so when I heated it with my heat gun it wouldn't stick to itself.  Cleaned off the VersaMark with a soft toothbrush and water, dried it and painted it with Brilliance and Mica Gloss Colors.  I heated them to seal and dry and then I applied 2mm pearls and Glossy Accents as a seal and let that dry.

On the back I used a stamp from another Kalani Allred set, All Occasion I.  You really need to check out all her new phrase sets starting HERE.  You will go crazy, I swear.  One is has such cute and fun phrases that I had to have it, even before knowing how I would use them.

So now that you have seen what  I did, check out what the IO DT members did too!

And don't forget that the IO Blog is now using Inlinkz for people who want to join in the challenges.  Much easier and faster I think.  There will be some more changes for the challenges coming soon too.  We also have the DT doing posts on their blogs in off-challenge Thursdays.  You can check the IO blog on that day to find out who is creating for the day!

Thanks for stopping by to look and share!!  See you soon.

 Shirley

Saturday, January 24, 2009

Hugs And Kisses Too!

I've been waiting to use this stamp, Valentine Margarita by Impression-Obsession for almost a year.

1. The image was stamped with Brilliance Galaxy Gold on Neenah Classic Crest Solar White Super Smooth cardstock 80lb.
2. It was painted with Twinkling H2O Garnet and Solar Gold.
3. The glass was emphasized with Glossy Accents.

4. The truffle on the rim was painted with Twinkling H2O's Solar Gold. Stickles Garnet glitter glue was used on the top.

5. The holes for the ribbon were done with an eyelet Silent Setter. The picot ribbon is from Michaels.

6. The Drink Charm was made by using the EK Success Wrought Iron Corner Adorner Slot Punch on Clear Lucky Squirrel Poly Shrink. I added bold lines on the figure below to give you and idea of how it was trimmed after punching was done.
VersaMark was then applied to both sides to keep it from sticking to itself while shrinking using a heat gun. You can't do this if you paint or
color it before shrinking. The paint will run. This technique is also great when working Poly Shrink you are going to stamp while hot to make an impression. I also use a bread loaf non stick pan when shrinking something small like this. Helps keep it in sight....and a wooden skewer also rubbed with VersaMark and placed loosely in one of the holes while it was heated. When done the VersaMark was rubbed off the charm with a baby wipe before doing anything else with it.

7. The charm was painted with a Red Sharpee pen. Two size jump rings were used to hang it from the stem of the glass as shown.


8. The edge punched with the Fiskars Heart Border Punch, done after the image, is another story. If anyone knows of a better way please email me.
-a. Measured the width of the punched area itself from outside edge into the edge of the image and marked it.
-b. Trimmed the cardstock on each side, leaving the bottom and top alone at first.
-c. Centered the punch and punched the 2 hearts in the center.
-d. One heart was punched on each side of them by turning the punch over and lining up on the bottom of the punch.
-e. The top and bottom edge of the image was punched by lining the punch edges up with the two punched edges already there. The the edges were matched by trimming with cuticle scissors to match as well as possible.

9. The image was mounted on Stardream Metallic Jupiter Text weight paper.

10. Neenah Classic Crest Solar White Super Smooth cardstock 80lb. cardstock was run though the Cuttlebug using Floral Fantasy and trimmed down to 4X5.25".
11. It was mounted on another piece of Stardream Metallic Jupiter Text weight paper.
12. The image was mounted on it as shown.
13. Certain areas shown on the embossed Floral Fantasy were painted with Twinkling H2O's Garnet.

14. White Prima Forever Flowers were used on the top and bottom of the cardfront, mounted with glue dots.
15. 3 Hearts were punched from some Stardream Metallic Jupiter Text weight paper using a Fiskars Hand Punch 1/4" Heart. They were mounted in the centers of the flowers and Glossy Accents was added for depth and shine.
16. A glue pen was used on the veins of the petals and DecoArt Glamour Dust Crystal glitter was applied. Then Shimmerz Angel Wings was used to highlight the edges of the petals.

Thanks for stopping by 'the blog' to look and share. Have a great weekend too!


 Shirley


Related Posts Plugin for WordPress, Blogger...