 SUPPLIES:
3/4" Matte Removable Scotch Tape (Blue Plaid)
*This brand tape does not leave residue behind to which Embossing Powder will stick.
Cardstock (CS) to be Edged or Edged/Embossed
Dye Ink Pad (for just inked edges)
OR
Pigment Ink Pad & Embossing Powder (EP) for an Embossed Edges
*(Tip) A Small Flat edge art brush for stray EP if you have touched the CS and the oil from your skin causes it to stick to areas of the CS.

STEP 1.
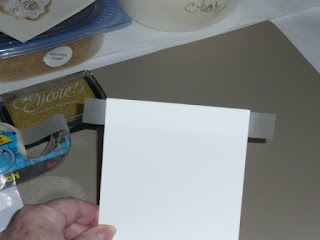
Remove a piece of tape longer than the edge you are going to do. Place it evenly across the edge of the CS.

Step 2.
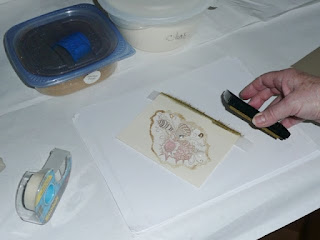
Hold the CS down with one hand and apply the ink to the CS direct from the ink pad with the other hand.

Step 3.
When all of the CS edge is covered with ink remove the tape by holding the CS with one hand and pulling the tape up and toward the inked edge. *Tip (If you think the ink is still wet set aside to dry or dry it with your heat gun before going on to the next edge.)

STEP 4.
Repeat Steps 1 through 3 until you have the edges you want finished.

STEPS1.-3. (WITH PIGMENT INK TO EMBOSS)
Apply tape and ink, and remove tape as you did for dye ink above.

STEP 4. Apply Embossing Powder after the tape is removed. *Tip (Remove any stray EP from areas where you may have touched card with a straight edge art brush.)

*TIP - I have found that heating the area I have just used to edge cards or where I have brayered ink on my work area reduces ink, etc. from getting on my art piece. I either do that or just plain remove the paper I was working on. It greatly reduces messing up your artwork.

Step 5.
Emboss edge and do what you need to finish project.
I chose the plain white cardstock and a finished project to show you can do this with new projects and those you thought were finished, but you decided differently. I either made this too difficult or too simple. I hope the last is what happened. This is my first attempt to show a tutorial through pictures so bear with me. I learn something new almost every time I post. Thanks for stopping by to see "the blog".
Shirley

2 comments:
Thanks so much for taking the time share this with us.
Like the story of the Three Bears. Not too simple, not too hard ~ JUST RIGHT!
Thanks for sharing this great tip and tutorial Shirley. I never thought to do it this way!
Vicki
Post a Comment