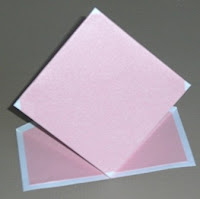
Supplies used:
Cardstock: 5.25X10.5
Pencil
Ruler
2 sided tape
 STEP 1
Lay your cardstock in front of you with the top side up. It was easier for me to have 2 distinctive sides. If your paper is one color you may want to mark Side 1 and Side 2 in pencil and then remove later. My paper is text weight and is 2 layers.
 Fold the cardstock from left to right. Smooth center fold crease with bone folder, fingernail, etc.
 Open the cardstock.
 STEP 2
Fold cardstock from right side to left to center fold crease. Smooth new fold crease.
 Open cardstock.
 STEP 3
Place cardstock TOP SIDE face down. Bring left hand bottom corner up so that its edge is even with the first fold on the right side as shown. Smooth the crease that is at an angle so it is a sharp crease.
 Open the cardstock again.
 STEP 4.
Bring left hand top corner down so that its edge is even with the first fold on the right side as shown. Smooth the crease that is at an angle so it is a sharp crease.
 Open cardstock again top side down, bottom side up.
 STEP 5.
The end with the rectangular fold should be furthest away from you. On the edge closest to you measure with your ruler to the center of the 5.25 end and mark it with a pencil. It should be at about 2 5/8 inches.
 Fold the left bottom edge so it is even with the center and lines up with your pencil mark. Crease the new edge. Do the same with the right bottom edge lining it too up with the center and the penciled mark. Now you have 2 distinct triangles.
 Open the new folds so you can apply 2 sided tape and then tape them down as shown. This step is different from the original. The original has you cut off the edges. I don't because I used text weight paper to make the card and it adds support to the whole card.
 When you turn the cardstock over it should look like the picture on the left.
.JPG) STEP 6.
STEP 6.This step is extra so the card not only "Springs", but can sit up without falling this way and that. Turn the card so it has the rectangle facing you.
Next add tape to the right, left, and bottom sides of the triangle above it only. Do not tape the rectangle at all. Just the triangle. Bring the triangle down to attach to the rectangular base.
 The finished card should look something like the one to the left. All that is left to do is add your cardfront or card, like the one I made that opens.
Okay now. fingers crossed, I am going to post this. I make no promises. I have learned that sometimes even what you have previewed doesn't turn out like you wanted. LOLOL
Shirley

2 comments:
nice job on your tutorial!
Thanks Shirley. I tried to fold one of those from a sample I received impossible. PatG
Post a Comment